Manage Product Updates
|
Content
|
|---|
The Item Update menu contains options to import price list from Supplier(s).
Creating the Import File
To use the Product Updates Wizard, you will need to create an excel file from your existing system data to serve as your import source. You may export the information from your existing system. The format that the data needs to be presented in is described in an Excel spreadsheet called the “import template”. To know more about the columns in the import templates, download the file structure and notes below.
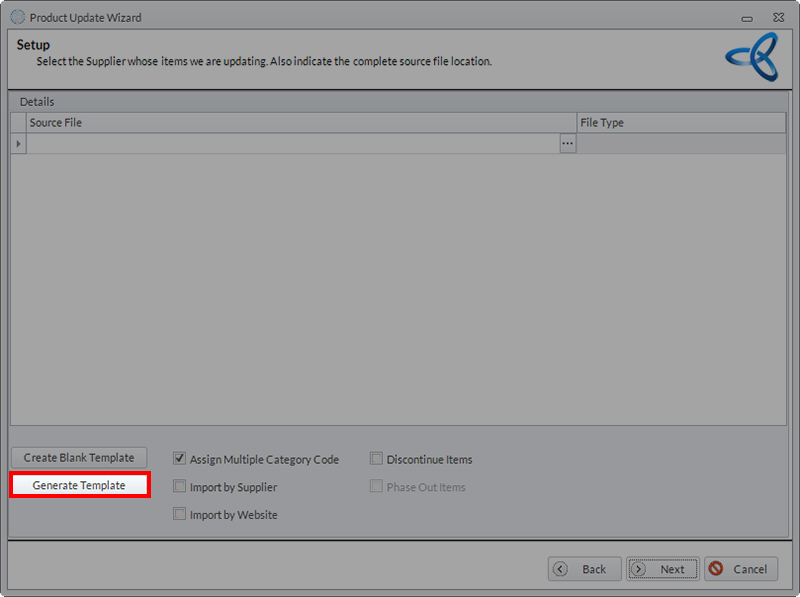
- From the Inventory Module > Item > Item Update Wizard.The Product Update Wizard will be displayed.

- On the Product Update Wizard, click on the button labeled Generate Template to create an excel file.
Click Image to Enlarge
-
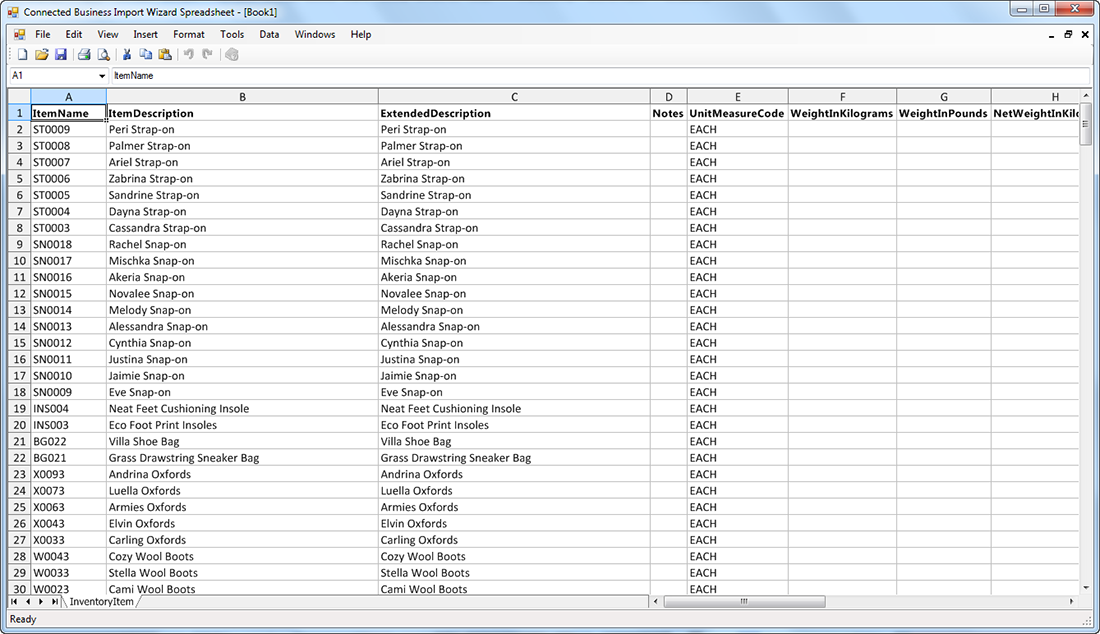
The system will generate an excel file containing your current price list.
Click Image to Enlarge
Save the file into your own system. To change the prices for your products, you can edit the excel file and upload it into the Price Update Wizard. Consult the subtopic Manage Product Updates to learn more about this process.
Notes:
- About the Import Template
You may download the ready-to-use import template from the table above. Or you can refer to the import template generated from the Product Update Wizard.
You may use the import template spreadsheet from the Product Update Wizard as the import source itself and all you need to do is remove the notes therein and fill in the columns. You may refer to the File Structure and Notes spreadsheet for these notes. Note that the column positions need not be the same, only the labels for the column header. Each column need not be present in the import source file. - About the File Structure and Notes spreadsheets
The File Structure spreadsheet provides information on the column type, data sources and notes for each column in the Product Update template. In the table above, double click on the link for the file structure and note for the import template. The following are the representation of the data that needs to be presented in the import file.
- Type - type of data to enter
- Character
- Numeric
- Date
- Size - no. of characters to accommodate
- Usually up to 30 characters by default
- Will report if the value exceeds the recommended size
- Validation
- Optional - field may be skipped
- Required - field shoul.d not be left empty
- Lookup - data entered should be in the list of options e.g. item category, department or manufacturer specified in the import template must be setup prior to properly importing the import file
- Data source
- Priority 1 - Where will it go to get the data first (usually in the column of the import source file)
- Priority 2 – If the field was blank then the system would look for defaults
- Priority 3 and 4 - same as Priority 2

Learn more about how you can make your company profile and preferences work better for you and your business.
See More: Setting Up Your Company Data
Manage Product Updates
The Product Update allows you to import a file containing new and existing items. If new items, the wizard will create a new inventory item data. For existing items already in the database, the wizard will update all changes including the Last Cost, Pricing Cost and all price levels for the items. In cases that the cost or prices cannot be updated for the item, the Price Update History will be updated with exception information.
- From the Inventory Module > Item > Item Update Wizard. The Product Update Wizard will be displayed.
- Click Next to continue. Click the
 icon under the Source File column to locate the import file. File Type will be automatically detected based on the source file.
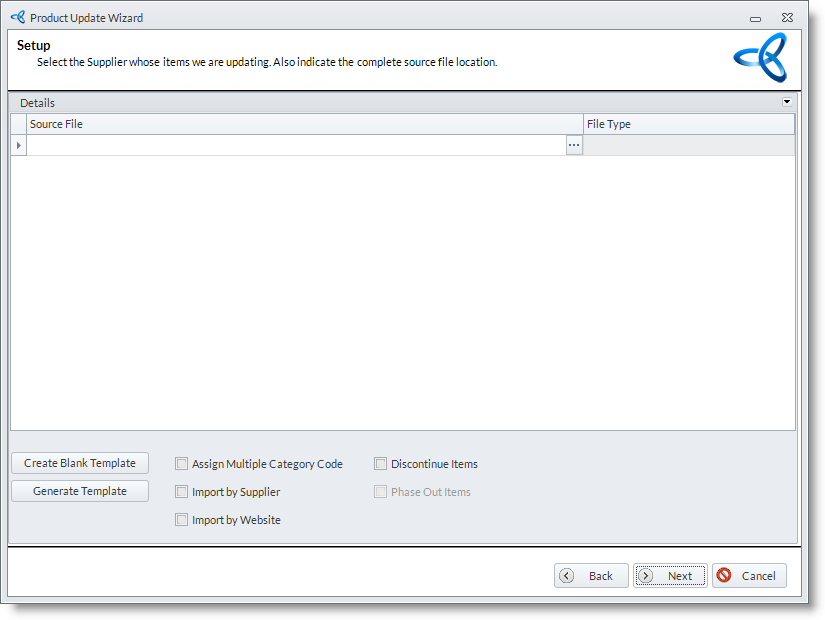
If the file is still to be created you may click the Create Blank Template or Generate Template button to display the template you can use for creating the price list. To learn how to create your import file, see Creating the Import File for more details.
- Select the following options: (a) Assign Multiple Category Code, (b) Import by Supplier, (c) Import by Website, and/or (d) Discontinue Items.
|
Product Update Wizard Settings and Descriptions |
||
|
Field |
Condition |
Description |
|
Assign Multiple Category Code |
If Checked |
|
|
If Unchecked |
|
|
|
Import by Supplier |
If Checked |
|
|
If Unchecked |
|
|
|
Import by Website |
If Checked |
|
|
If Unchecked |
|
|
|
Discontinue Items |
If Checked |
|
|
If Unchecked |
|
|
- Click Start Update to start the update process.
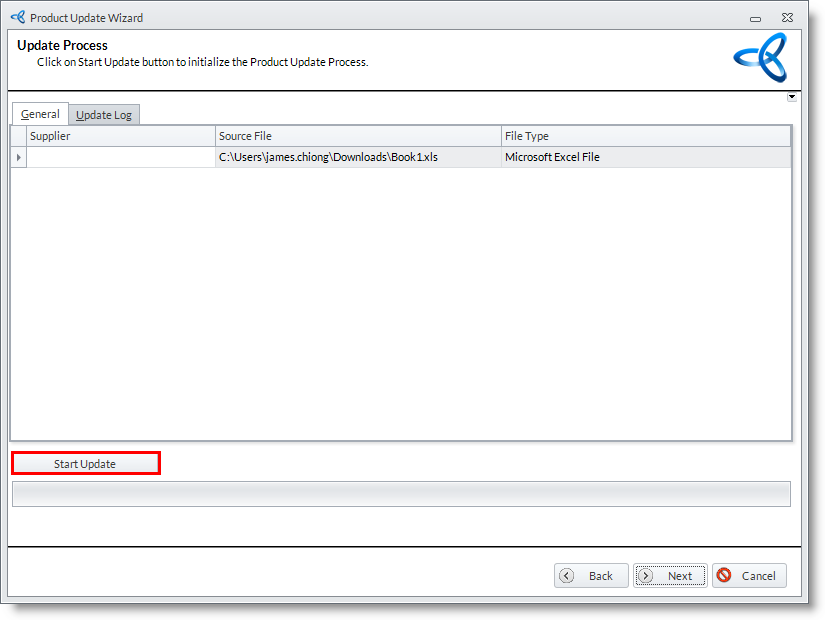
- Once done, click Next to continue. The Update Log tab will automatically be displayed.
- The Product Update Wizard will prompt you when updating is finished. Click the Finish button to close the form.
Review Product Update History
The Product Update History dashboard is consists of three (3) tabs, namely: Open Exceptions, Resolved Exceptions and Successful Updates.
To view the history of all updates and exceptions:

- Go to the Inventory module then click the Item Update History under the Item drop down list. The Product Update History search screen will be displayed.

- Click the Open Exceptions tab to view the list of items with price update exceptions information.
Open Exceptions tab lists the items that were excluded in the product update process. These items should be manually updated.
- Click the Resolved Exceptions tab to view the list of items with resolved price update exceptions information.
- Click the Successful Updates tab to view the list of items that were successfully updated.
Resolve Item with Price Update Exception
- On the Open Exceptions tab, select the items to be resolved by checking the corresponding checkbox(es).
- Click OK.
- A message “Are you sure want to resolve the following inventory item price update conflicts?” will be displayed. Click Yes to confirm.
- Items will then be listed under the Resolved Exceptions tab.
Resolving the exception(s) means that items will be updated. The list in the Open Exceptions tab only shows the log of the items that were excluded in the product update process.
![]()