How to Create RMA in the Webstore
This article will demonstrate how to create RMA in the webstore.
In Connected Business v14, customers now have the ability to create and submit return requests directly from the webstore.

This feature is only available in Connected Business v14 and higher.
To do this,
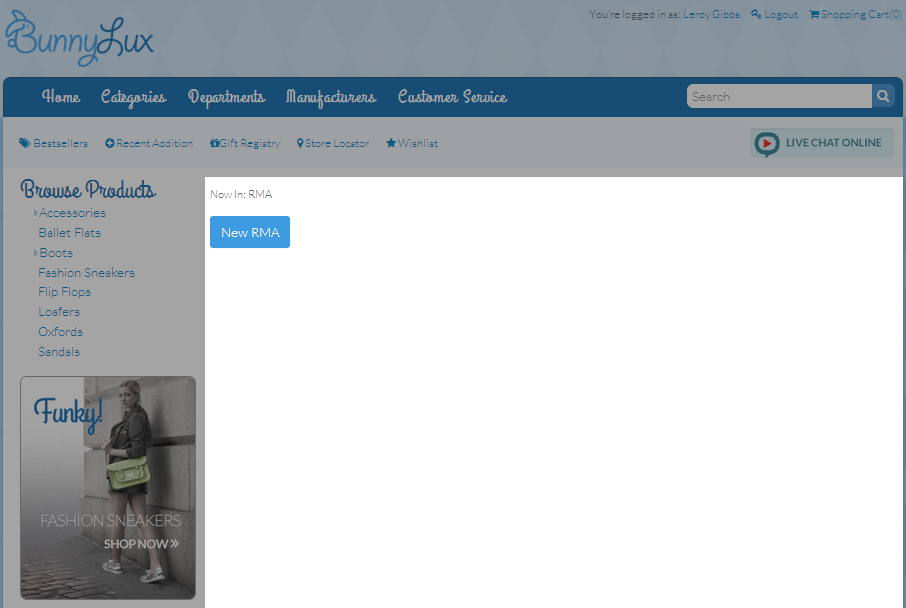
- Login to the webstore and go to Customer Service > RMA.
This feature is only available by default in SKINID = 99.

Click Image to Enlarge
- Click the New RMA button.
Click Image to Enlarge
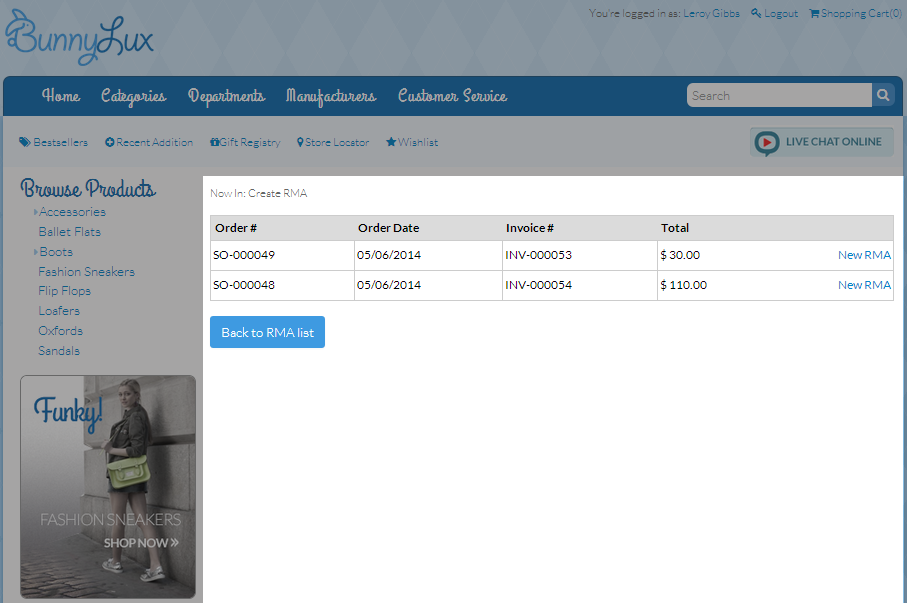
The list of completed SO will be displayed.
Click Image to Enlarge
Completed sales order means that the invoice has been posted (paid) and the items already received by the customer.
- Click the New RMA link to view the order details.
Click Image to Enlarge
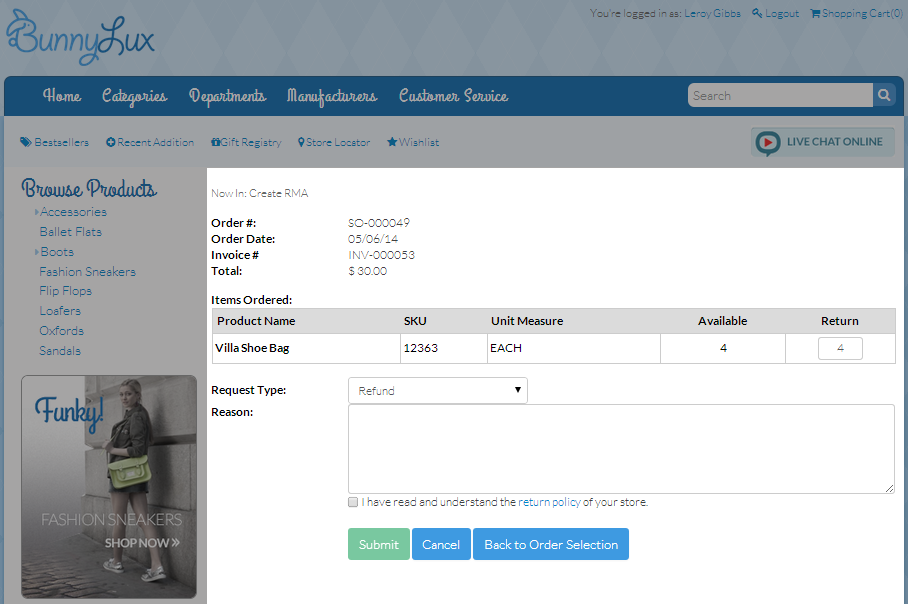
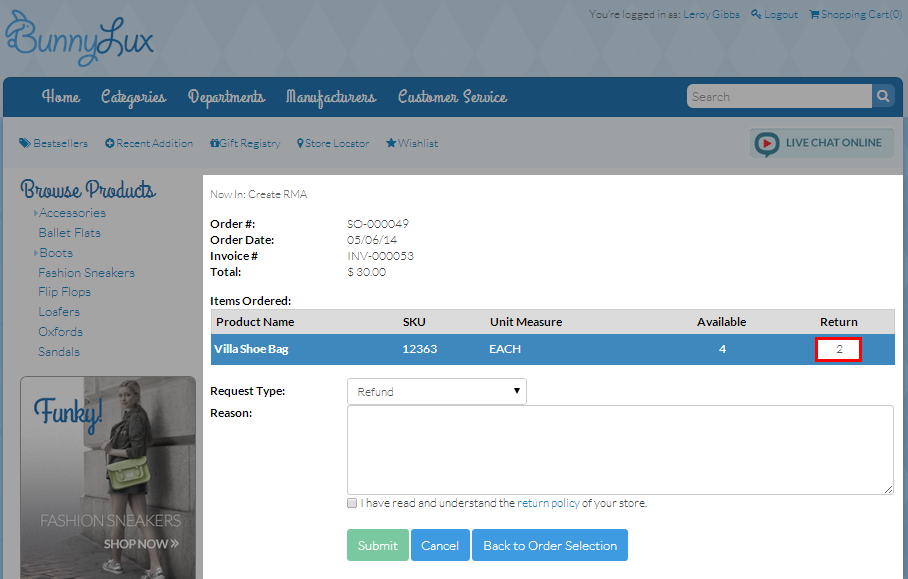
- Enter the number of items to be returned in the Return column.
Click Image to Enlarge
By default, the number of the items to be returned is the same as the number of items ordered. You can change the number as needed.
- In the Request Type field, select the return request type from the dropdown list.
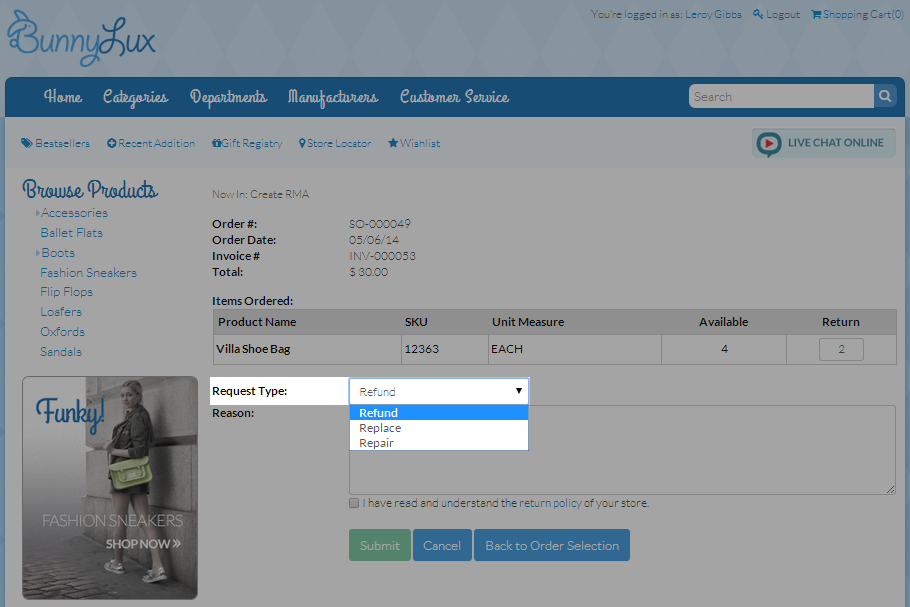
Click Image to Enlarge
You can set the types of return request from the Connected Business backend. Refer to How to Set RMA Request Types.
- Enter the reason for the return in the Reason field.
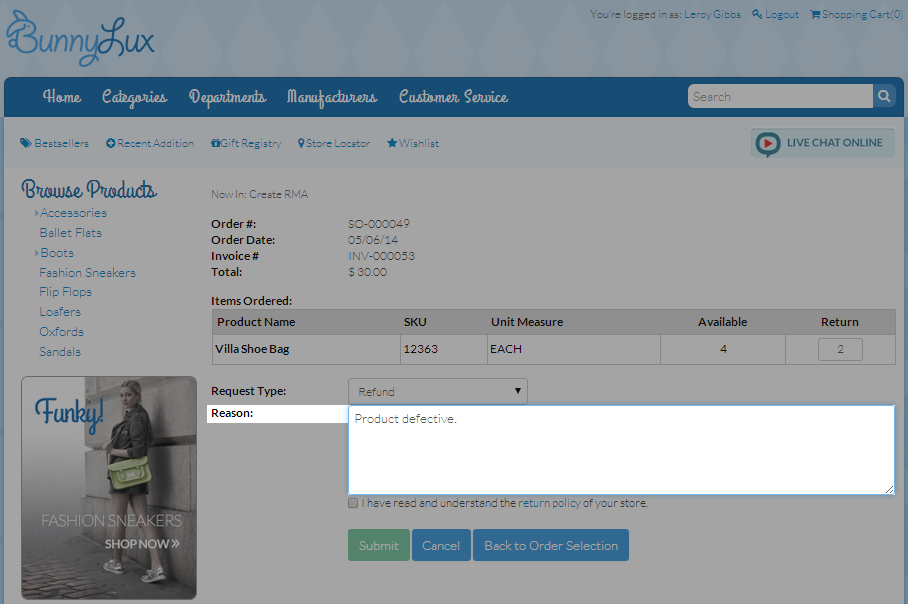
Click Image to Enlarge
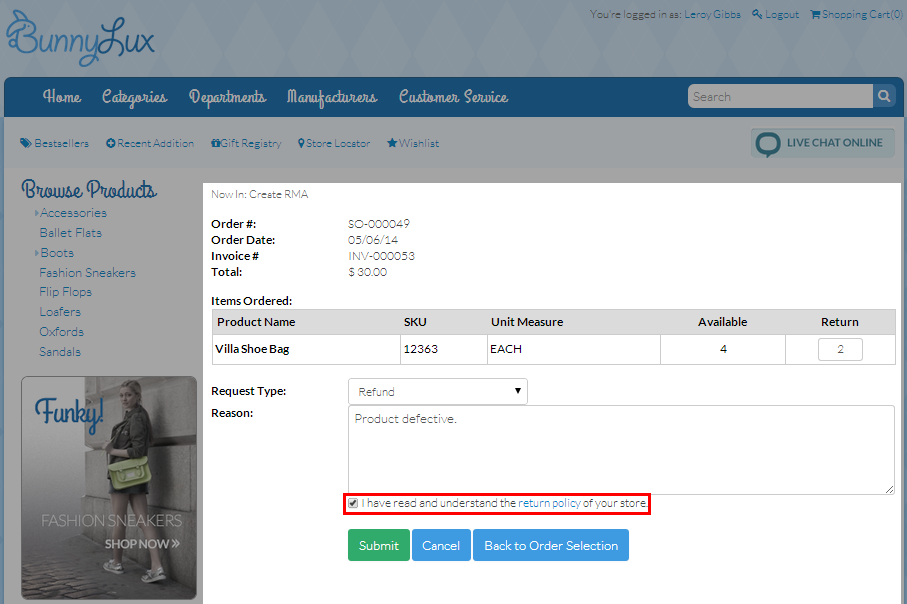
- Tick the “ I have read and understood the return policy of your store” checkbox then click Submit.
Click Image to Enlarge
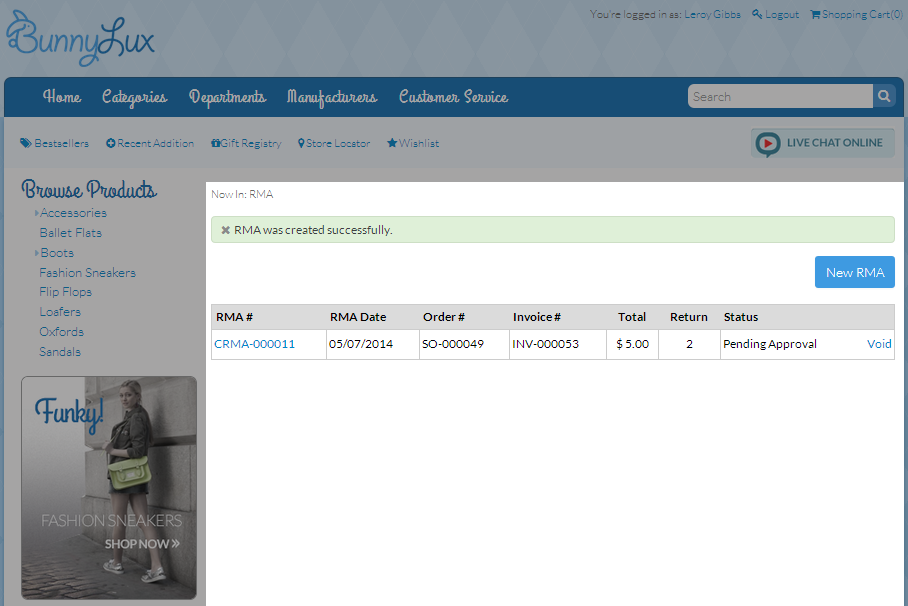
Once submitted, a message prompt will be displayed indicating that the RMA was successfully created and the request status will be set to Pending Approval. If you want to create anotherreturn request, click the New RMA button. If you want to cancel the return request, click Void.
This checkbox will be disabled if there are no items to be returned.
Click Image to Enlarge
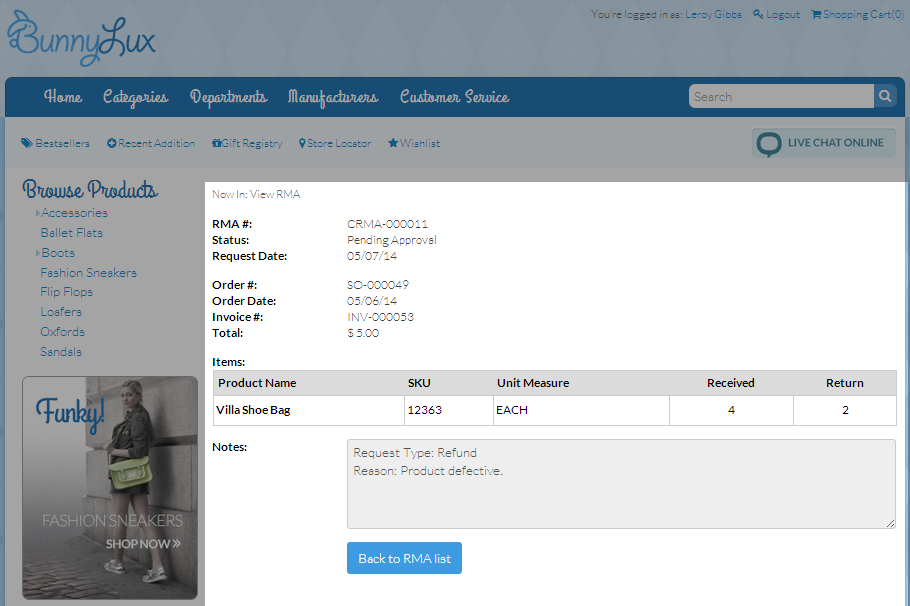
You can also click on the RMA document code to view the transaction details. If you want to view other submitted RMA requests, click the Back to RMA list button.
You can also set the number of RMA transactions to be displayed per page. Refer to How to Set Number of RMA Transactions Per Page.
Click Image to Enlarge
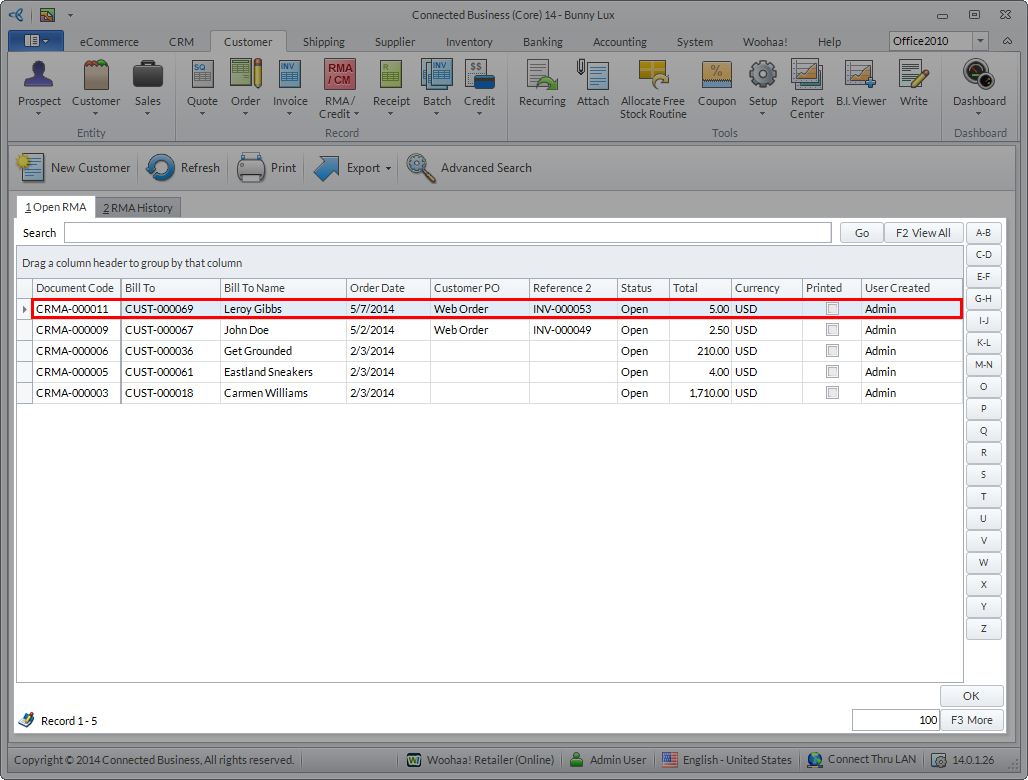
In the Connected Business backend, you can find the RMA transaction from Customer module > RMA/Credit > Find RMA > Open RMA. Select the RMA from the list and process the transaction as needed.
Click Image to Enlarge
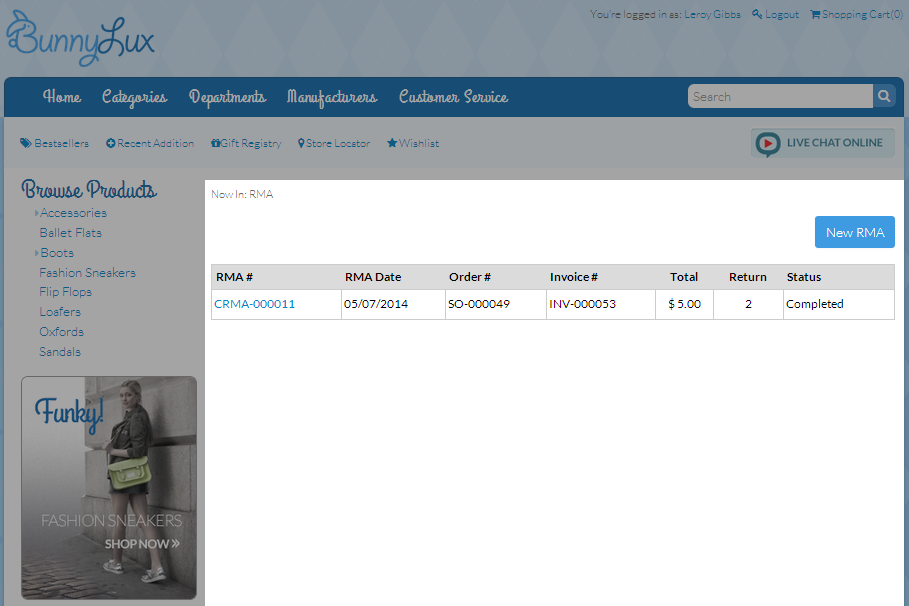
Once the transaction is completed in the backend, the RMA request status in the webstore will be changed from Pending Approval to Completed.
Click Image to Enlarge