Maintain Sales Orders
|
Content
|
|---|
Overview
In Connected Business, you can maintain Sales Order records by editing or updating the details. Modifying the information on every sales order forms can be done in any of the sections. You can approve customer credits, confirm picked items, convert a sales order to a sales invoice or even adjust the shipping dates and due dates of your sales orders.
Maintain Sales Orders
Steps

Note that only open or partial sales orders can be amended.
- From the Customer module, select Order > Find Order. A search screen of open and closed sales orders will display.
- Select a sales order in the Open Sales Order tab to display the Sales Order form.
- Edit the necessary details again before closing.
Approve Customer Credits
If you require credit approval before processing sales orders, take note that sales order status must be set to Approve Credit.
Steps
Setting the Sales Order to "Approve Credit" Status
- From the Customer module, select Order > Find Order. A search screen of open and closed sales orders will display.
- Select a sales order in the Open Sales Order tab to display the Sales Order form.
- From the Order tab of the Sales Order form, select the Workflow tab.
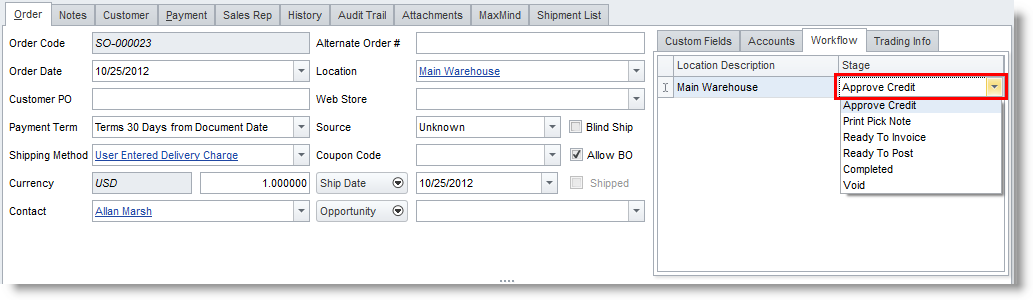
- On the Stage column, click on Approve Credit status.
- Click Save and Close.
Approving Customer Credit
- To approve the customer credit, select Order > Approve Credit. A search list of sales orders for credit approval is displayed.
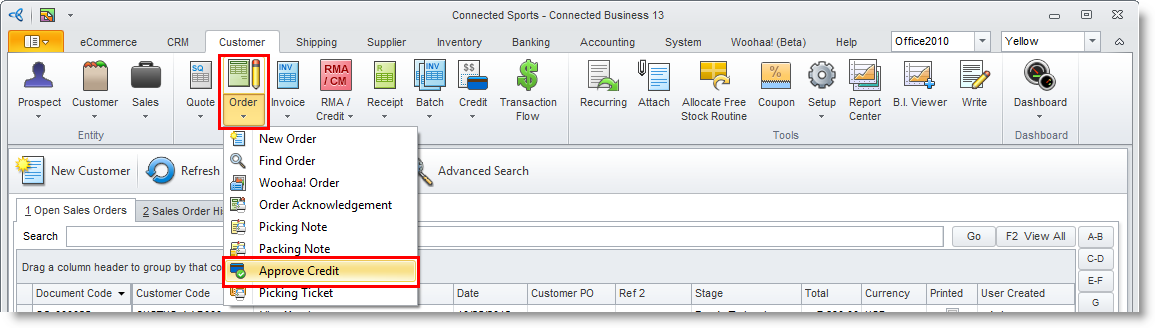
- Select the document(s) to approve and click Ok. The status of the sales order would be changed to Print Picking Note (or the next stage in your sales order workflow).
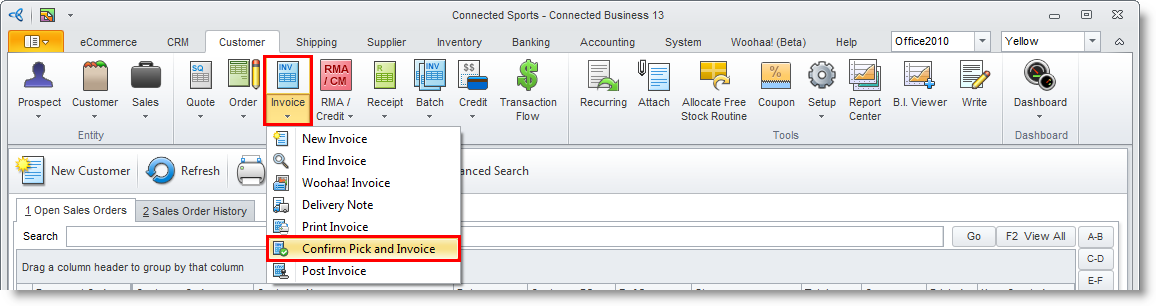
Confirm Picked Items
If items are ready to ship, you can confirm the picked and quantity to ship using the Confirm Pick and Invoice option. This option “Ready to Invoice” status sales orders to “Ready to Post” and generating a sales invoice in the process.
- From the Customer module, select Invoice > Confirm Pick and Invoice. The Confirm Picked Routine form will display.
- Select sales orders to confirm by ticking the checkboxes in the Select column.

- Click on the Node button inside the Select column to view the line items and input the Quantity to confirm.
- Click on the OK button to start the process. Select Yes in the prompt to confirm the sales orders.
- Note that a sales invoice is created for every sales order selected from the list. You may view the sales invoices by choosing Yes in the prompt to view or No to view them later in the Find > Invoice.
Convert the Sales Order to Sales Invoice
- From the menu options of the Sales Order form, click on the Convert To Sales Invoice option. You will be prompted to convert the sales order to invoice.
- Select Yes in the prompt to convert.
- You will be asked to view the sales invoice. You can choose to view the sales invoice or later.
Update Shipping Date or Due Dates
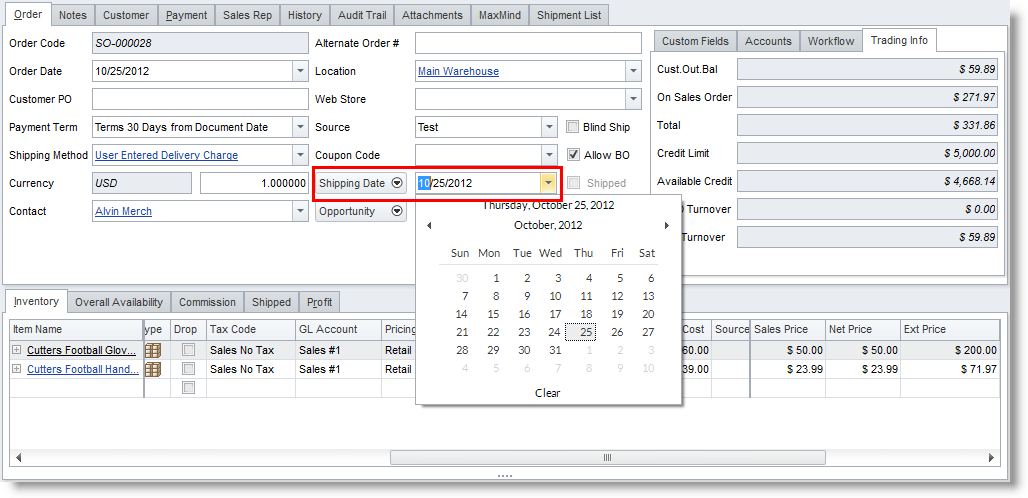
To amend the shipping date,
- In the Shipping Date field, click the pulldown button to select which date field you want to fill in. The date in this field will provide the default shipping dates for the line items.
To amend the due date, you may either:
- Change the date in the Due Date field of the Order tab.
- Change the date in the Due Date column for every line item in the Inventory tab.
Call off the Sales Order
Note that you can only void open or partial status sales orders.
- From the Customer module, select Order > Find Sales Order. A search list of open and closed sales orders is displayed.
- Select a sales order record in the list to display the Sales Order form.
- Click on the Void option in the toolbar menu.
- Choose Yes in the prompt to void the sales order.
Manage Serial and Lot Numbers for Sales Orders
Serial and Lot numbers can be maintained through the Customer Module Advanced Preference.
View Stock Detail
- On the Availability tab of the Sales Order form, select by double clicking the values under the Allocated column. The Stock Detail Form will display.

- On the General tab, the Item Name, Location and Description are already specified.
- You may select on the type drop down list based on the following options:
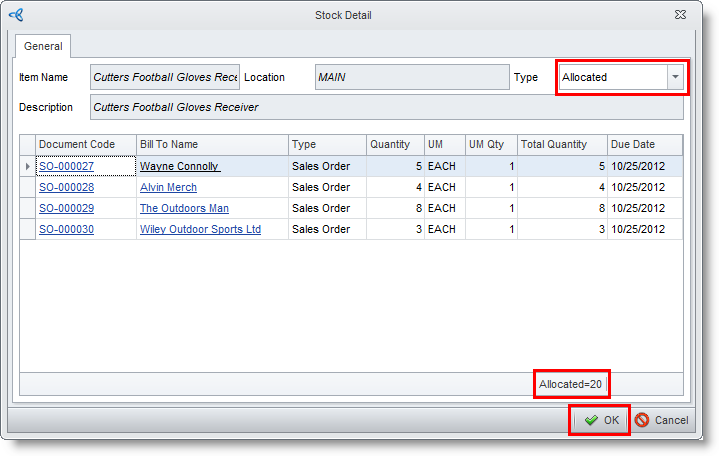
Type
Description
Total Committed shows both Sales Order and Back Order committed. SO Committed shows the total quantity ordered in SO transactions. BO Committed shows the total quantity ordered in BO transactions. In Transit shows the total quantity of items on the way for delivery. Allocated shows the total quantity allocated in Sales Order, Invoice and Back Order transactions. Reserved shows the total quantity reserved in Sales Order, Invoice and Back Order transactions. Open Shows the total quantity tat is neither allocated nor reserved in Sales Order, Invoice and Back Order transactions. - Click OK.