Create New Custom Fields
|
Content
|
|---|
|
From the data dictionary, you can add new custom fields of the following types: text entry, text box, date and time, number, or pull down list. You may create new custom fields for forms with a “Custom Field” area.
In creating new custom columns or fields, you will need to define the column or field description, column length, data type, etc and set up whether it will be a static or dynamic pulldown list. Even with the wizard to guide you, you may need to be familiar with SQL and related database concepts to define the properties for the new column or field you will create.
Creating a Custom Field
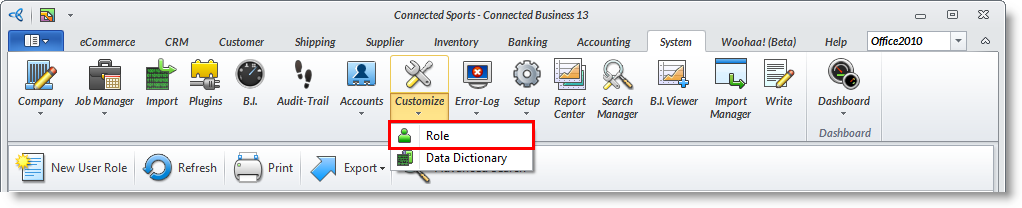
- Go to the System Manager module.
- Select Customize > User Role button from the menu. The User Role search list will display.
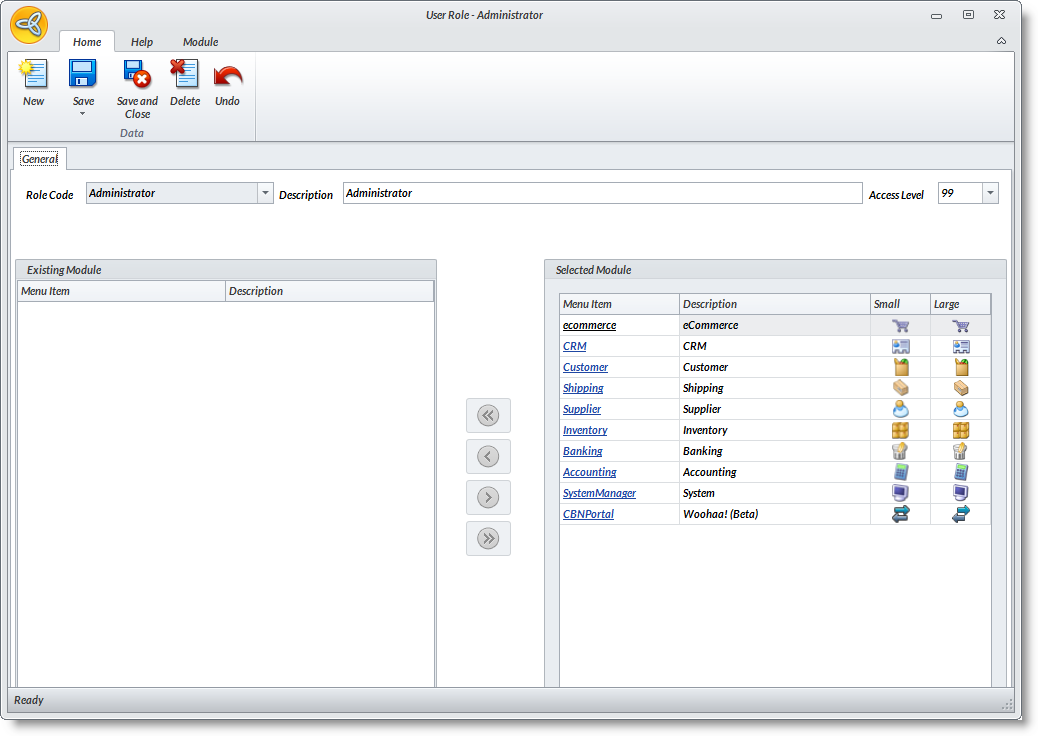
- Select the role code you want to apply the custom field to.
- On the User role-"User Name" form, select the module you want to create a custom field. e.g. Customer Module
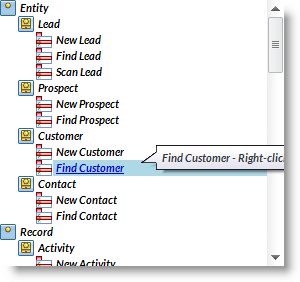
- On the Detail tab, select an entity e.g. Find Customer
- Click on the Customize button from any of the sections, then click Add Custom Field. The Custom Field Wizard will then display
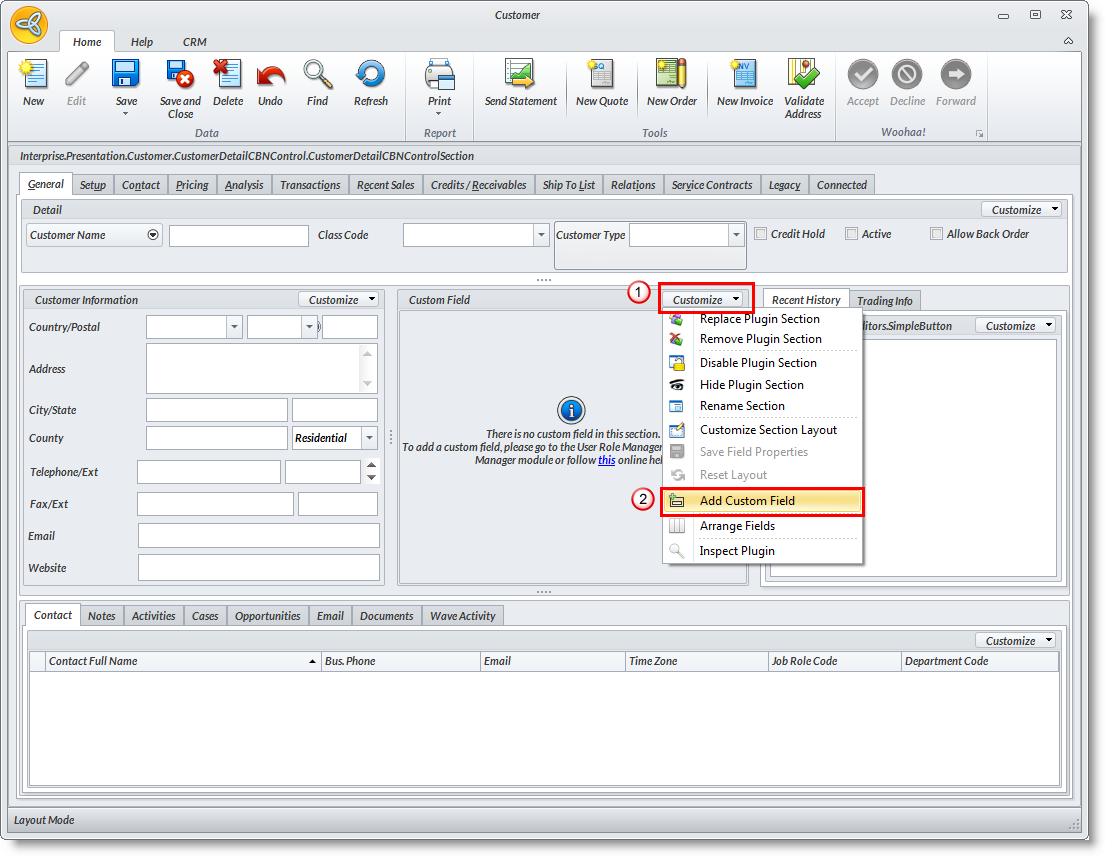
- Supply the needed information on the fields. Click Next.
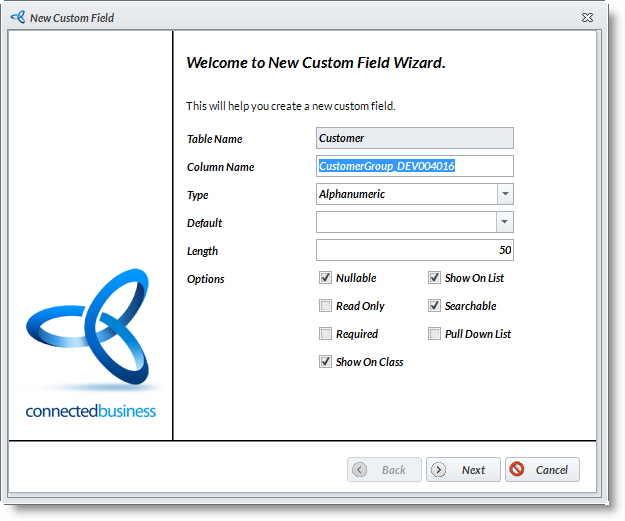
Field
Description
Table Name Indicates the name of the table as selected in the database objects. These are already built within the system. You may also create a new table; refer to: Creating New Custom Table Column Name Shows the column name or field name in the table or form Type Shows the type of data supported (alphanumeric, numbers only, date etc.) Default Shows the default value for the field. Length Shows the maximum recommended length of characters Precision, Scale Indicates the relative position of the custom field on the form, section or grid. Options You can set the various options as to what do you want the custom field should appear on the form. The options are as follows: - Nullable - indicates that the column or field can be skipped or left empty. When unchecked, it indicates that the field is required and should not be left empty.
- Read Only - indicates that the field would be read only and cannot be edited
- Required - indicates that the field requires to be filled up.
- Show on Class - indicates that the column would appear in the table or form where it is contained.
- Show on List - indicates column field would appear as a column in search pulldown lists, list tabs and search screens.
- Searchable - indicates the column or field would be searchable in lists and search boxes.
- Pull Down List - indicates column field will have several values that can be fetched through a drop down option.
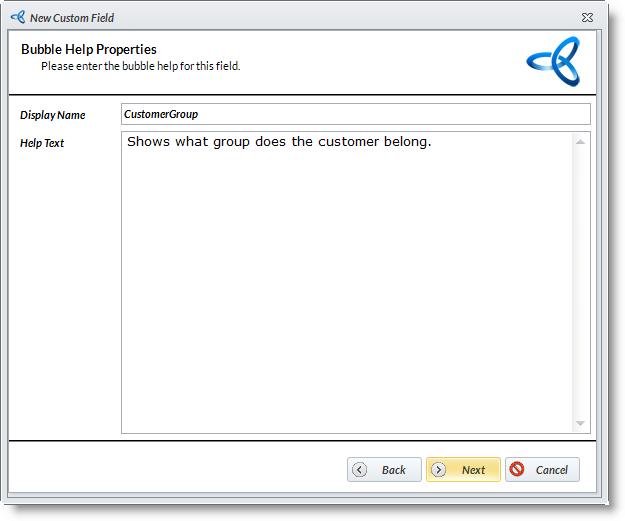
- On the Bubble Help properties section, specify the Display Name and the Help Text. Click Next.
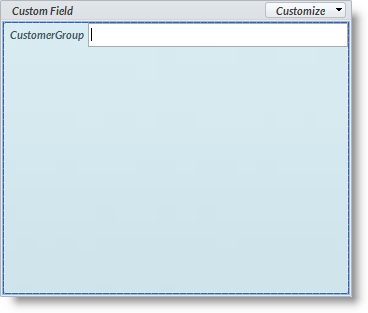
- The newly created custom field will be automatically added on the custom field.
CREATING A CUSTOM TEXT FIELD
We will use an example to create a custom text field. In this example, an “Employee Name” text field is added to the Customer detail form.
- Type in Column Name: EmployeeName
- Select Type as Alphanumeric.
- Leave Default field empty.
- From the Options field, make the necessary settings to the new field such as Visible, Searchable, Nullable and the like. Click Next to continue.
- For the Bubble Help Properties, enter the display name and text that will appear in the bubble help. Then, click Next button to continue.
Example: - Display Name: Employee Name
- Help Text: Full name of the employee.
- Click the Finish button to create the new custom field. The custom field is listed under the Custom Fields list.
![]()
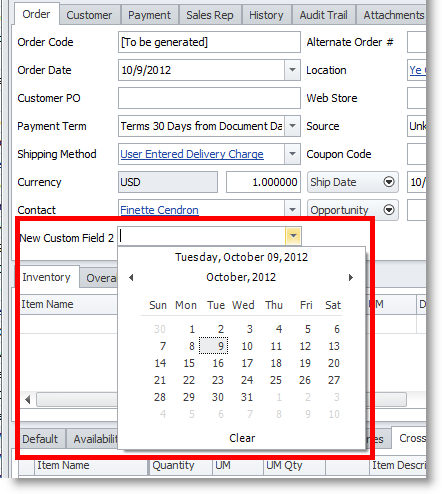
CREATING A CUSTOM DATE FIELD
In this example, a “Hired Date” date field is added to the Customer detail form.
- Type in Column Name: HiredDate
- Select Type as Alphanumeric.
- Leave Default field empty or enter getdate to get the current system date.
- From the Options field, make the necessary settings to the new field such as Visible, Searchable, Nullable and the like. Click Next button to continue.
- For the Bubble Help Properties, enter the display name and text that will appear in the bubble help. Then, click Next button to continue.
Example:- Display Name: Hired Date
- Help Text: The date that the employee was hired in the company.
- Click the Finish button to create the new custom field. The custom field is listed under the Custom Fields List.
![]()
CREATING A CUSTOM FIELD PULLDOWN (STATIC LIST)
In this example, an “AddressType” pulldown is added in the Customer detail form.
- Type in Column Name: AddressType
- Select Type as Alphanumeric.
- In the Default field, you may add a default value for the field. For example: Unknown.
- In the Length field, the ideal character length for the selected data type (applies in some fields) is displayed. You may change the default length. It is recommended to stick to the ideal number of character to avoid getting errors.
- From the Options, check Is Pulldown List. Click Next button to continue.
- In the next screen, set the pulldown list properties. Select Static List in the Is Static List field pulldown.
- In the List Values, type in Unknown, Residential and Commercial separated by commas. Click Next button to continue.
- For the Bubble Help Properties, enter the display name and the bubble help text. Then click Next.
Example:- Display Name: Address Type
- Help Text: Select the type that closely matches the customer’s address type.
- Click the Finish button to create the new custom field. The custom field is listed under the Custom Fields List.
![]()
CREATING A CUSTOM FIELD PULLDOWN (DYNAMIC LIST)
In this example, an “Associated Company” pulldown is added in the Customer detail form. The field pulldown will show the list of active customers.
- Type in Column Name: AssociatedCompany
- Select Type as Alphanumeric
- In the Default field, you may add a default value for the field. For example: Unknown.
- In the Length field, the ideal character length for the selected data type (applies in some fields) is displayed. You may change the default length. It is recommended to stick to the ideal number of character to avoid getting errors.
- From the Options, check Is Pulldown List. Click Next button to continue.
- In the next screen, set the pulldown list properties. Select Dynamic List (Database Table) in the Is Static List pulldown.
- In the Pulldown Table field, select the CustomerActiveCustomersView.
- In the Pulldown Field field, select CustomerName column.
- For the Bubble Help Properties, enter the display name and the bubble help text. Then, click Next button to continue.
Example:- Display Name: Associated Company
- Help Text: If the customer has an associated company in which the main company holds at least 50% interest.
- Click the Finish button to create the new custom field. The custom field is listed under the Custom Fields List.
Adding a Custom Field
ADD A CUSTOM FIELD IN A CUSTOM FIELD SECTION
Newly created custom fields are automatically added in the custom field section. However, if you want to add more custom fields in the section, you may follow the steps below:
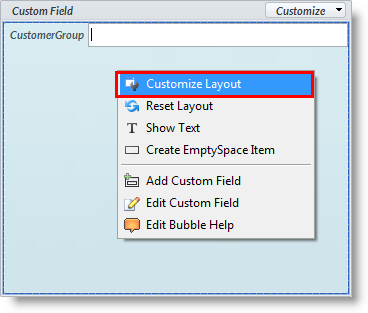
- Right click on the Section, select Customize Layout. The customization pop up form will display.
- Select the specific custom field and drag it on the section container.
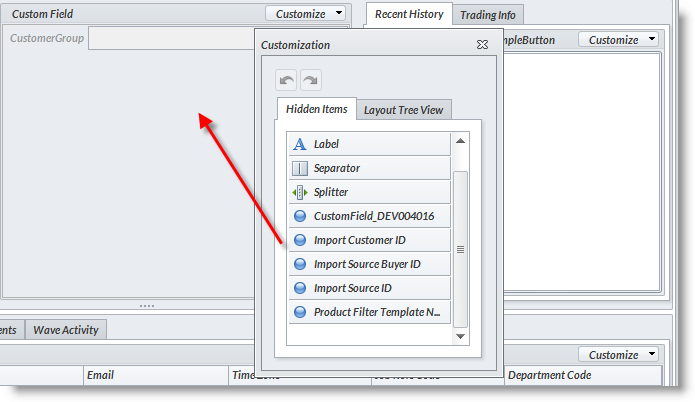
- You may add a label, splitter or separator depending upon your needs.
- Close the form and save the changes made in the UI.
- Click save and close in User Role Dashboard and close User Role Form
ADD A CUSTOM FIELD ON AN EXISTING PLUGIN SECTION
If you want to add custom fields on an existing plugin section, you must create first a new custom field. Refer to: Creating a Custom Field. After that you may now be able to add more fields on an existing plugin section.
- Right click on the Section, select Customize Layout. The customization pop up form will display.

- Select the specific custom field and drag it on the section container.
- You may add a label, splitter or separator depending upon your needs.
- Close the form and save the changes made in the UI.
- Click save and close in User Role Dashboard and close User Role Form.
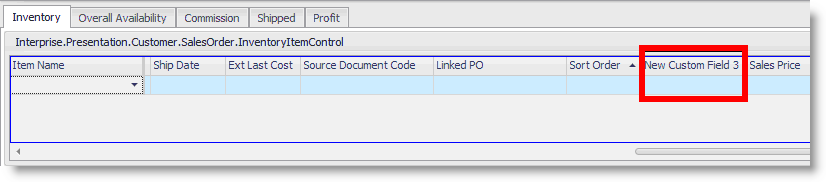
ADD A CUSTOM FIELD IN THE GRID
- Right click on the Section, select Customize Layout. The customization pop up form will display.
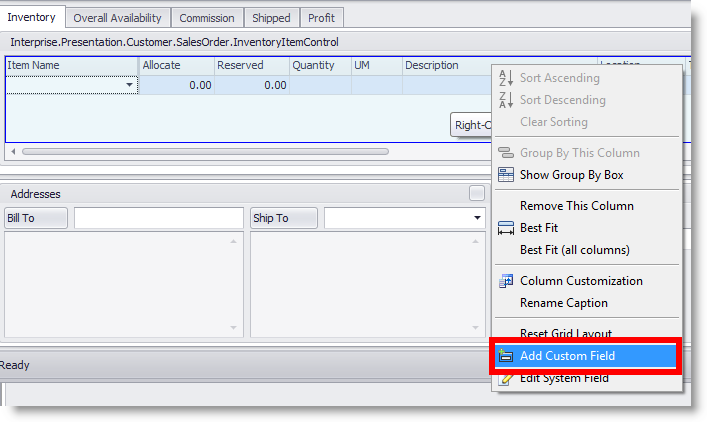
- Select the specific custom field and drag it on the section container.
- You may add a label, splitter or separator depending upon your needs.
- Close the form and save the changes made in the UI.
- Click save and close in User Role Dashboard and close User Role Form