Set Up the Web Config
|
Content
|
|---|
The web.config file is an XML-formatted file where the eCommerce system settings are defined. It defines the behavior and characteristics of the store site. Since it is an XML file, you can use any text editor to make modifications to the web.config file.

Be careful in making modifications to the Web.Config file. Any error caused by modifying the setup may result to the store crashing or not functioning properly. It is recommended to make a backup copy of the web.config file before editing for data recovery in case something goes wrong.
Open the Web.Config File for Editing
To open the web.config file,
- Go to the installation directory of eCommerce and open the Web folder.
- Select the web.config file.
- Right Click on the web.config file and select Open With then Notepad option. This opens the web.config file in the Notepad utility.

Click Image to Enlarge
You can also use any other text editor aside from Notepad to open the web.config file.
![]()
Customize the Store Encrypt Key
To customize the encrypt key of the store,
- Search for the keyword “EncryptKey” using the Notepad’s auto search facility.
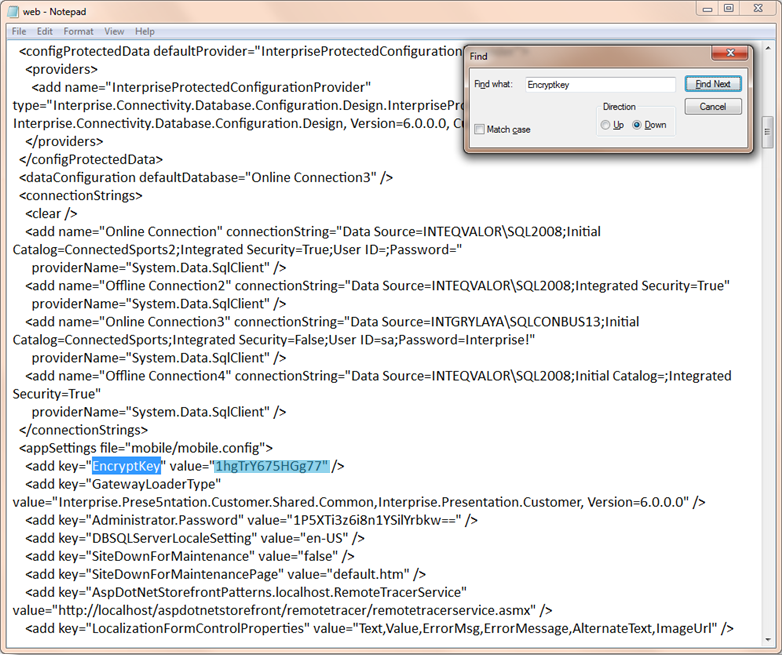
Click Image to Enlarge
- By default this parameter is set to a specific code. You can change this code to personalize your store. Just replace the currently specified EncryptKey value with a new value.
- Save your new setting.

Customize the Store System Globalization
To set the globalization settings of the application,
- Search for the keyword “globalization” using the Notepad’s auto search facility.
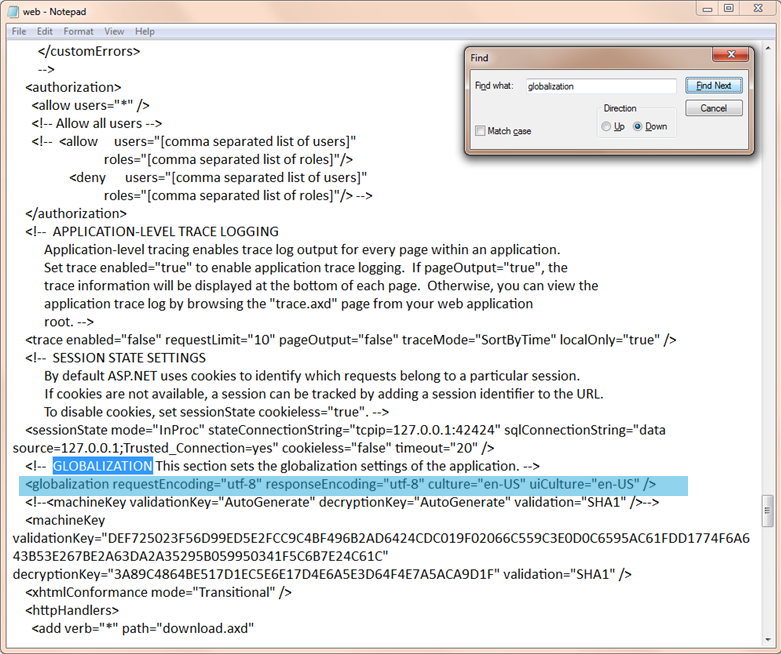
Click Image to Enlarge
- Set the coding standards to use for the system on the RequestEncoding and ResponseEncoding parameters.
The default is UTF-8 which is the widely used standard in most systems. Common variations for this value include UTF-16 and UTF-32.
- The locale to use for the system that determines its language, currency, and measurement standard is entered to the Culture and uiCultureparameters. The default en-US indicates the use of the United States English standard locale.
- Save your new setting.
![]()
Customize the Store Sign-In Behavior
To set the sign-in behavior of the store,
- Search for the keyword “SIGNIN” using the Notepad’s auto search facility.
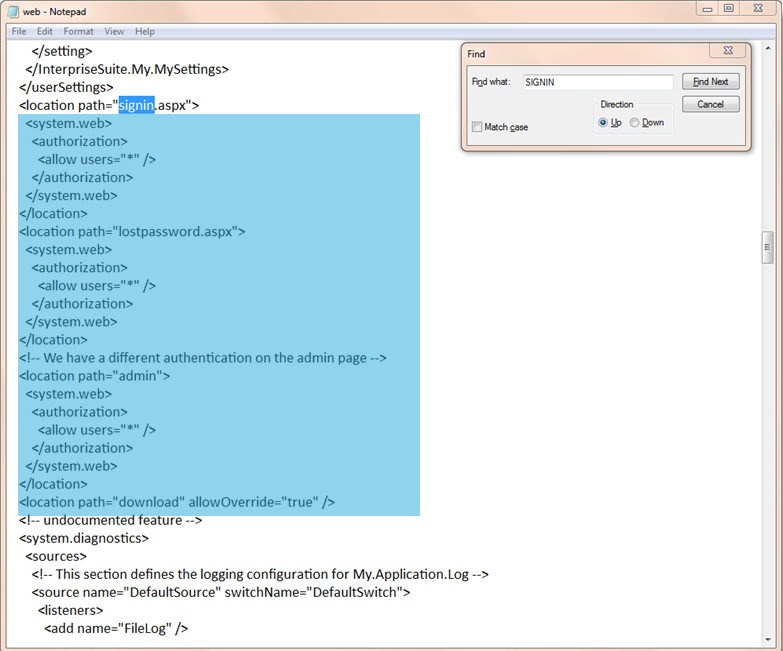
Click Image to Enlarge
- This section is where the sign-in behavior of the store is specified. You can change this and override the default authentication scheme of the store site since it uses a different credential for forms authentication for the admin pages.
- After making the changes, save your setting.
![]()
Set Up Admin Site Login Settings
To set up the admin site login settings,
- Search for the keyword “ADMINAUTH” using the Notepad’s auto search facility.
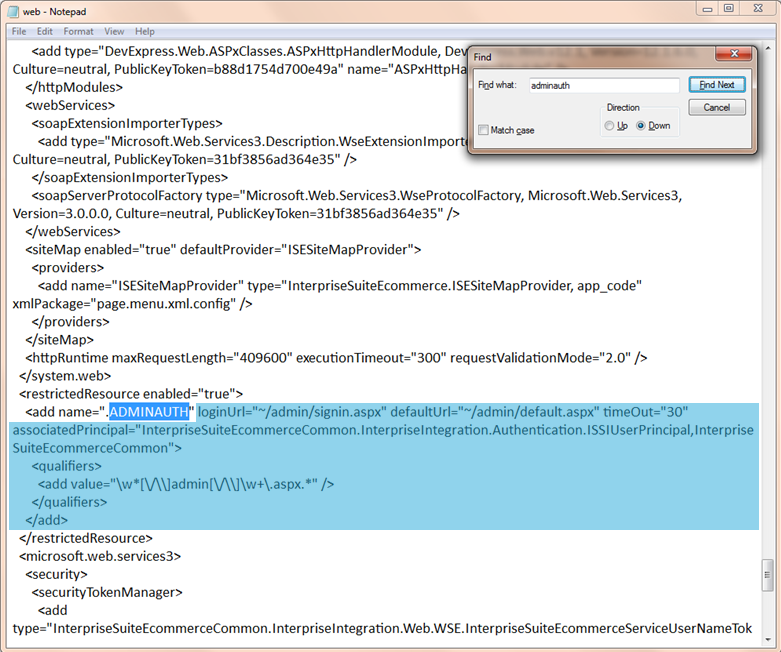
Click Image to Enlarge
- This area is where the setting of the admin site login activity is specified and where the following parameters can be set:
- LoginUrl - the URL where the user will be redirected if not authenticated.
- DefaultUrl - the default admin page
- (Qualifiers) Add Value - the pattern by which pages are restricted.
- LoginUrl - the URL where the user will be redirected if not authenticated.
- The locale to use for the system that determines its language, currency, and measurement standard is entered to the Culture and uiCulture parameters. The default en-US indicates the use of the United States English standard locale.
- Save your new setting.
![]()
Set Up Admin Site Security
To set the admin site security,
- Search for the keyword “HTTPMODULE” using the Notepad’s auto search facility.
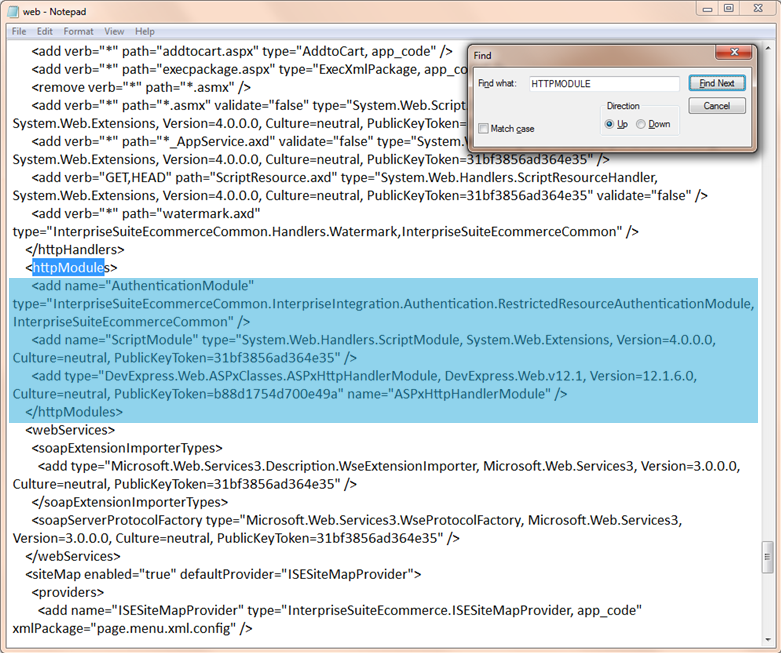
Click Image to Enlarge
- This portion of the web.config file is where the admin security is implemented.
- Save your new setting.
![]()
Add Custom Extensions to Use for XML Packages
To add custom extensions,
- Search for the “DEFAULTEXTENSION” keyword using the Notepad’s auto search facility.
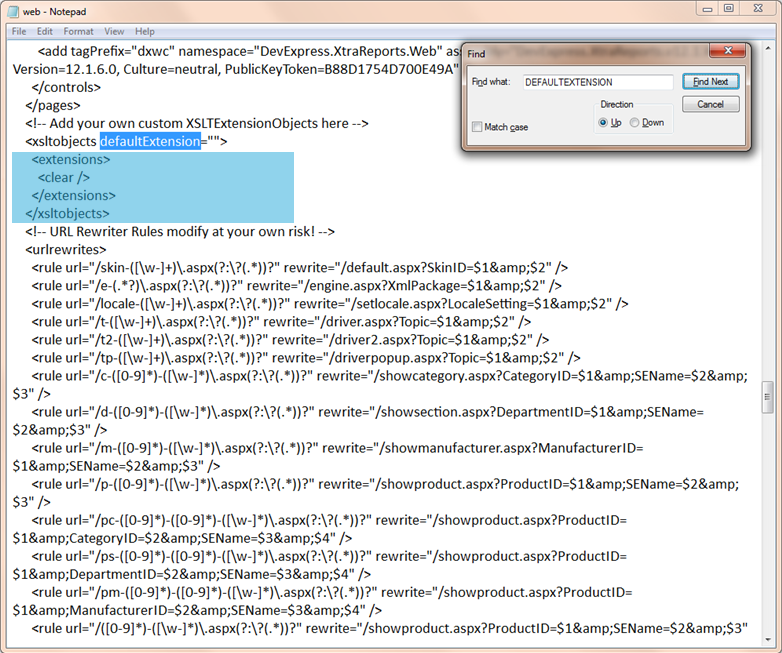
Click Image to Enlarge
- This code segment allows you to add custom extensions that you can use in your XML packages.
- Save your new setting.
![]()
Set Up Site Download Configuration
To set up the site download configuration,
- Search for the “HTTPHANDLER” keyword using the Notepad’s auto search facility.

Click Image to Enlarge
- This maps incoming download requests to the appropriate HttpHandler or HttpHandlerFactory class, according to the URL and the HTTP verb specified in the request.
- Save your new setting.
![]()