Set Up Store Database for Windows Authentication
In this discussion, we will demonstrate how to set up Windows Authenticationto access the store database. This type of authentication is the easiest way to access the server and database since user login is not needed and the credentials being used are the built-in windows users e.g. IUSR, Network Service.

We recommend using the SQL Server Authentication for a more reliable and secured connection to the server and database since it uses user credentials. Furthermore, Windows Authentication requires Windows operating system when accessing the server and database and it doesn’t work with remote connection via the internet.
To set up the Windows Authentication,
- Open the SQL Server Management Studio and connect to the store database.
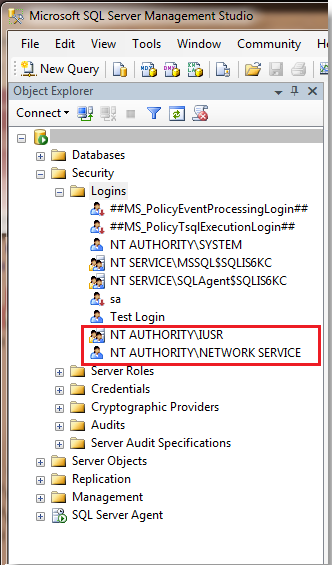
- Search for the ASPNET or IUSR and NETWORK SERVICE user accounts by going to Security > Logins.
If ASPNET / IUSR or NETWORK SERVICE user accounts exist, all you have to do is check if the mode of authentication is set to Windows Authentication by clicking on either of the user account. If the user accounts are not in the list, you need to create the accounts. For this discussion, we will assume that the ASPNET / IUSR or NETWORK SERVICE user accounts are not in the list.
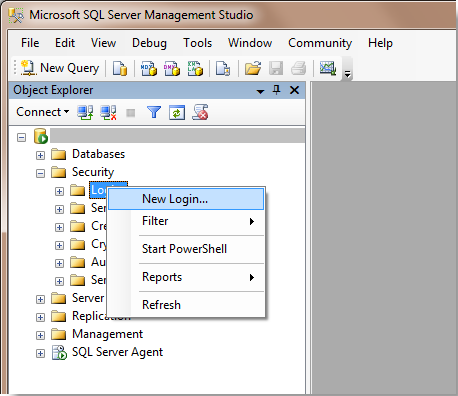
- To create the accounts, right click on the Logins folder and select the New Login option.
- In the Login - New window, select Windows Authentication option. Click Search button to search for the ASPNET/ IUSR user account.

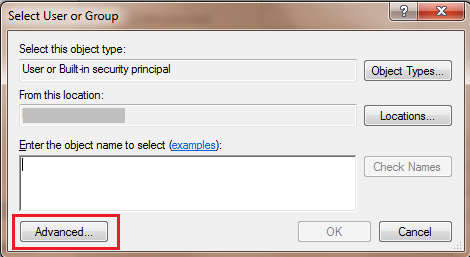
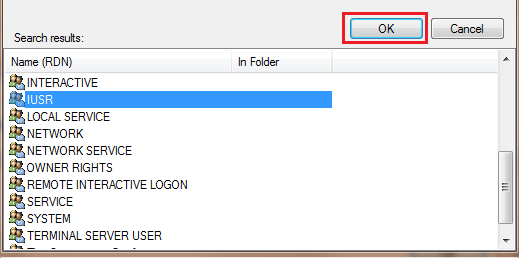
- The Select User or Group Window will load.Click the Advanced button for an extended search interface.
- A new window will load. Click Find Now button.
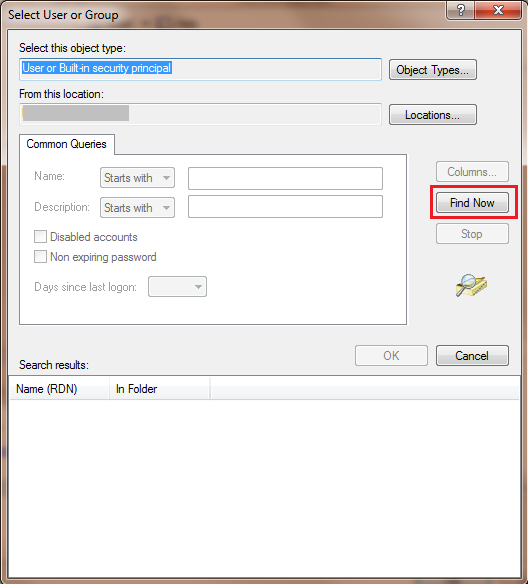
- A list of available users will be displayed in the Search Results field. Select the ASPNET/IUSR user and click OK.
We now have the requirements in setting up the Windows Authentication database access: the ASPNET/IUSR user to access the database and the Windows Authentication to enable access to the database.
- After setting up the user account, set the database to access. Still in the Login - New window, click the User Mapping option.

- The list of databases in the system will be displayed. Select the store database.
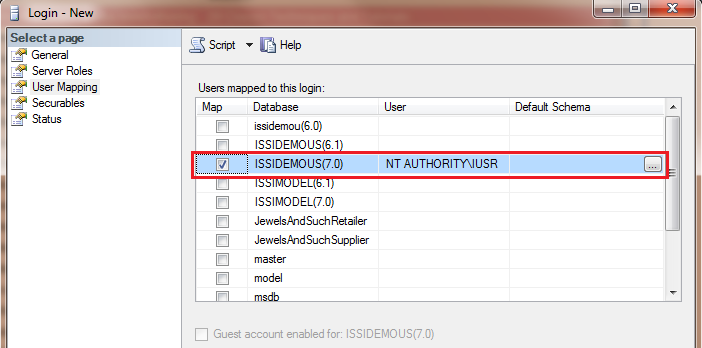
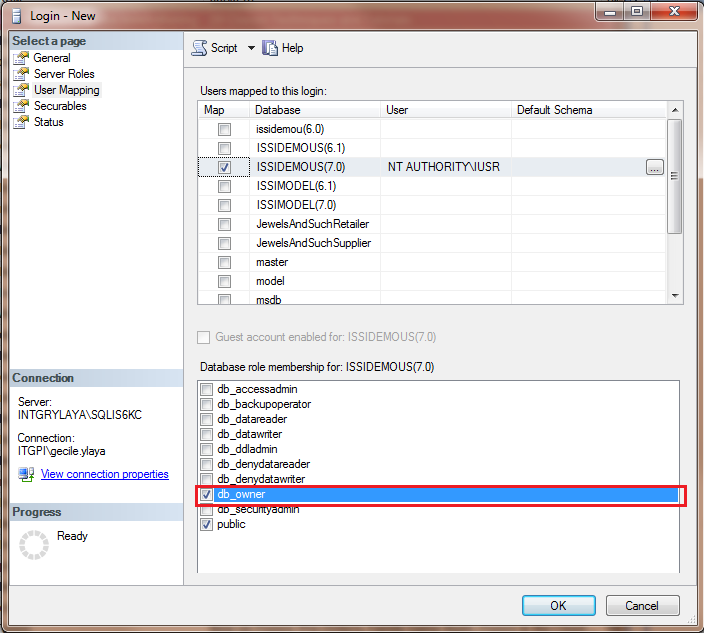
- Check the db_owner database role membership option for this database. Click OK to finish the setup.
- Do the same procedure for NETWORK SERVICE user.
- The ASPNET/IUSR and NETWORK SERVICE user accounts are now added in the login list and Windows Authentication access to the database is now established.