Set Up Department Mapping
Mapping departments allow you to define how departments behave and represented in the webstore.

The mapping only applies to the webstore selected. You need to re map the department if you choose another webstore.
To map a department,
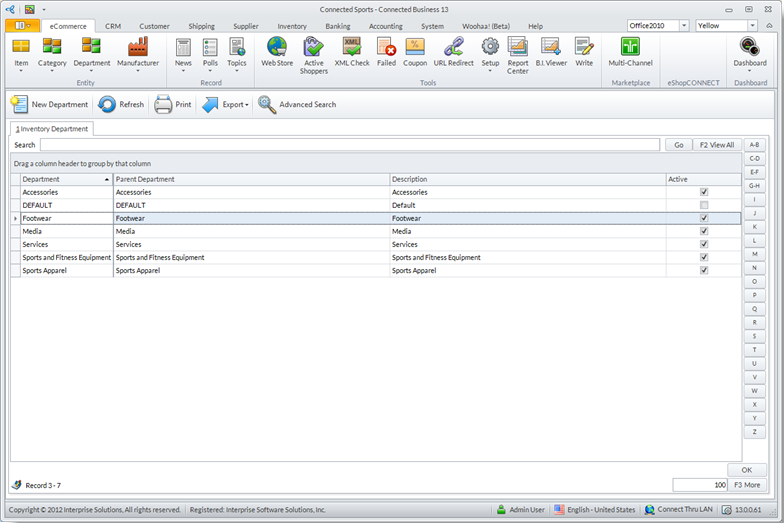
- Go to the eCommerce module > Department and select the Find Department option.
- The Department window will be displayed showing the list of all departments defined in the store. Select the department you want to edit from the list, e.g. Footwear. The Department details will be displayed.
Click Image to Enlarge
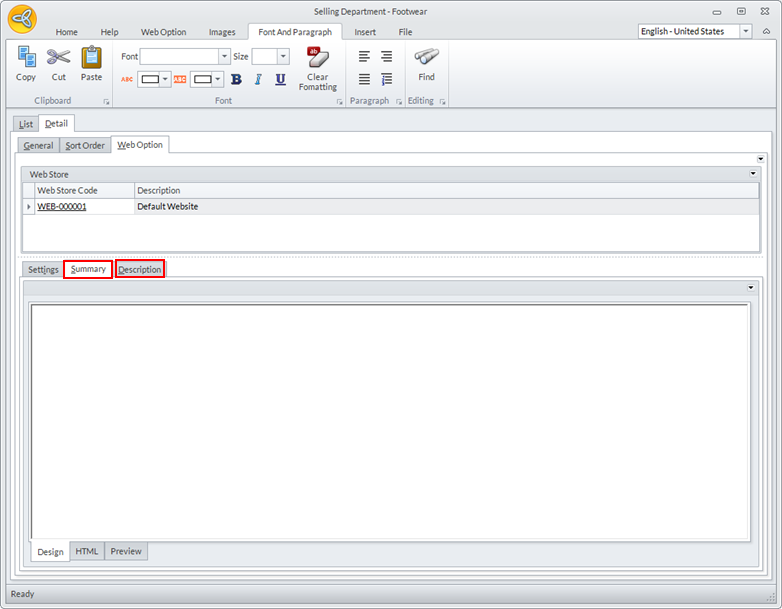
- Click the Web Option tab. Choose the website where you want to define the mapping for the department.

Click Image to Enlarge
- In the Settings tab, you will find all the function you need to define how the department is being displayed in the store.

Click Image to Enlarge
The following table summarizes the function of each field in the Settings tab.
Field Function Page Settings These settings defines how a department page is being displayed on the browser. XML Package Determines the way products are being shown on the department page. Mobile XML Package Determines the way products are being shown on the department page on a mobile device. Display Columns If using Grid Display format, this specifies the number of items in each grid column. Display Rows If using Grid Display format, this specifies the number of products in each grid row. Page Size Specifies the number of products to be displayed in the department page. By increasing the value of this field, it enables the page to display more preview of the company's products. Start/ End Date Specifies the time frame for displaying the department in the web store. Skin Template Specifies the skin template to be used for the department page. The TemplateSwitching.Enabled appconfig must be set to true for the skin to load in the webstore Published (Show on Web) Specifies whether the department will be displayed on the webstore or not. Search Engine These settings specify the meta codes that enable the department to be searchable on the internet. Page Title Specifies the title text of the department to be searched in the internet. Keywords Specifies possible keywords to access the department in the internet. Description Specifies the description for a particular department in the web store NoScript Specifies an alternate content (text) if a script is NOT executed. Images This is where images that represent the department are specified. Thumbnail Specifies the icon display image for the department. Medium Picture Specifies the medium-sized display image for the department. Large Picture Specifies the enlarged display image for the department. Mobile Picture Specifies the display image of the department on a mobile device.
- You can use the Summary tab to provide a short summary for the department being mapped. You may use HTML scripting to make it more attractive.
Click Image to Enlarge
- You can use the Description tab to provide a more detailed explanation or description of the department and/or its items. Descriptions are shown at the top of the department pages. You may use HTML scripting to make it more attractive.
- After entering all the necessary details for the department, click the Save, Save & Close to apply the updates in the database or the New button to map another department.