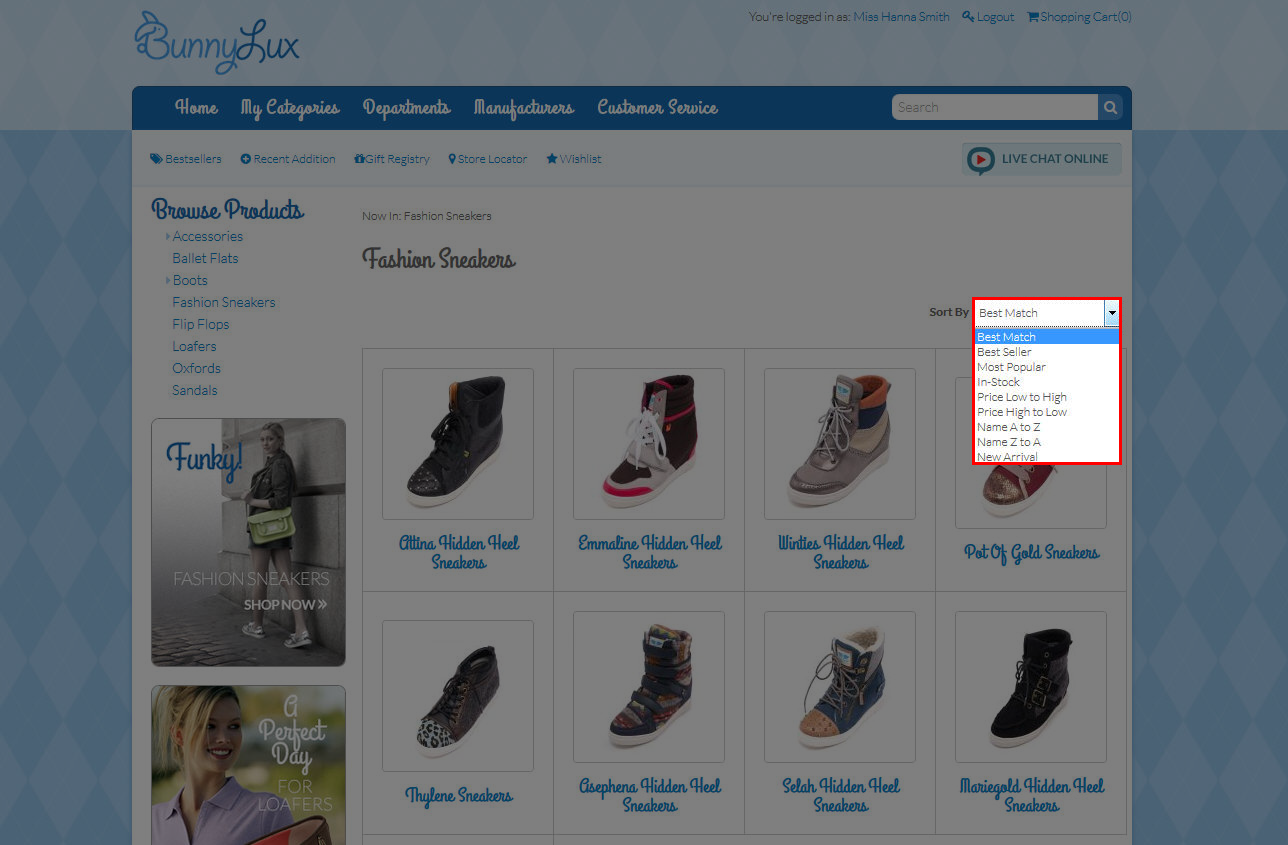
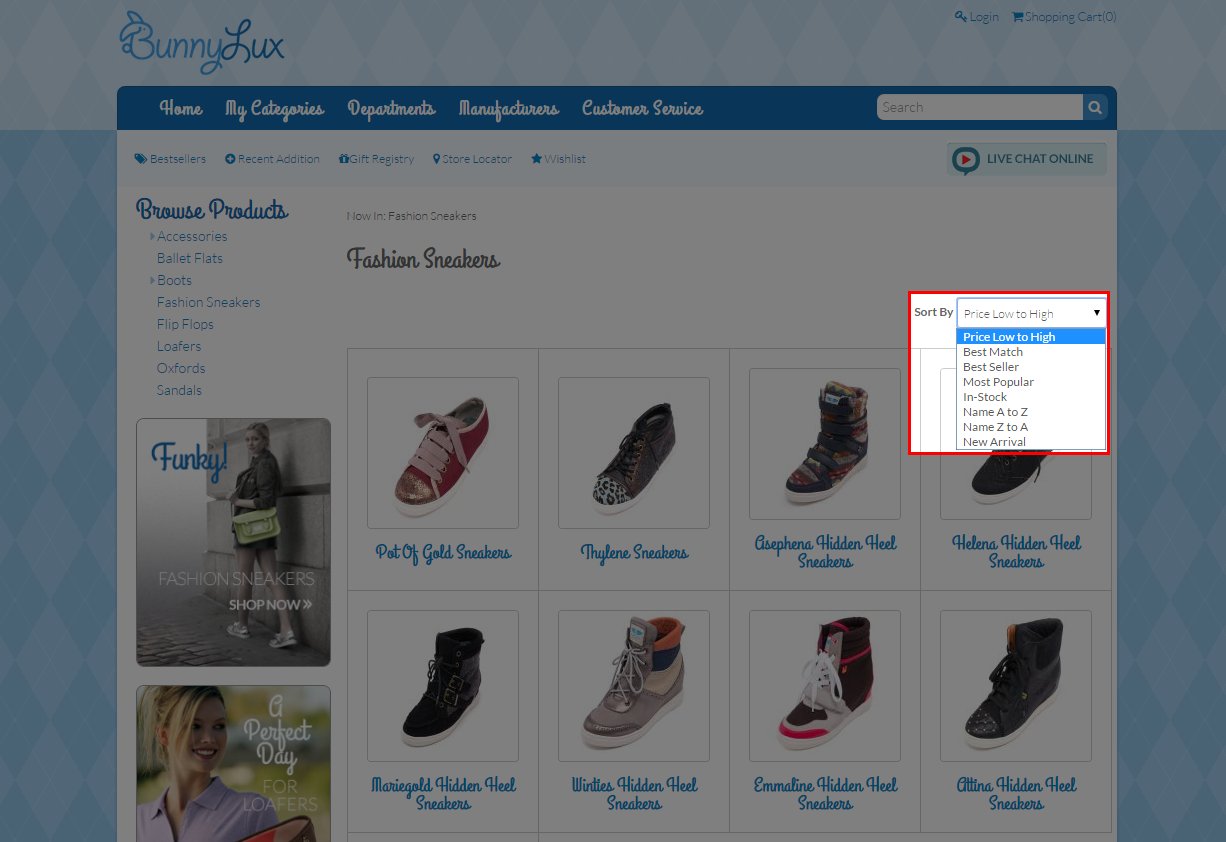
Product Sorting
The Product Sorting feature of Connected Business allows you to set sorting options in your website to improve customer experience when browsing through your products in the webstore. These sort options can be applied to the Category, Manufacturer, and Department page of your website. The Product Sorting feature is already integrated in the website, thus, no need to set it up.
Product Sorting Options
The following are the sort options in Connected Business and its corresponding functions.
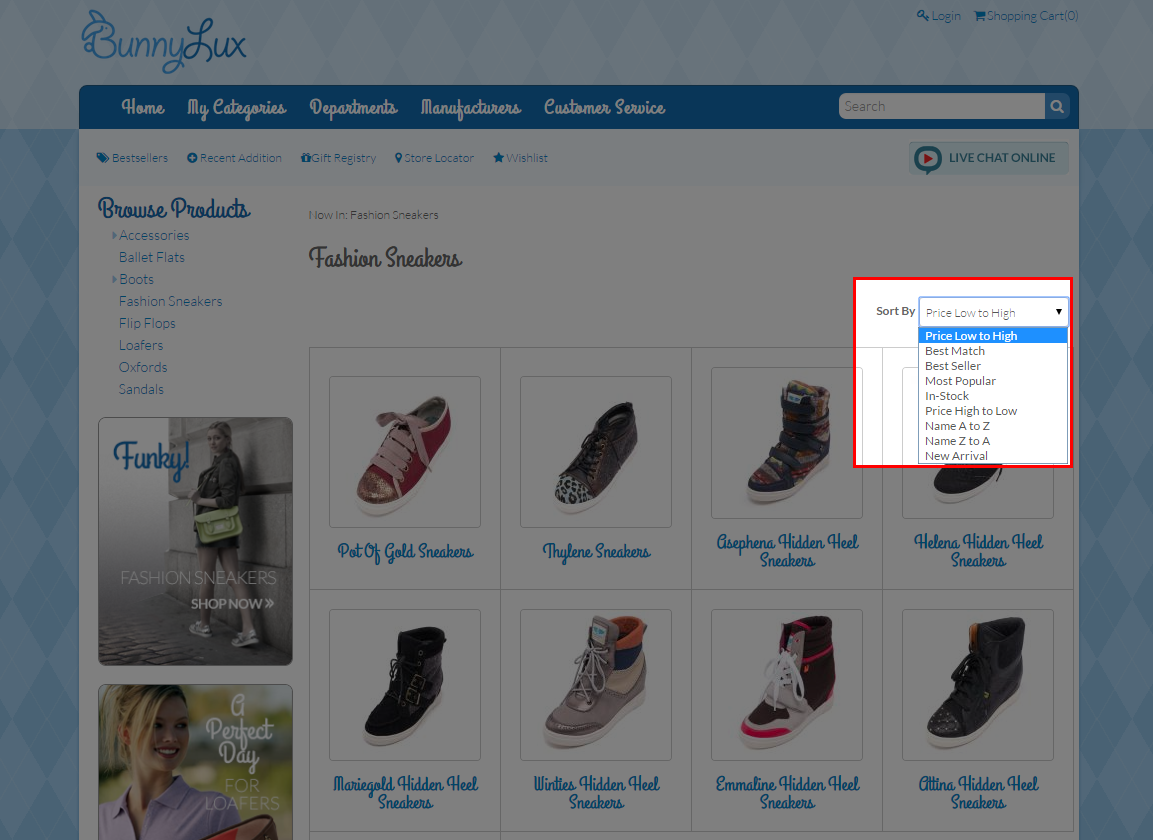
Click Image to Enlarge
| Sort Option | Description |
| Best Match | The most relevant sort option thatallows you to search for the specific product you are looking for. This option is based on the number of factors such as the buyer’s behaviors on past searches or track records of recently purchased items from your website. |
| Best Seller | Allows you to sort products from the highest to the lowest selling products recorded within a period of time. Note that you can customize the number of best seller products on your webstore. You can change it through the eCommerce module > Setup > Application Configuration and search for the BestSellersN appconfig. Set the number of best sellers to be shown in your website in the Config Value field. |
| Most Popular | Allows you to sort products according to the most number of views on your webstore. |
| In-Stock | Allows you to sort products that have available stocks.. The order of the stocks shown on the website is sorted according to products with the highest number of available stocks down to the lowest. |
| Price Low to High | Allows you to sort products with the lowest price to the highest. |
| Price High to Low | Allows you to sort products with the highest price to the lowest. |
| Name A to Z | Allow you to sort product names alphabetically in descending order. |
| Name Z to A | Allow you to sort product names alphabetically in ascending order. |
| New Arrival | Allows you to sort products according to the latest products posted on the website. In the back end, these products can be the newly purchased stocks or new products to be sold. |
Customize Sorting Option
You can modify the default sorting option when your items are displayed in the item pages of your web store. To do this,
- Go to the XML Packages in the installation folder of your Connected Business e.g. C:\Program Files (x86)\Connected Business 15\CBE\Web\XmlPackages.
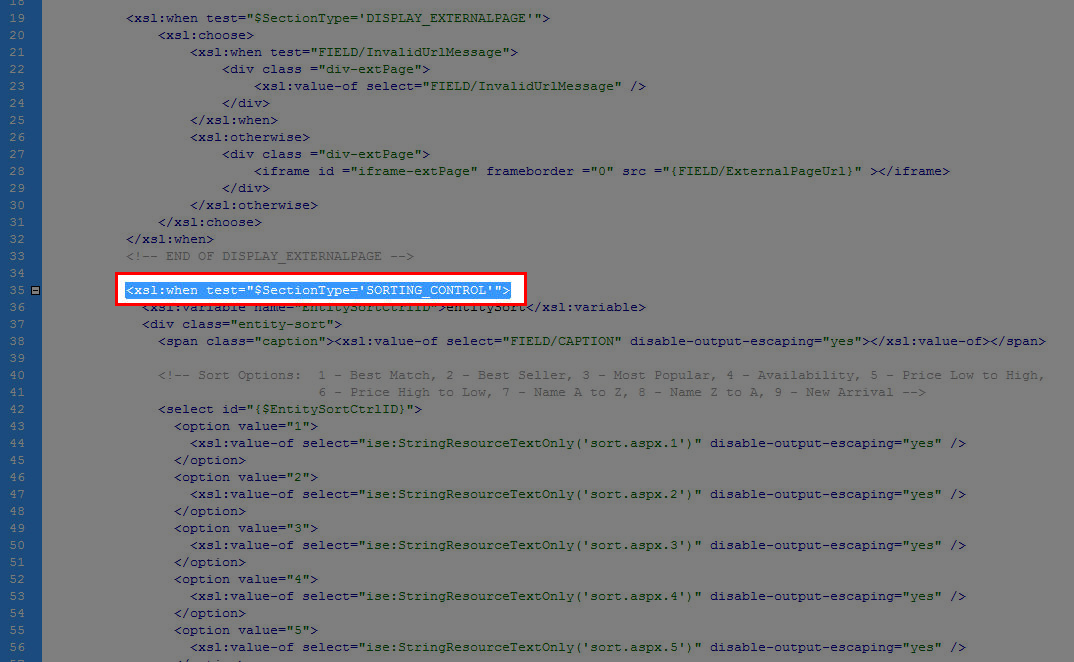
- Open the <helper.entity.xml.config> in any text or html editor and find the line <xsl:when test="$SectionType='SORTING_CONTROL'">.
Click Image to Enlarge
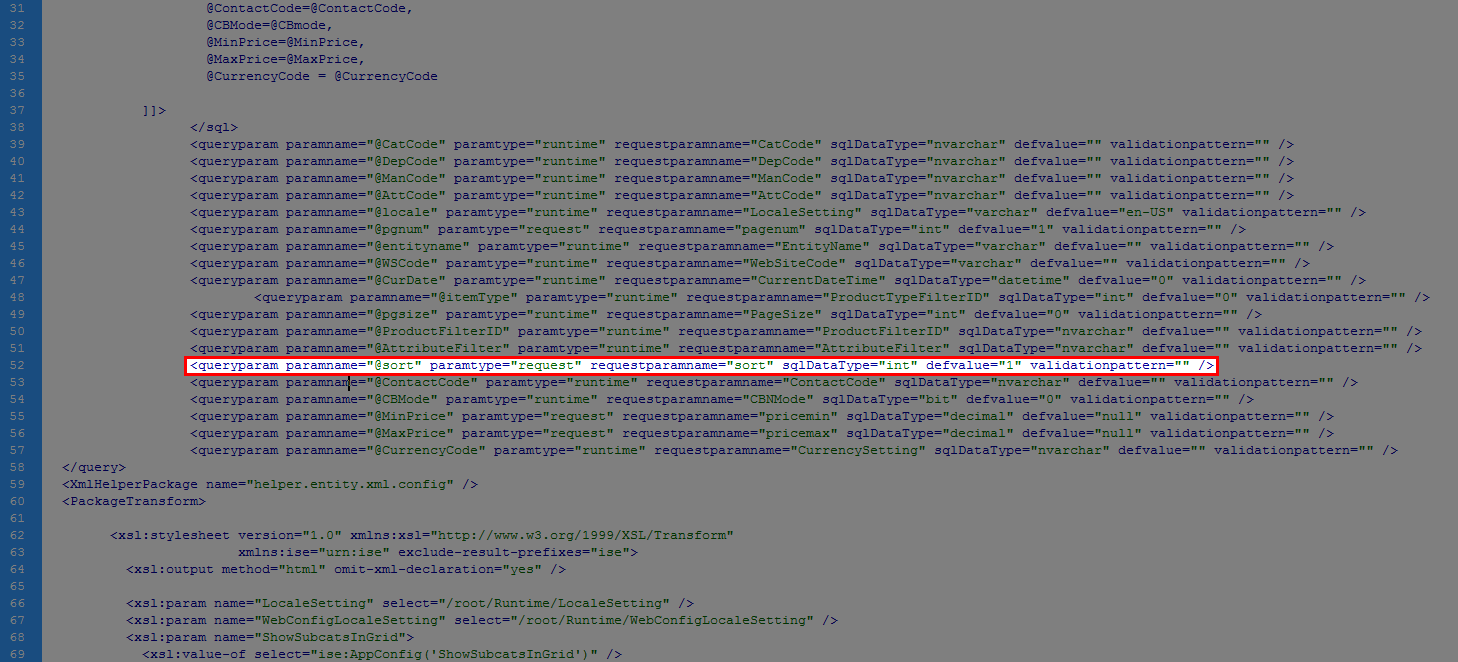
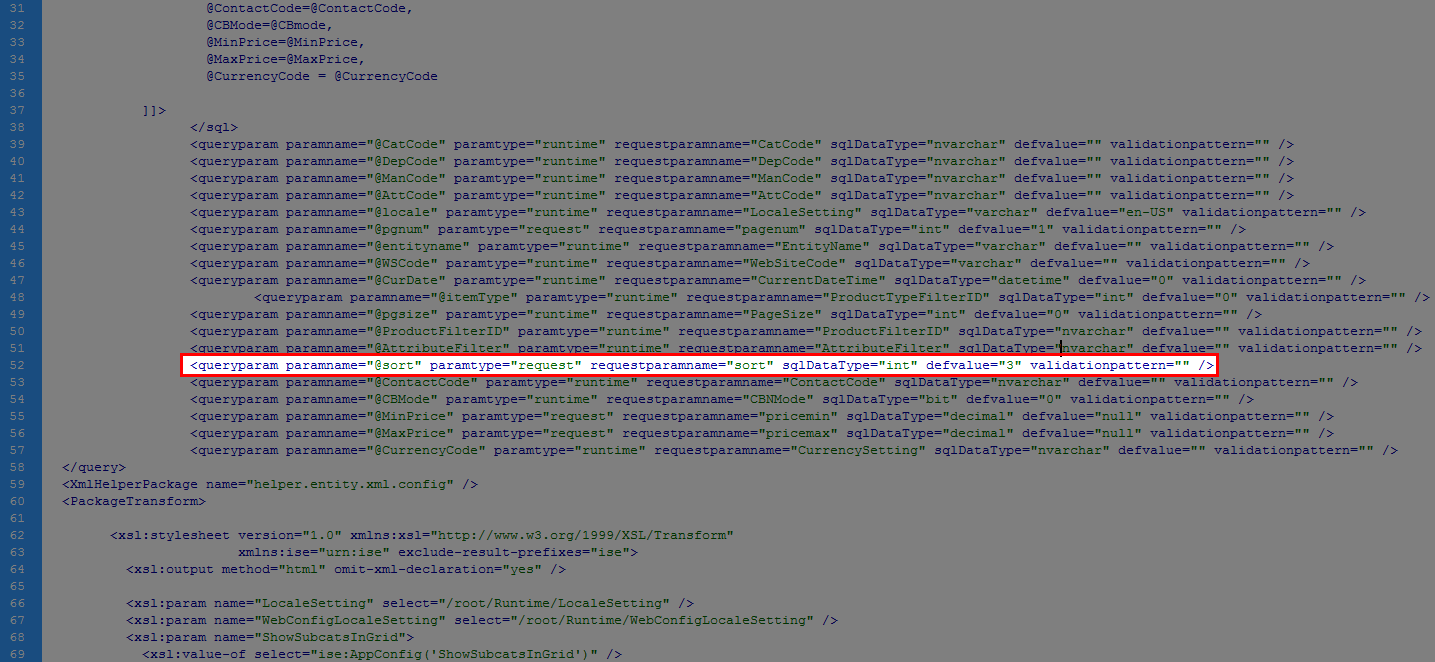
- Go back to the XML Packages folder and open the file <entity.grid.xml.config>.
- Find the line <queryparam paramname="@sort" paramtype="request" requestparamname="sort" sqlDataType="int" defvalue="1" validationpattern="" />.
Click Image to Enlarge
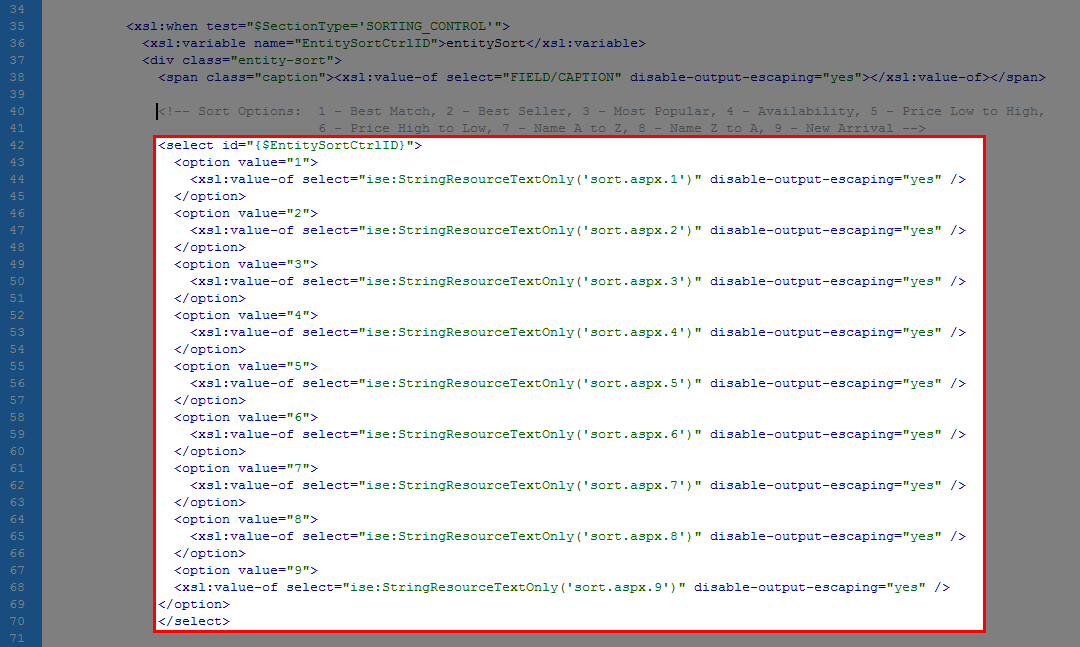
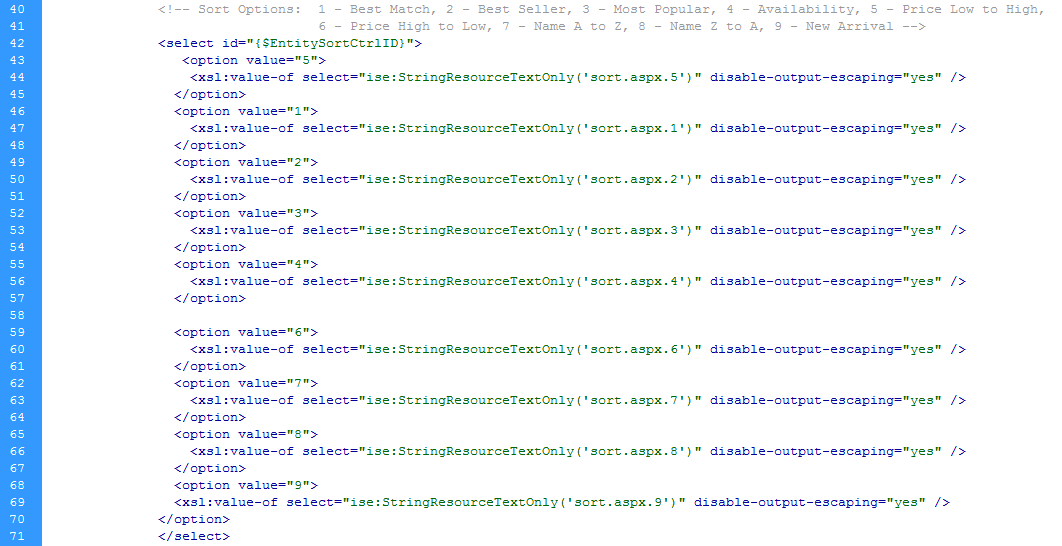
- Now go back to the <helper.entity.xml.config> file. You will notice a list of sort options with corresponding option values on their respective lines.
Click Image to Enlarge
Copy the option value of the sort option you want to be used as default, and input it in the defvalue in the line <queryparam paramname="@sort" paramtype="request" requestparamname="sort" sqlDataType="int" defvalue="1" validationpattern="" />.
Click Image to Enlarge
- While still in the <helper.entity.xml.config> file, move the whole <option> line of the default sort option you want to display first, and move it to the top of the list of sorting options.
Click Image to Enlarge
- Save both the <helper.entity.xml.config> file and the <entity.grid.xml.config> file.
Click Image to Enlarge
Delete Sorting Option
You can delete specific sorting options you do not want your web store customers to use. To do this,
-
Go to the XML Packages in the installation folder of your Connected Business e.g. C:\Program Files (x86)\Connected Business 15\CBE\Web\XmlPackages.
-
Open the <helper.entity.xml.config> file in any text or html editor and find the line <xsl:when test="$SectionType='SORTING_CONTROL'">.
Click Image to Enlarge
-
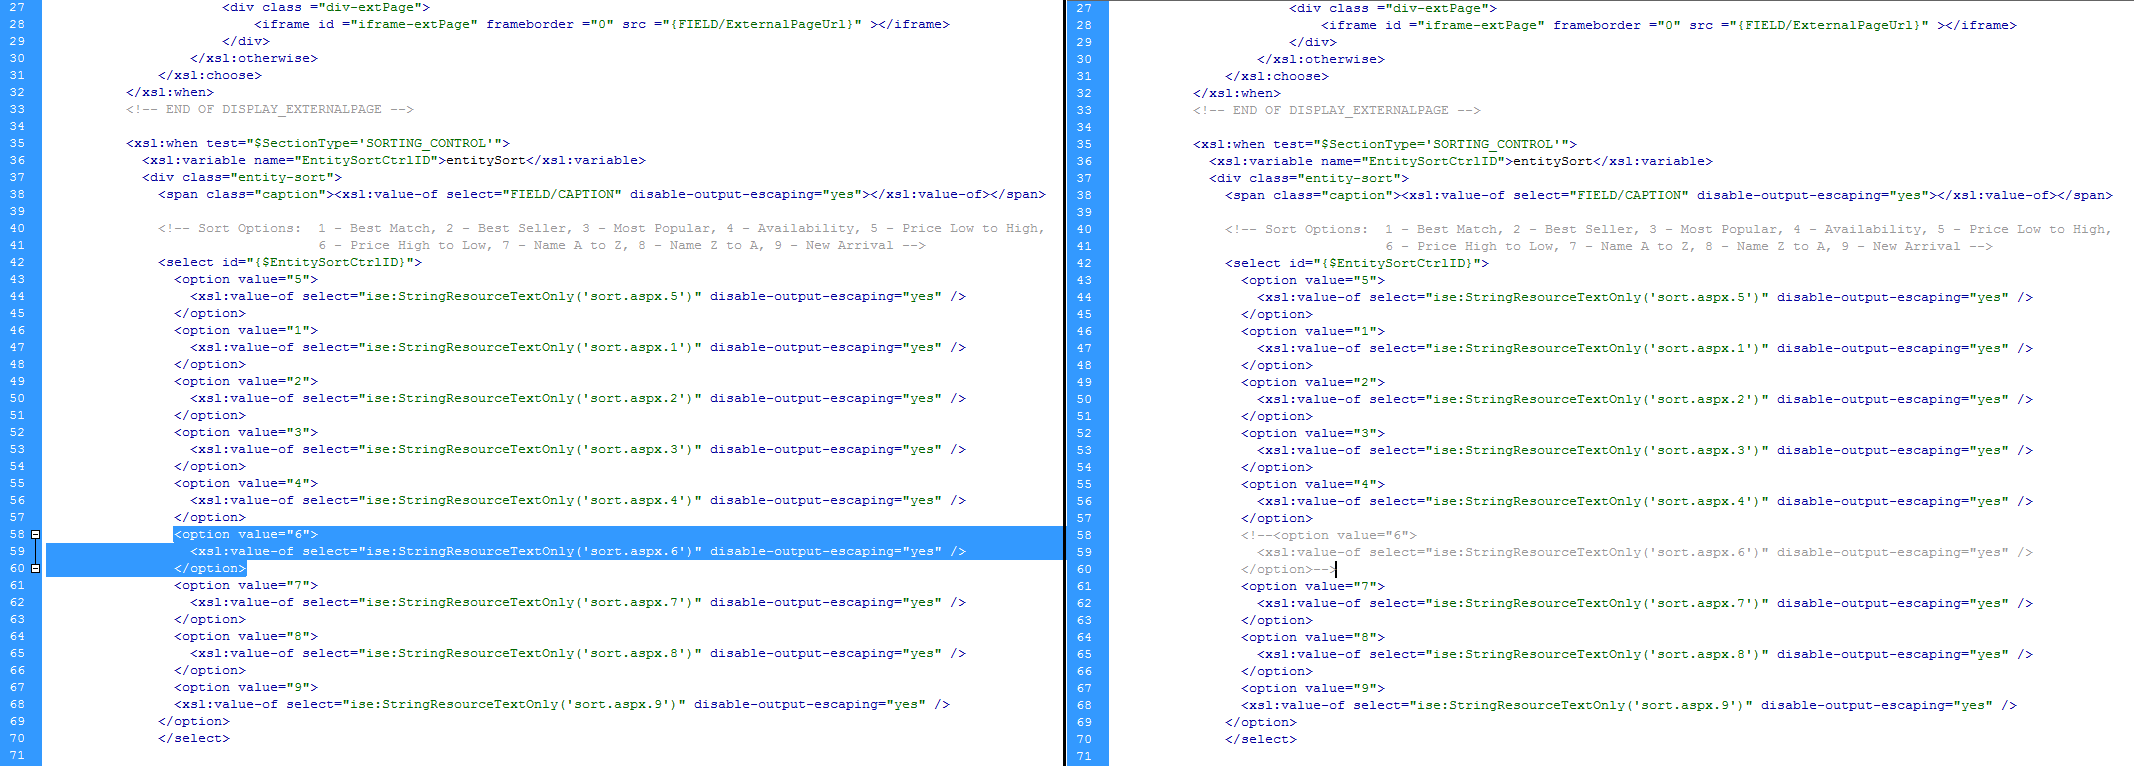
You will notice a list of sort options. Delete the whole <option> line of the sort option you want to remove from the web store, or hide the whole line of code with a <!--content/code-->.
Click Image to Enlarge
-
Save and close the <helper.entity.xml.config> file and view your web store in a browser.
Click Image to Enlarge