Process Loyalty Points in Desktop POS
This article will demonstrate how to process loyalty points in Connected Business Desktop POS.

This feature is only available in Connected Business v14 and higher.
Track Loyalty Points
To enable Loyalty Points in the POS Customer Module,
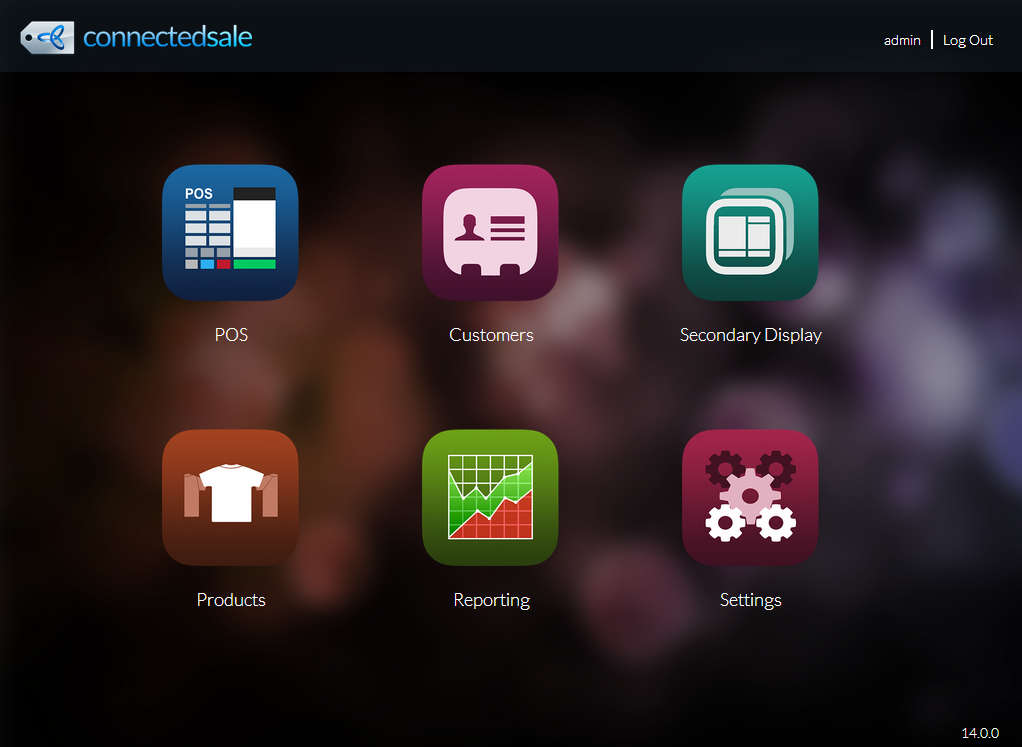
- On the POS Dashboard, click Customers. The Customer module will be displayed.
Click Image to Enlarge
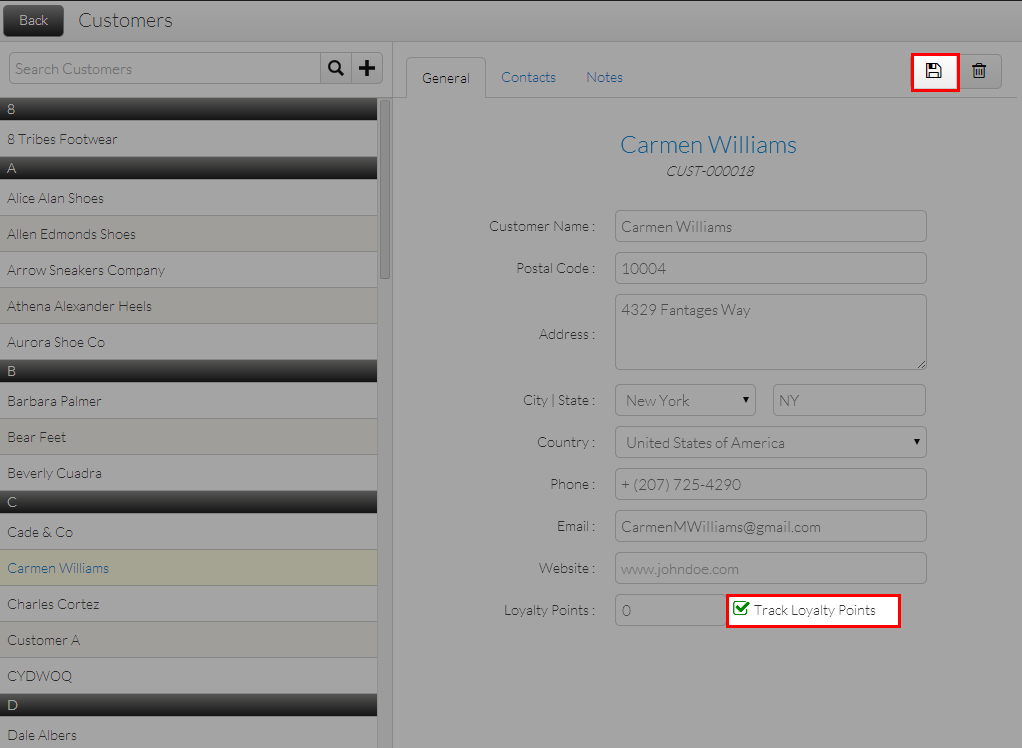
- Select a customer from the list.
- In the customer’s General Information tab, tick the Track Loyalty Points checkbox then click Save to apply changes.
Click Image to Enlarge
You can also enable tracking of loyalty points directly from the POS screen. To do this,
- On the POS Dashboard, click POS. The POS screen will be displayed.
- Click Customer Lookup. The Customer List will be displayed.

Click Image to Enlarge
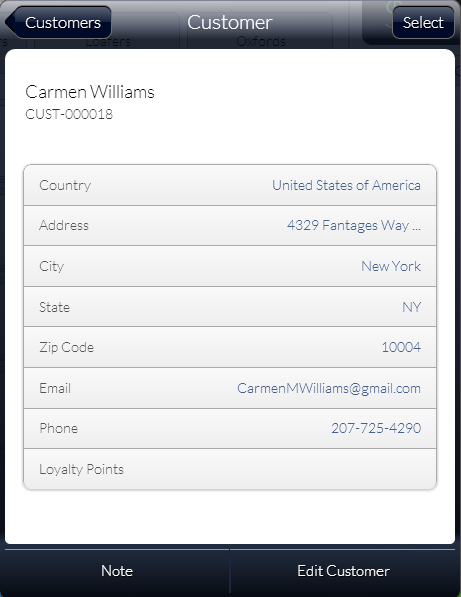
- Click the Arrow Icon (
 )next a Customer’s Name in the list. The Customer screen will be displayed.
Click Image to Enlarge
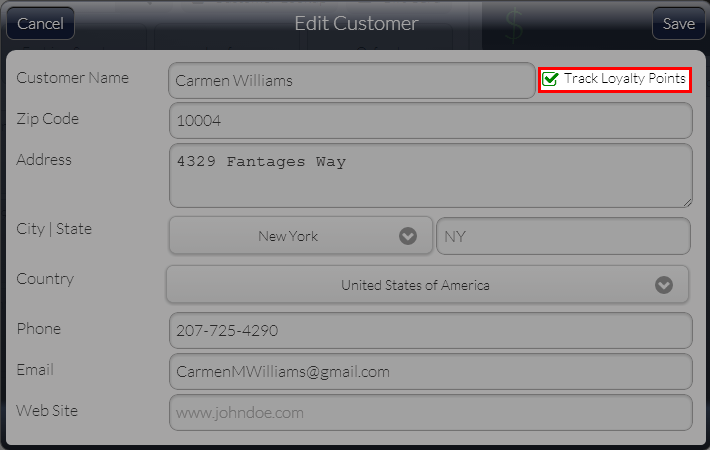
- Click Edit Customer. The Edit Customer screen will be displayed.
- Tick the Track Loyalty Points checkbox then click Save to apply changes.
Click Image to Enlarge
![]()
Earn Loyalty Points
To earn Loyalty Points in the Desktop POS,
- On the POS screen, select item/s to be purchased then click Complete. The Payment Options screen will be displayed.
Click Image to Enlarge
- Select a mode of payment then complete the transaction. A print previewof the receipt will be displayed with the loyaltypoints indicated.

Click Image to Enlarge
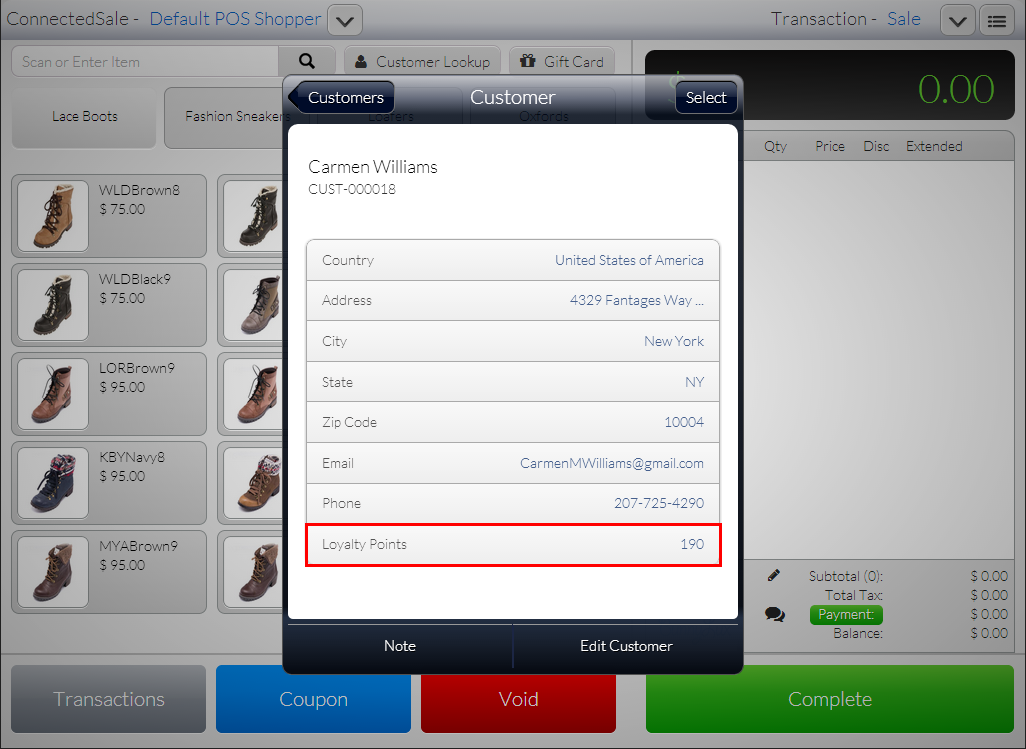
The amount of loyalty points will also be reflected in the Customer screen.
Click Image to Enlarge
![]()
Redeem Loyalty Points
To redeem Loyalty Points in the Desktop POS,
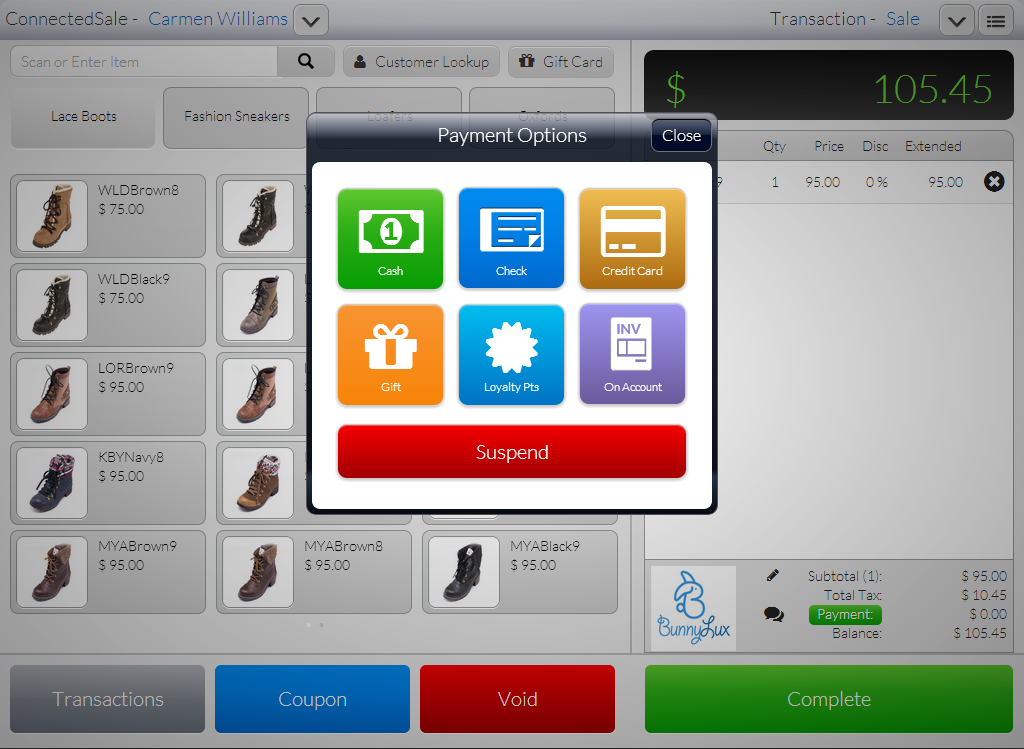
- On the POS screen, select item/s to be purchased. Click Complete. The Payment Options screen will be displayed.
Click Image to Enlarge
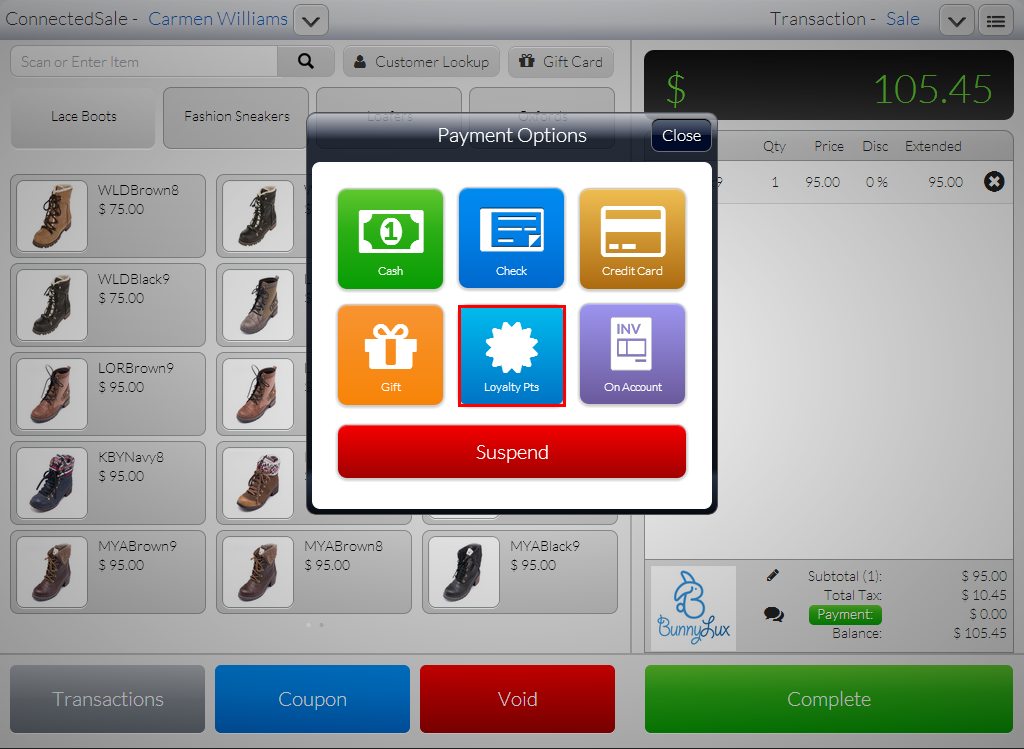
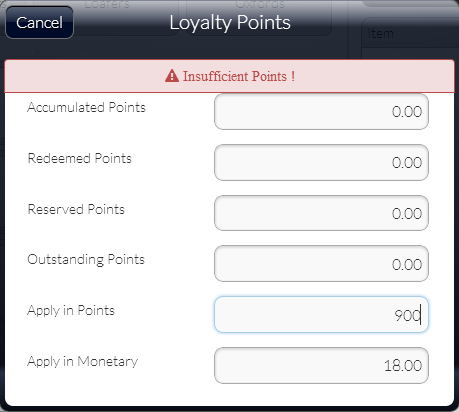
- Click Loyalty Points. The Loyalty Points screen will be displayed.
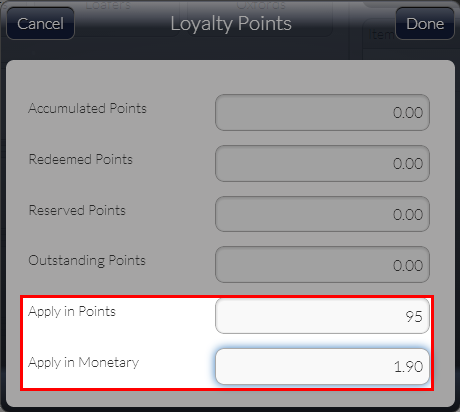
- Enter amount of points to be used in Apply in Points field. The Apply in Monetary field will automatically adjust accordingly. Click Done to apply Loyalty Points.
Click Image to Enlarge
The Loyalty Points applied will reflect in the POS screen as Payment applied.
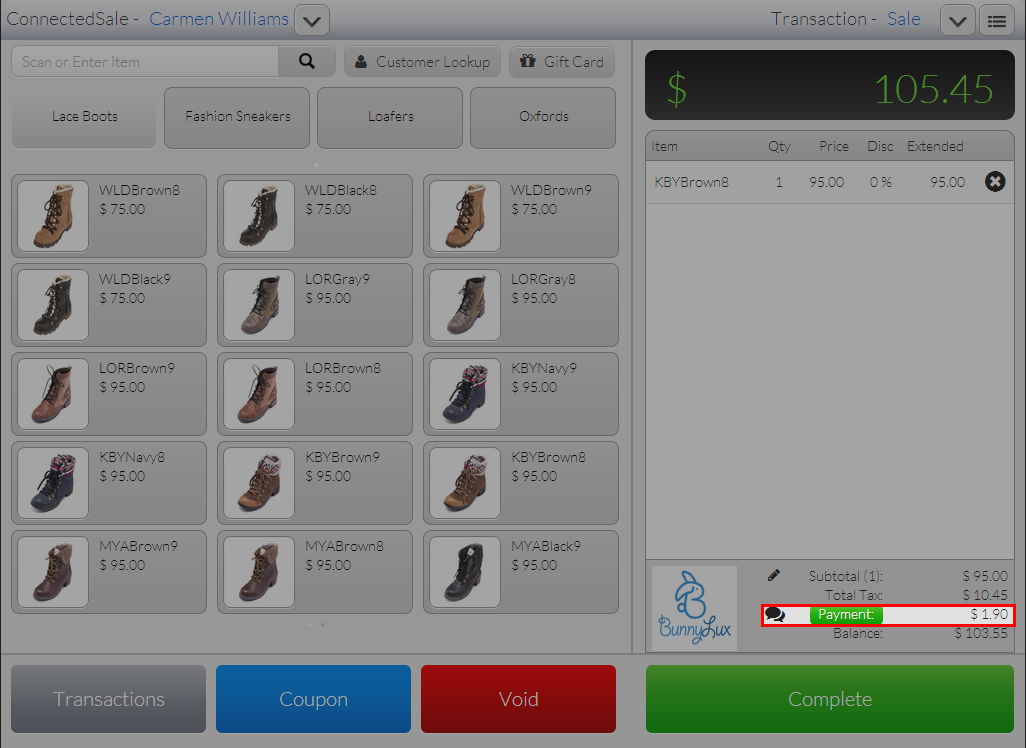
Click Image to Enlarge
Attempting to apply more Loyalty Points than what are available will return an Insufficient Loyalty Points error.
Click Image to Enlarge
When applying Loyalty Points, only whole numbers can be entered in the field. Use of decimals is disabled.
- Complete the transaction. A print preview of the receipt will be displayed showing the earned, redeemed and available loyalty points of the customer.
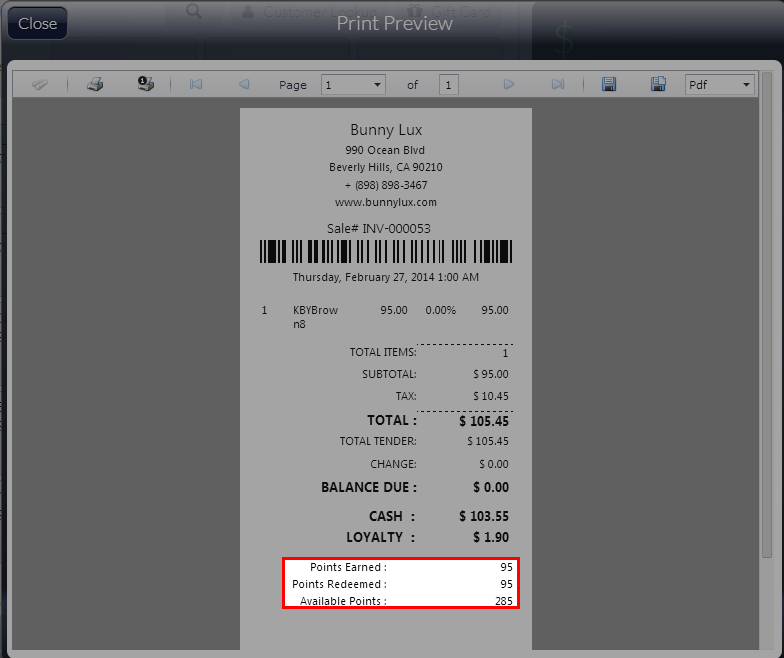
Click Image to Enlarge
![]()