Priority Order
This document demonstrates the setup and implementation of the priority order, a feature which can be applied to sales orders. This feature is created in the Connected Business system as a service product within the Inventory module.
Priority orders can be added as an option in the web store or it can be applied to a newly created sales order using the Connected Business backend.
This feature is only available in Connected Business v15 and higher.
Create Priority Order Product
-
Go to Inventory > Item > New Item to launch the New Item Wizard. Select the item type Service before clicking Next.

Click Image to Enlarge
-
Create the Item Name and Description for the priority order. The description field will contain the text that will appear in the web store.

Click Image to Enlarge
-
Continue with the item wizard process, including the setup for costing and pricing. Once all of the relevant information has been encoded, click on the Finish button and generate the priority order item.
The priority order item form will automatically appear after you have finished the item wizard setup. To launch the item form again, go to Item > Find > Item and double click the correct entry from the item list.
-
On the Setup tab of the item form, look for the tick box labeled Priority and make sure that it is enabled.

Click Image to Enlarge
-
Go to the Web Option tab and find the Settings tab. Look for the tick box labeled Check Out Option and make sure it is enabled.

Click Image to Enlarge
-
Click the Save button to apply the changes.
Apply Priority Orders to Sales Transactions
The priority order option can be applied to sales transactions through two methods. The first method is adding the priority order item directly to a new sales order. The second one is by choosing the priority order option through the web store.
-
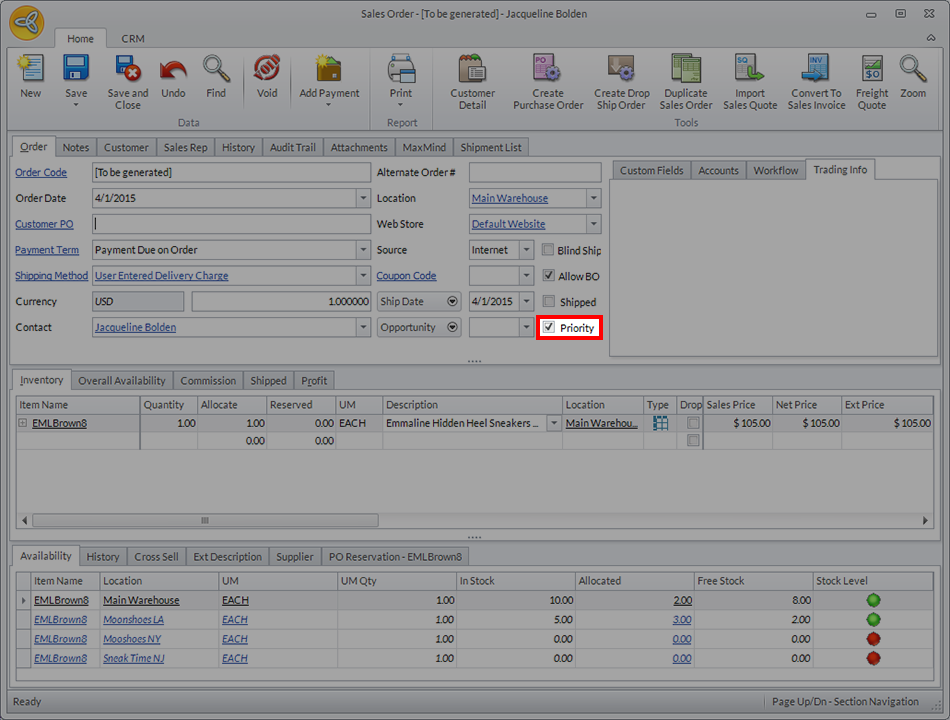
To apply the priority order directly, create a new sales or by going to Customer > Order > New Order to launch the Sales Order form. Make sure that the tick box labeled Priority is enabled in the form.

Click Image to Enlarge
-
In the Inventory tab, click on the line item so that the list of available products will appear. You can find the priority order item entry by using the search bar located at the top of the dropdown.

Click Image to Enlarge
-
Choose the Priority Order item before clicking the OK button.

Click Image to Enlarge
-
Click the Save button to generate the sales order.
-
To use priority orders for eCommerce, add the product to the shipping cart to initiate the order. On the Shipping Cart page, scroll down to find the option box containing the text: "The Following Order Options Are Available." Check the tick box labeled Priority Order.

Click Image to Enlarge
Proceed with the rest of the steps using the regular order process. For more information, read our documentation about Online Store Ordering Process.
-
The created sales order will appear under the Priority Orders tab found in Customer > Order > Find Order.

Click Image to Enlarge

The priority order tab will only appear if there's an unprocessed sales order tagged as a priority. The tab disappears when the priority order queue has been cleared.
-
Sales transactions tagged as priority orders are automatically added to the top of the picking ticket list. To view the newly created priority orders go to Customer > Order > Picking Ticket.

Click Image to Enlarge
