Manage Customers in Connected Sale
|
Content
|
|---|
You can create or change customers and shipping addresses in Mobile Connected Sale. The processes below will discuss about how to add new customers and change a new customer if in case you will create a new transaction or change the shipping address of the customer.
Create a New Customer
In this process, you will be creating a new customer for the Connected Sale.
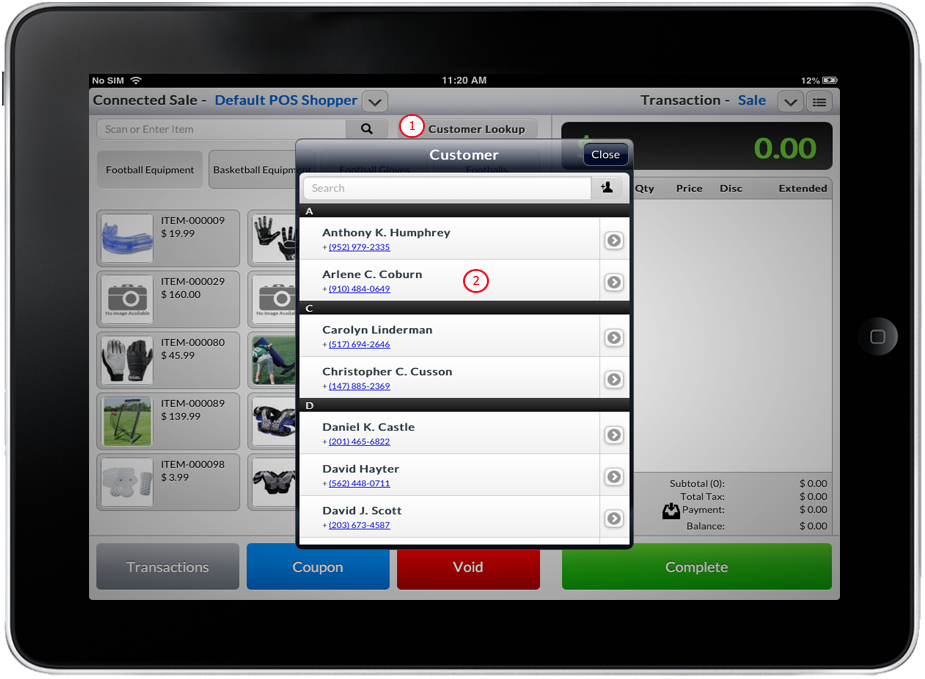
- Tap the Customer Lookup button. List of Customers form will pop up.
- Tap Add Customer icon located at the right side of Search Customer text field. New Customer form will load.
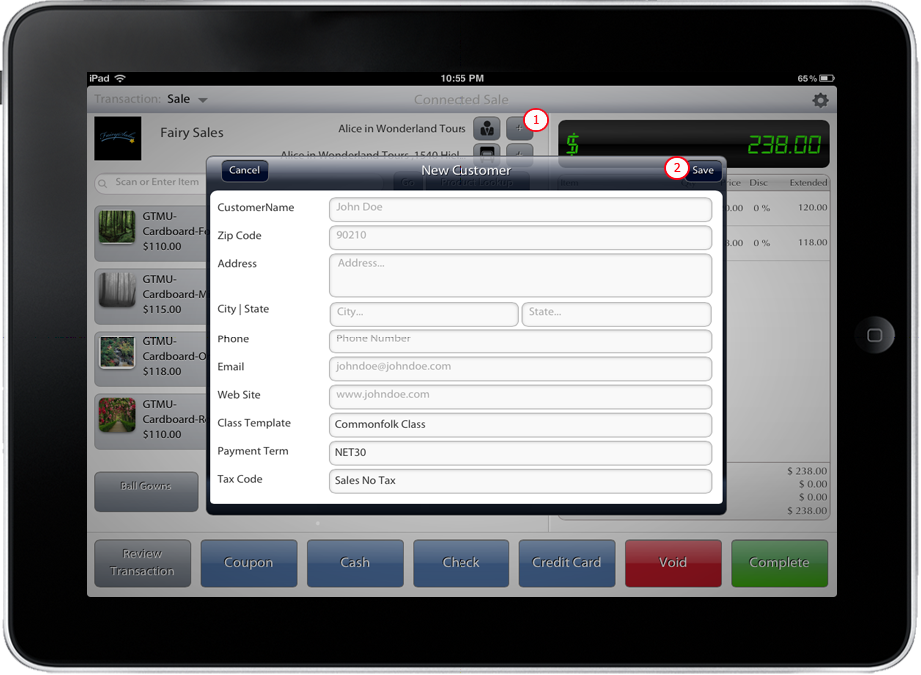
Click Image to Enlarge
- Fill up the form and click Save button located at the upper right corner of the form. The newly created customer will be the current customer when you transact in ConnectedSale Mobile.

Modify Customer Details
In this process, you will edit an existing Customer. The fields that you can only modify are the Customer name, address, country, city, state, phone number, email and website.
- Tap the Customer Lookup button or the Customer Name beside ConnectedSale header, Customer List will appear.
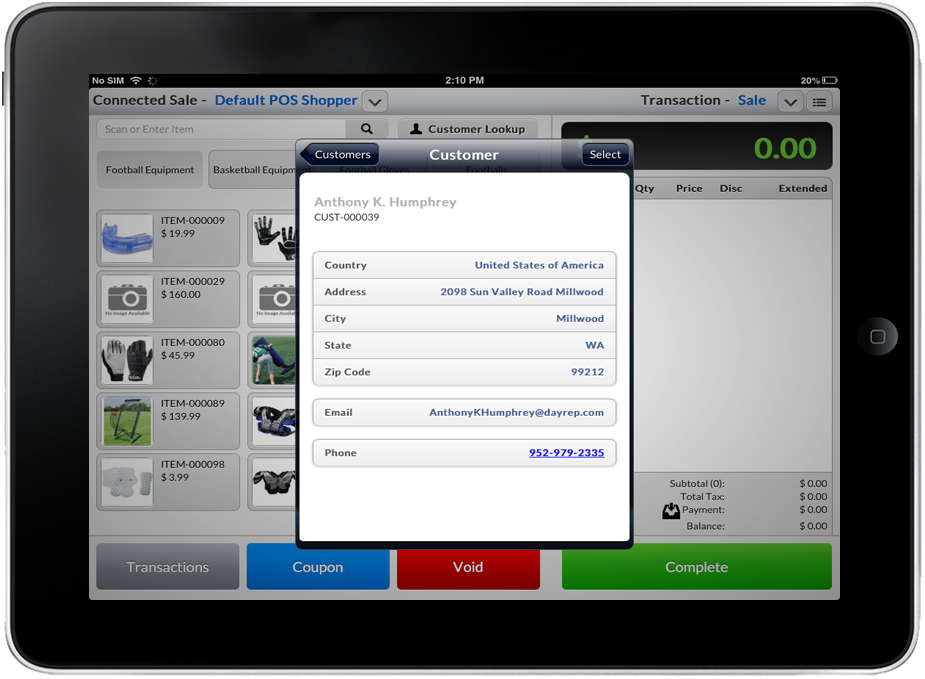
- Select a Customer by tapping the right-chevron button location at the right most part of the Customer Name, Customer Detail will appear.
Click Image to Enlarge
- Tap the Edit Customer button, Edit Customer form will appear.
- Edit the Information by filling up the form and tap Save button located at the upper right corner of the form. The edited customer will be the default selected customer.
Changing the Customer
To change the current customer in your Connected Sale interface, there are two ways two change the customer:
-
Tap the desired customer from the list. Alternatively, you can key in the search text field the name of the customer and hit Return Tap the desired customer name.
Click Image to Enlarge
- The user can also tap on the arrow next to the customer on the list and the details of that customer will be displayed. Then Tap the button on the upper right corner labeled Select.

Click Image to Enlarge
Click Image to Enlarge
Create a New Ship To Address
In this process, you will learn how to create a new ship to address.
-
Tap the down arrow button beside the customer name. The Shipping Information panel will show.
- Tap the Add Ship To button. The New Ship To form will pop up.
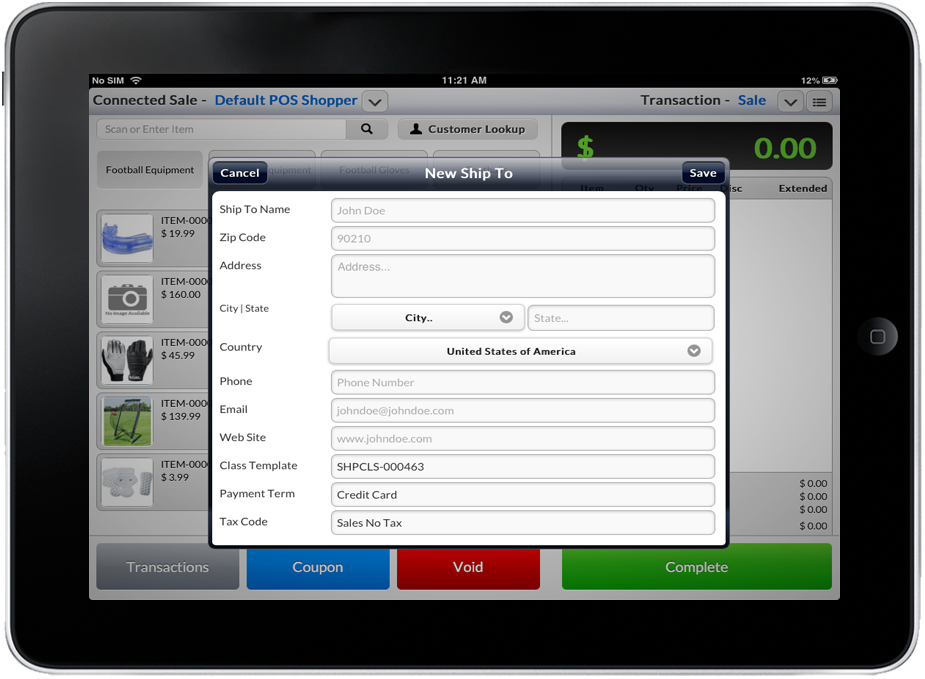
Click Image to Enlarge
- Fill up the form and click Save button located at the upper right corner of the form. The newly created address will be the current shipping address when you transact in Connected Sale.
Click Image to Enlarge
Changing the Ship To Address
In this process, you will learn how to change a ship to address.
- Tap the down arrow button beside the customer name. The Shipping Information panel will show.
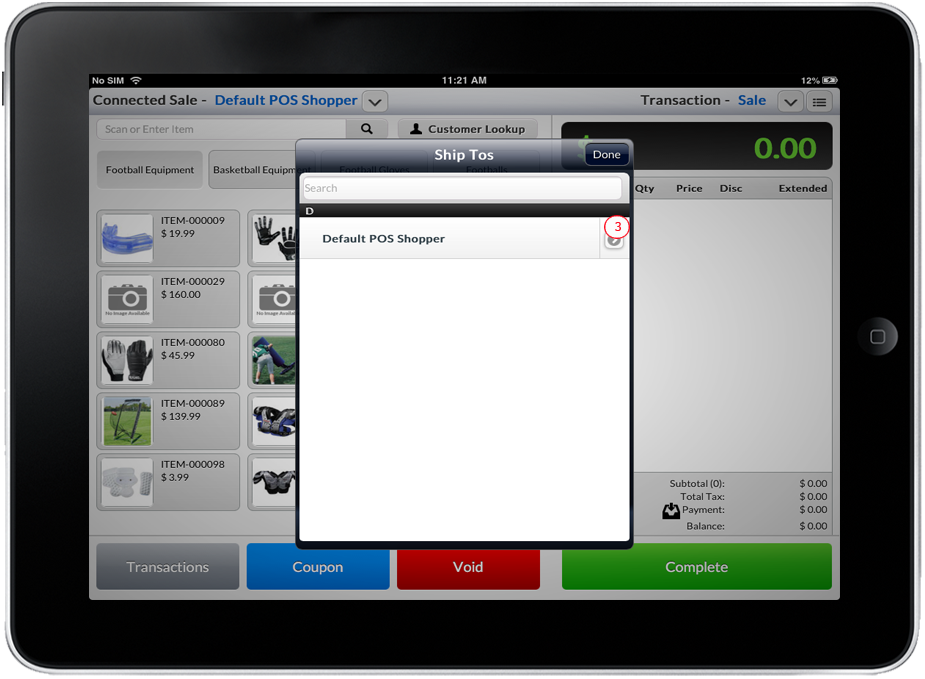
- Tap the Change Ship To button. The list of shipping address will be displayed.

- There are two ways to change the ship to address:
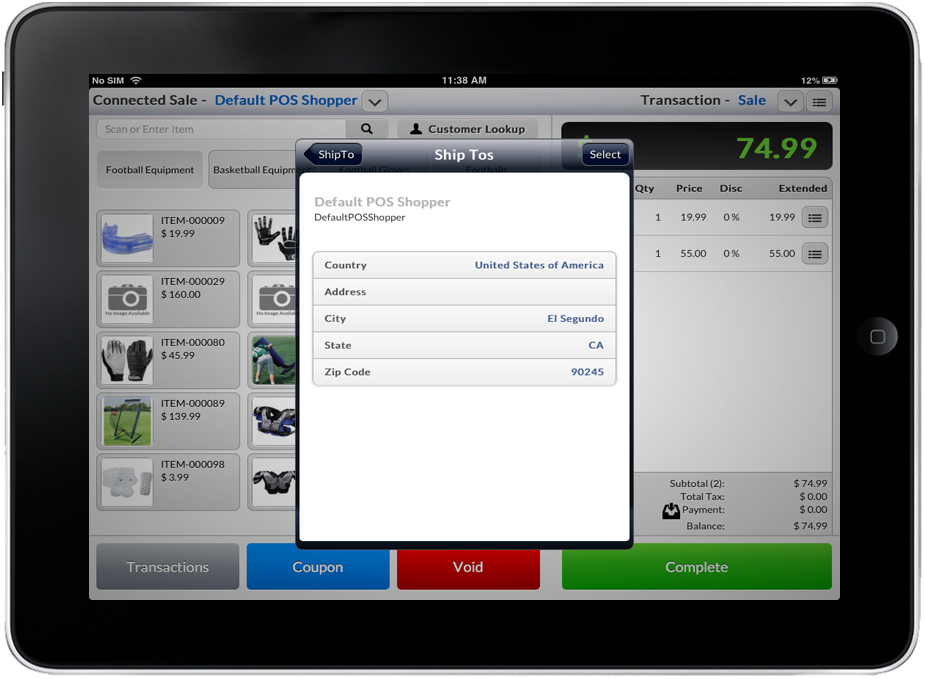
- Tap the desired address from the list or key in the search text field and press Return. Or tap on the arrow next to the shipping address on the list and the details will be displayed. Tap the “Select” button to assign the shipping address to the current transaction.

Click Image to Enlarge
- The user can also tap on the arrow next to the customer on the list and the details of that customer will be displayed. Tap button on the upper right corner labeled “Select” will set that customer as the customer for the current transaction.
Click Image to Enlarge
Click Image to Enlarge
- Tap the desired address from the list or key in the search text field and press Return. Or tap on the arrow next to the shipping address on the list and the details will be displayed. Tap the “Select” button to assign the shipping address to the current transaction.