How To Set Default Website for Customer Transactions
This article will demonstrate how to set the default website for customer transactions.
In Connected Business 14, you can select the default website for customer contacts when creating customer transactions as well as assign or select the website/s which the contact can access.

This feature is only available in Connected Business v14 and higher.
Assigning a contact default website can be done in the New Customer Wizard (upon creating new customers) or from the Customer Detail form.
To set the default website for customer contacts upon creating new customers,
- Go to Customer module > Customer > New Customer. The New Customer Wizard will be displayed.
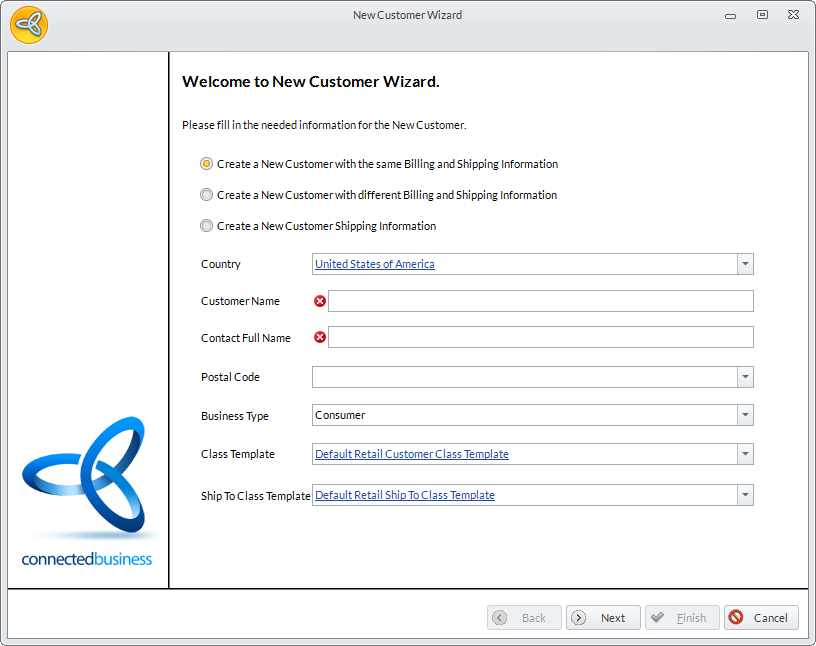
Click Image to Enlarge
- Select how you want create the customer (same billing and shipping info, different billing and shipping info, or create new shipping information), enter the customer details as needed then click Next.
- In the Billing Information page, enter the customer address and other pertinent details then click Next.
- In the Default Contact tab, enter the contact name in the Contact Full Name field (by default, the contact name is the same as the customer name. You can change the contact name as needed) and enter the contact details.
- Tick the Is Allow Web Access and select the website to be set as default for the contact from the dropdown list.
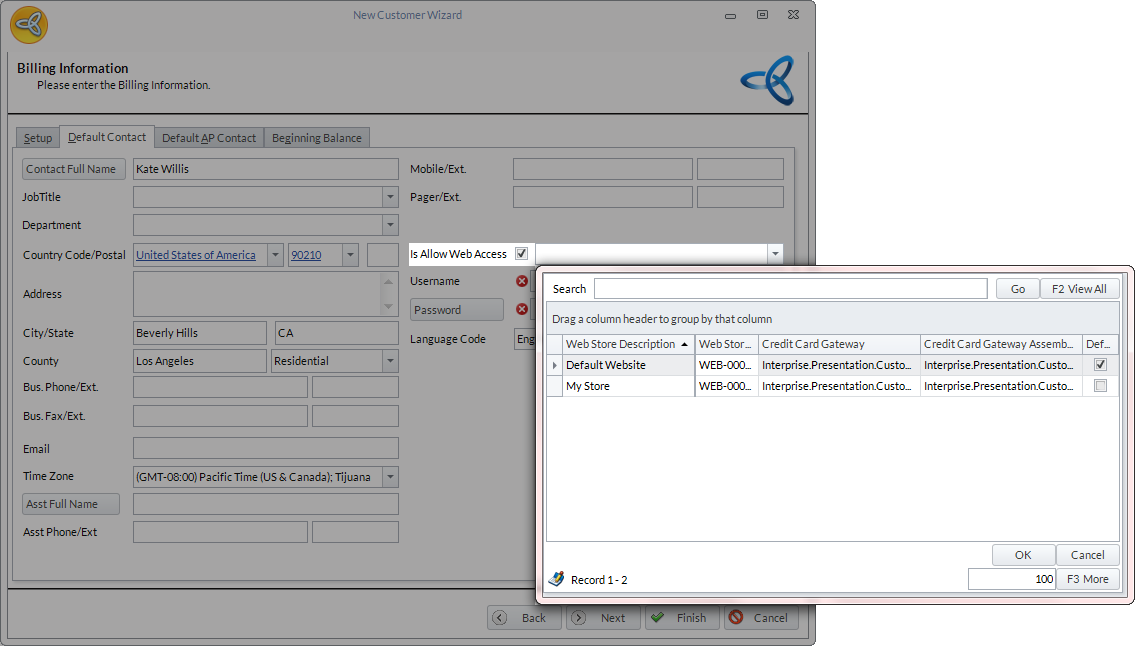
Click Image to Enlarge
- Set the contact username and password in the respective fields then click Next to go through the whole wizard and complete the customer creation.
To set the default website from the Customer Detail form,
- Go to Customer module > Customer > Find Customer. The list of customers will be displayed.
- Select customer from the list to load the Customer Detail form.
- Go to the Contact tab > Contact Information and select the customer contact from the list (if the customer has multiple contacts).
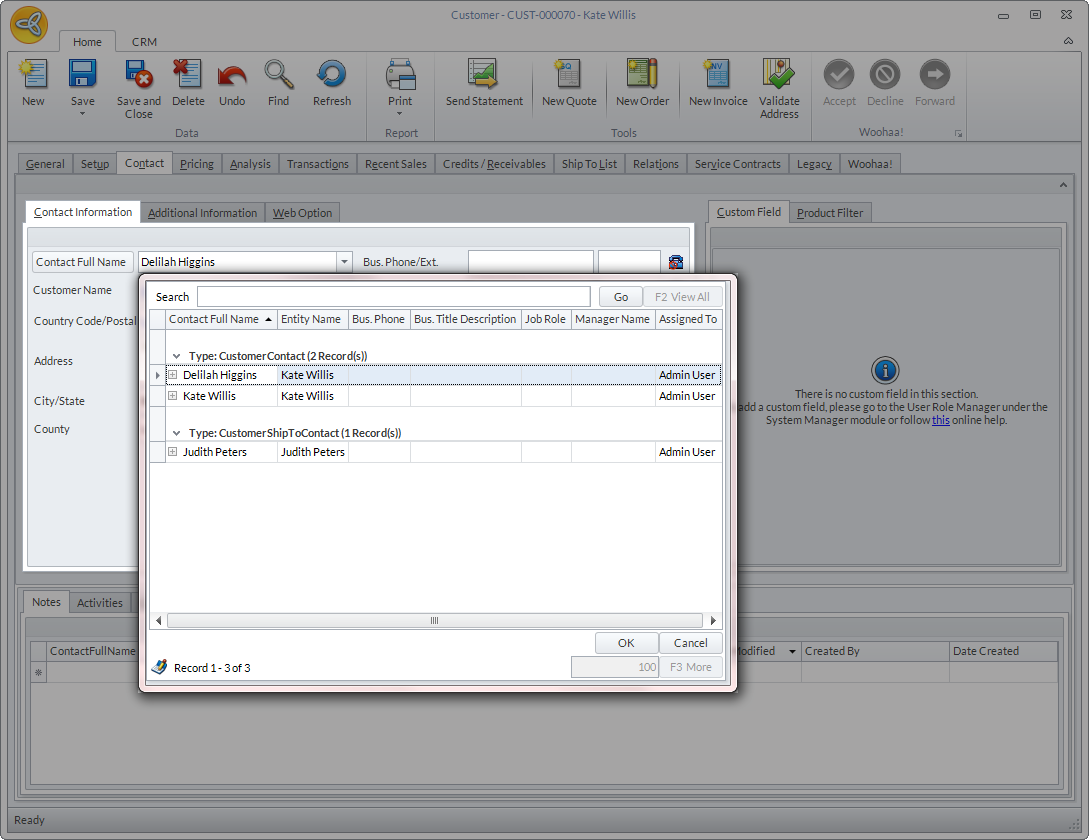
Click Image to Enlarge
By default, if the customer has no contacts, the contact name will be the same as the customer name.
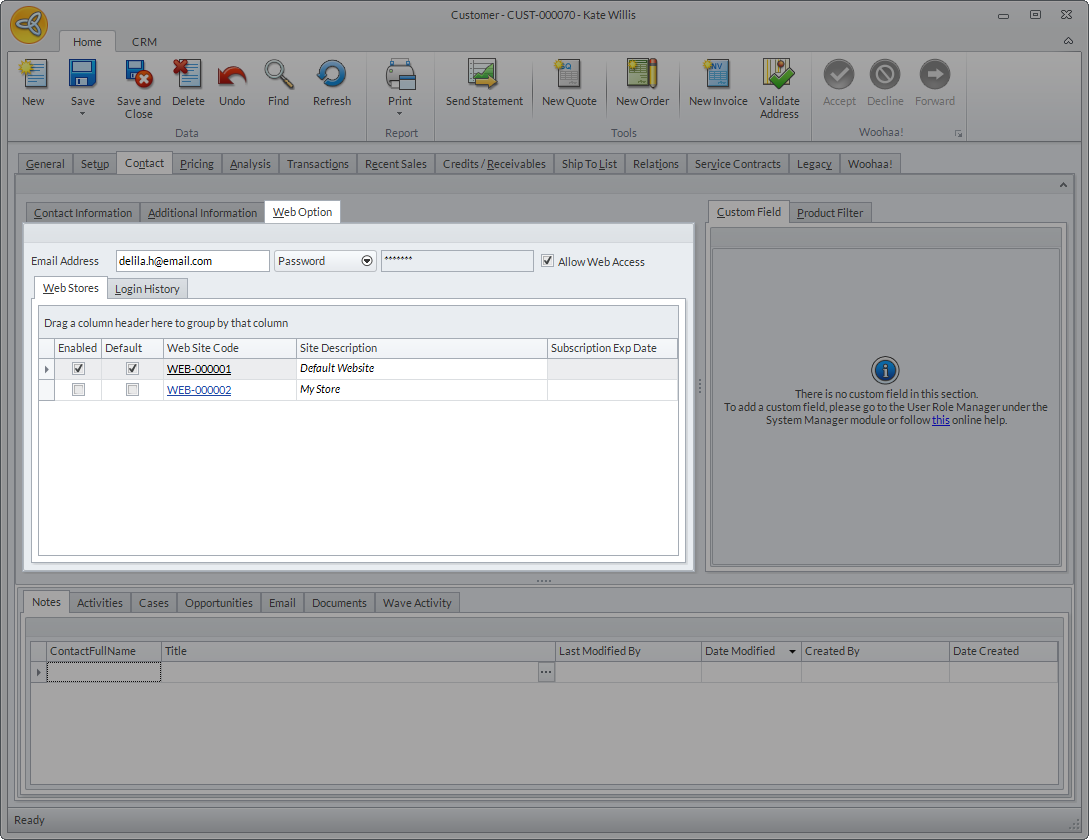
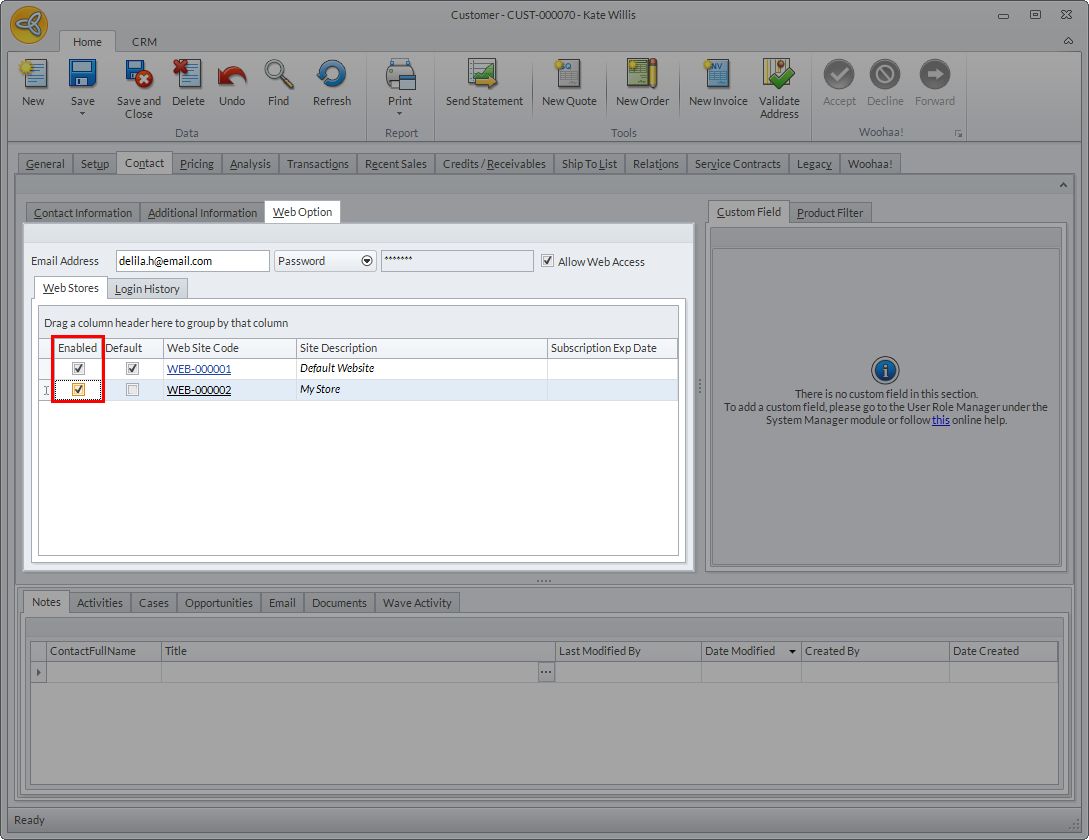
- Upon selecting the contact, go to the Web Option tab > Web Stores and select the website to be set as default for the contact (if you have multiple websites). Make sure that the contact is allowed to access the website/s (tick the Allow Web Access checkbox) and the contact web credentials are set (email address and password).
Click Image to Enlarge
You can also enable the websites where the contact will have access to by ticking the corresponding checkbox under the Enabled column.
During upgrade to CB 14, the default website for all contacts will be based on the defined default website in the Webstore form of the eCommerce module.
Click Image to Enlarge
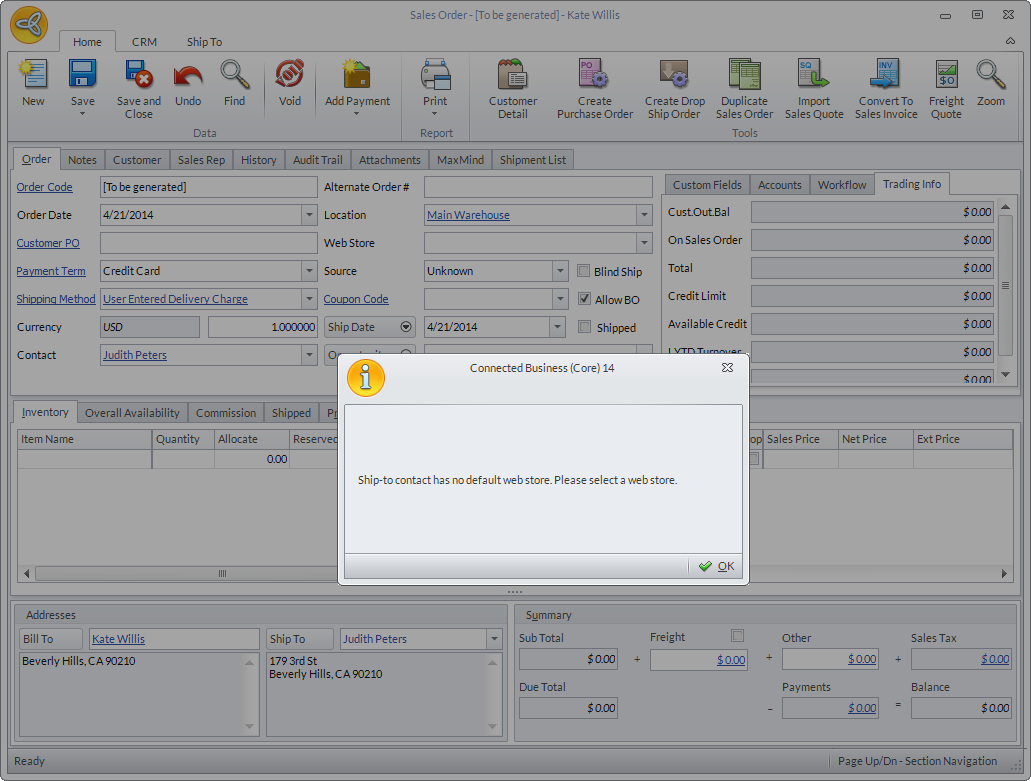
- You can only set a default website if the contact type is CustomerContact. You cannot assign a default website for a CustomerShipToContact (by default), however, you can indicate the web store for the ship-to contact in the transaction form. Upon creating orders for customer ship-tos, a message prompt will be displayed indicating that the ship-to contact has no default web store.
Click Image to Enlarge
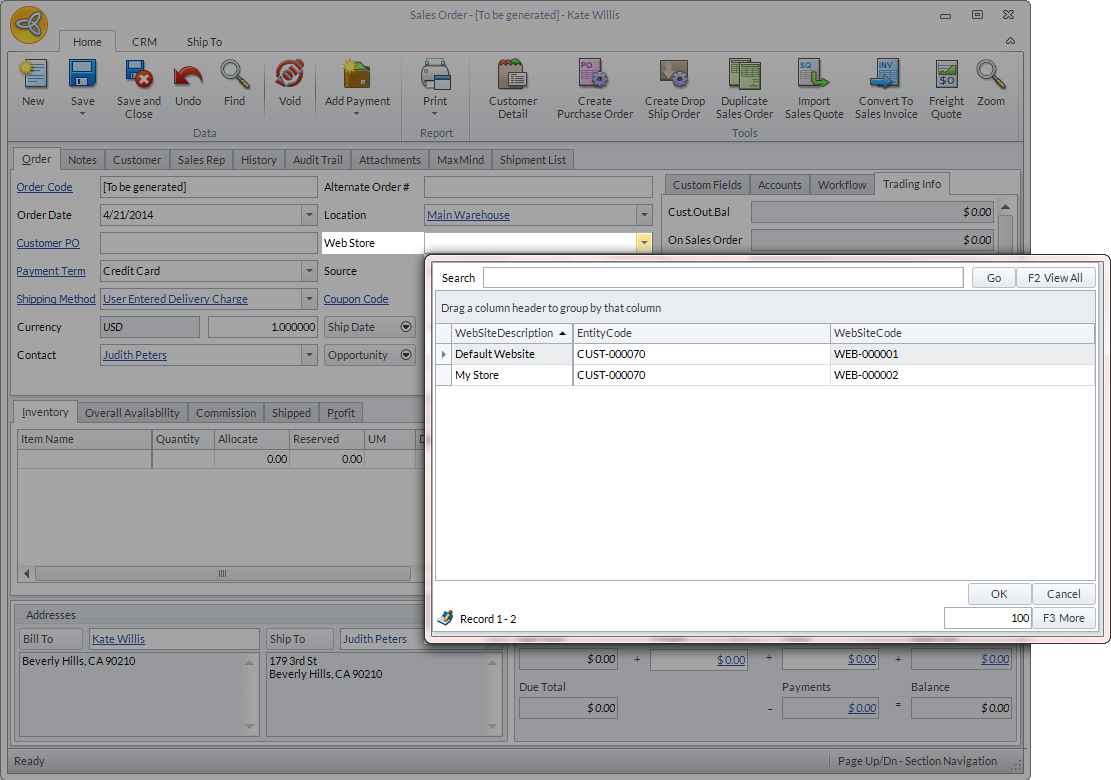
You can select the default web store from the web store dropdown list.
Click Image to Enlarge
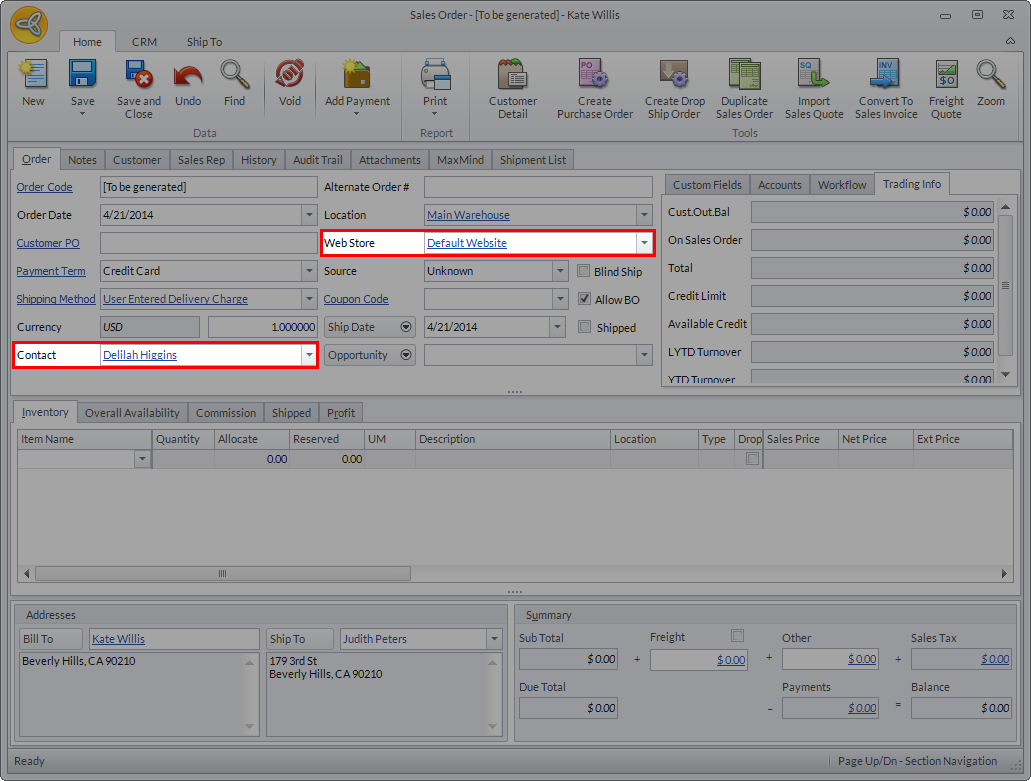
When creating transactions (quotes, sales orders, etc) for customer contacts, the default website for the contact selected will be automatically indicated upon opening the transaction form.
Click Image to Enlarge
If you want to select another web store, click the dropdown arrow and select the web store from the Web Store dropdown list. The web stores listed are those that are enabled or can be accessed by the selected contact.
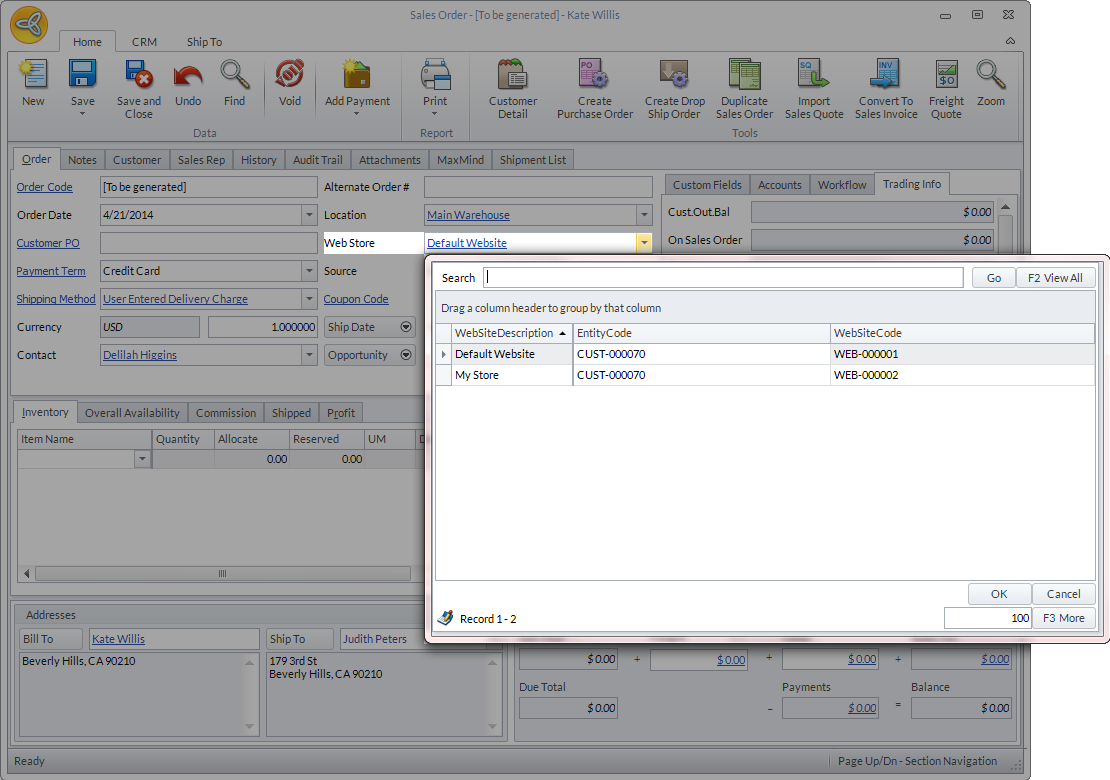
Click Image to Enlarge
You can check which websites have been enabled for the contact by going to Customer Detail form > Contact > Web Option > Web Stores.
When creating phone orders, the sales order will be assigned to the contact's default website. This is so that once the invoice is posted, the contact can pay it online.