How to Send Single Notification for Shipment Transactions
In Connected Business, you have the option to send email notifications for single or multiple shipment transactions. By default, the shipment notifications, which are generated for EACH package in the shipment transaction, contain the shipping details such as the carrier used, tracking number, shipping date and specified items in the package. The number of notifications generated will depend on the number of packages per shipment transaction, which may result with the customer receiving multiple emails for single or multiple shipments.

Before you can start sending shipment notifications, you need to set up your email account and shipping carrier plugin. You can refer to Set Up User Email Accounts and Carrier Setup for more details.
In Connected Business v14, shipment details for both single and multiple shipments can now be sent in a single notification.
This feature is only available in Connected Business v14 and higher.
To check this, you can create a multiple shipment (a shipment transaction with multiple packages shipped using different carriers) or multi package shipment (a shipment transaction with multiple packages shipped using the same carrier) for a customer. For this demonstration, we will create a multiple shipment for a customer.
- Create a sales order, with multiple items, for a customer. Go to Customer module > Order > New Order. The list of ShipTo Customers will be displayed.
- Select a customer from the list to load the Sales Order form. Enter multiple items in the sales order then click Save.
- Create the shipment record for the sales order. In the sales order form, click the Shipment List tab, a message prompt will be displayed indicating that no shipment found for the sales order. Click Yes to load the Shipment form. Alternatively, you can go to the Shipping module > From SO. Select the sales order from the list to load the Shipment form.

Click Image to Enlarge
- In the Shipment form, select the shipping carrier and shipping method to be used for the first package (e.g.FedEx ; 2nd Day).
- In the Shipment Items > Package Content tab, tick the items to be excluded from the first package then click Remove Selected button.
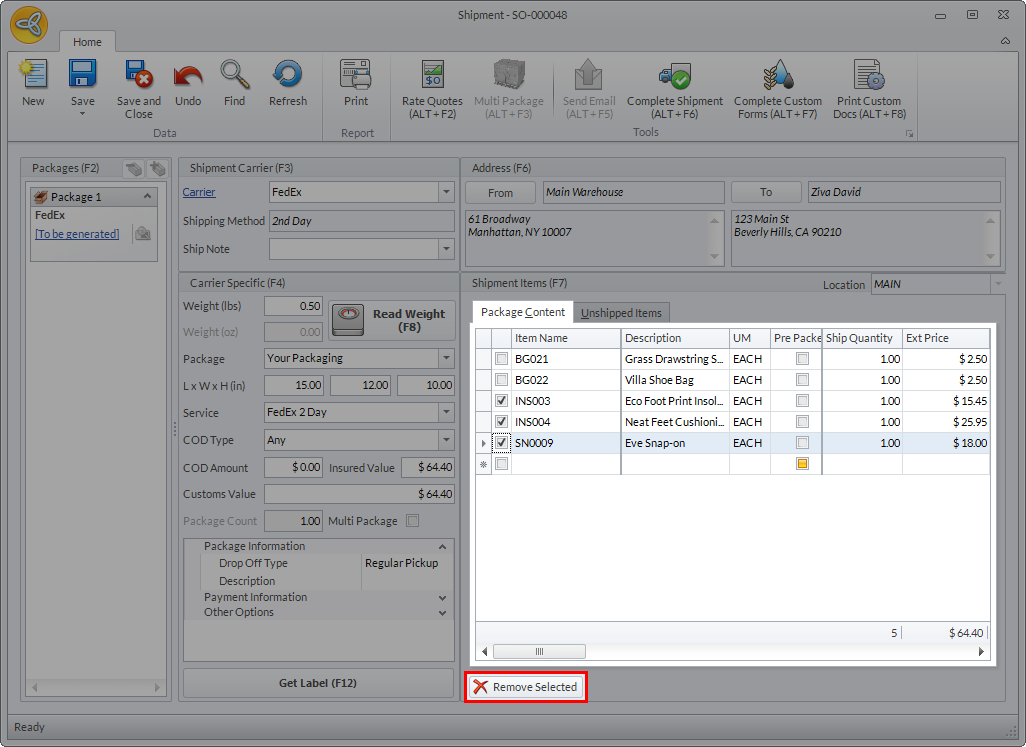
Click Image to Enlarge
- Once the selected items are removed, click Get Label (F12) button to generate the label for the first package.
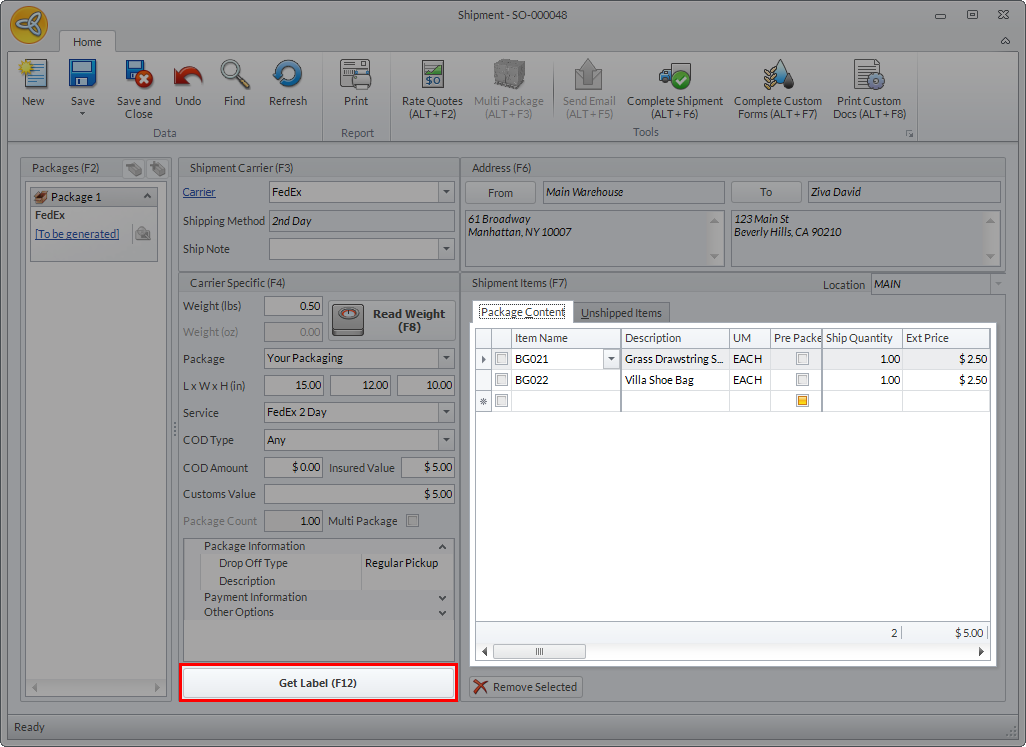
Click Image to Enlarge
- Once the label is generated for the first package, the Package Options dialog box will be displayed.
- Tick the Add New Package option then click OK. The remaining items for shipment will be displayed.
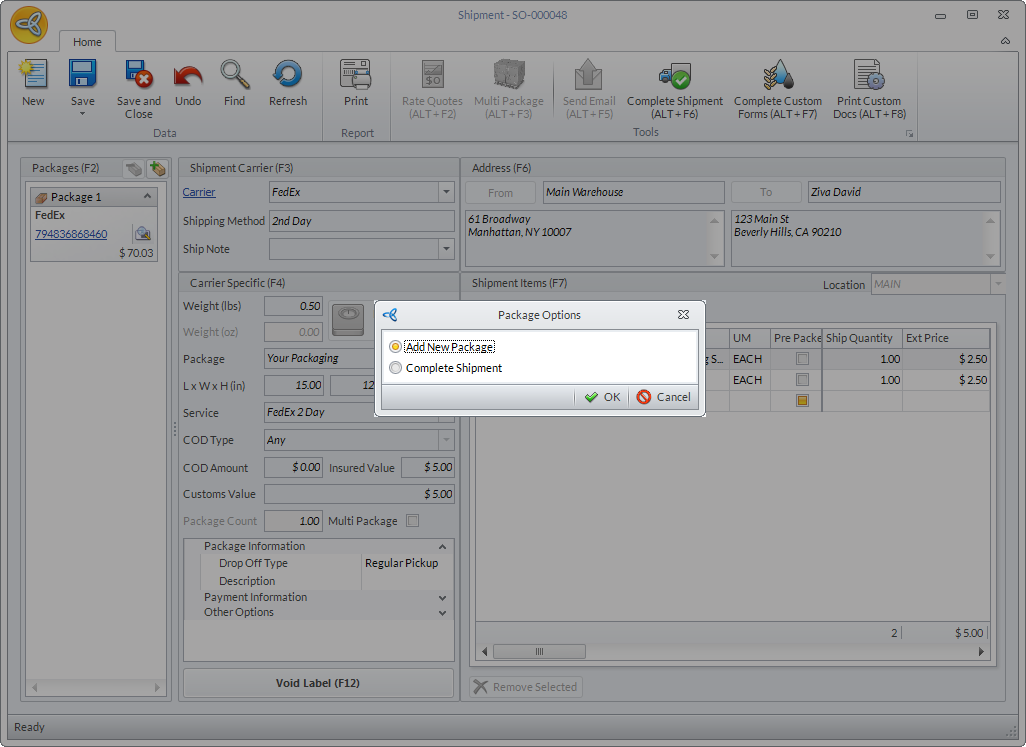
Click Image to Enlarge
- Select the shipping carrier to be used for the second package (e.g. UPS) and the shipping method.
- Tick the items to be excluded from the second package then click Remove Selected button or if you want to include all items in the second package, click Get Label (F12).
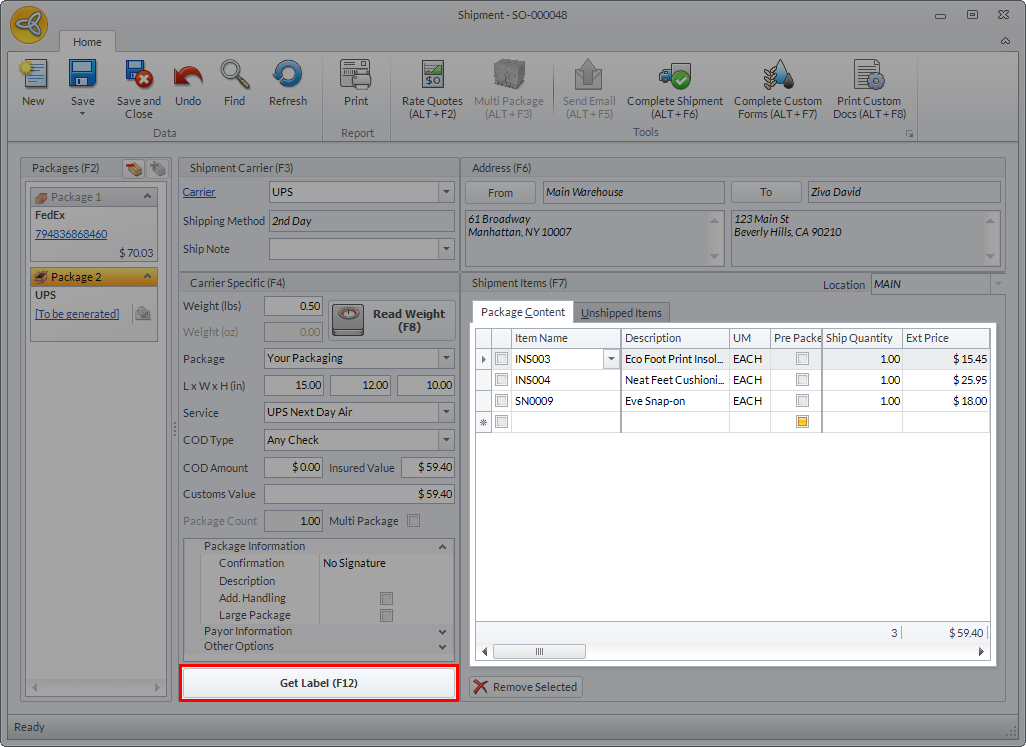
Click Image to Enlarge
- After the labels are generated for all packages in the shipment transaction, click Complete Shipment (ALT+F6) button. A message prompt will be displayed confirming if you want to complete the Shipment. Click OK.

Click Image to Enlarge
- Once the shipment is completed, a message prompt will be displayed indicating that the sales order has been converted to invoice. Click Yes if you want to view the invoice, otherwise, click No.
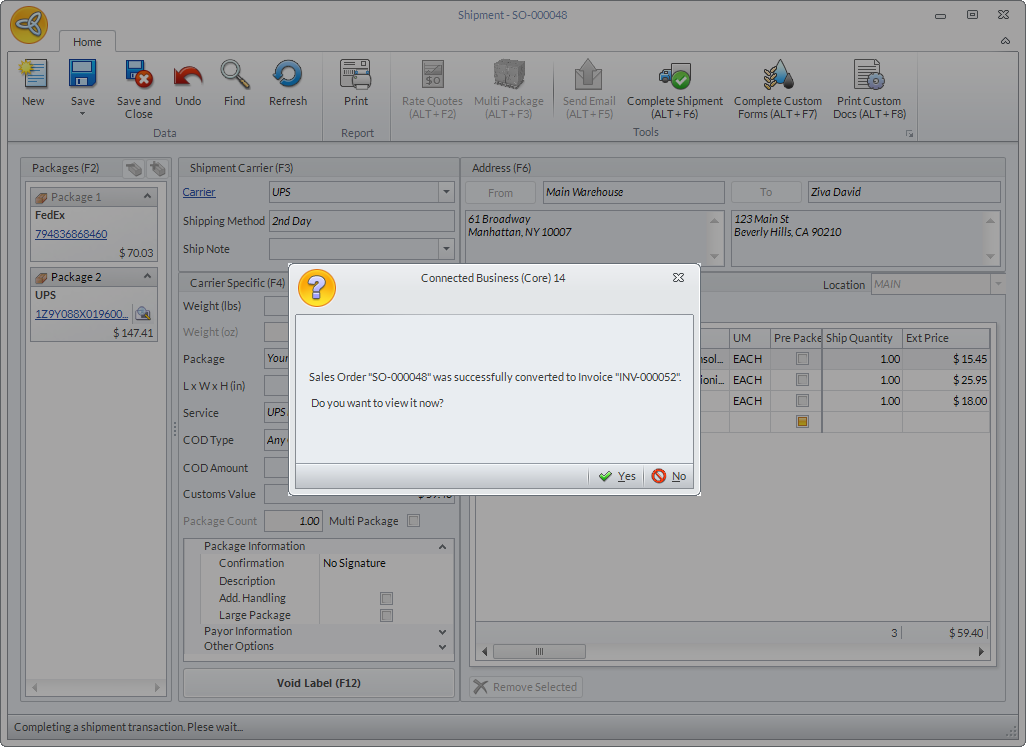
Click Image to Enlarge
- In the Shipment form, click the Send Email (ALT + F5) button to send the shipment notification to the customer’s email address. A message prompt will be displayed indicating that the shipment notification has been successfully sent.
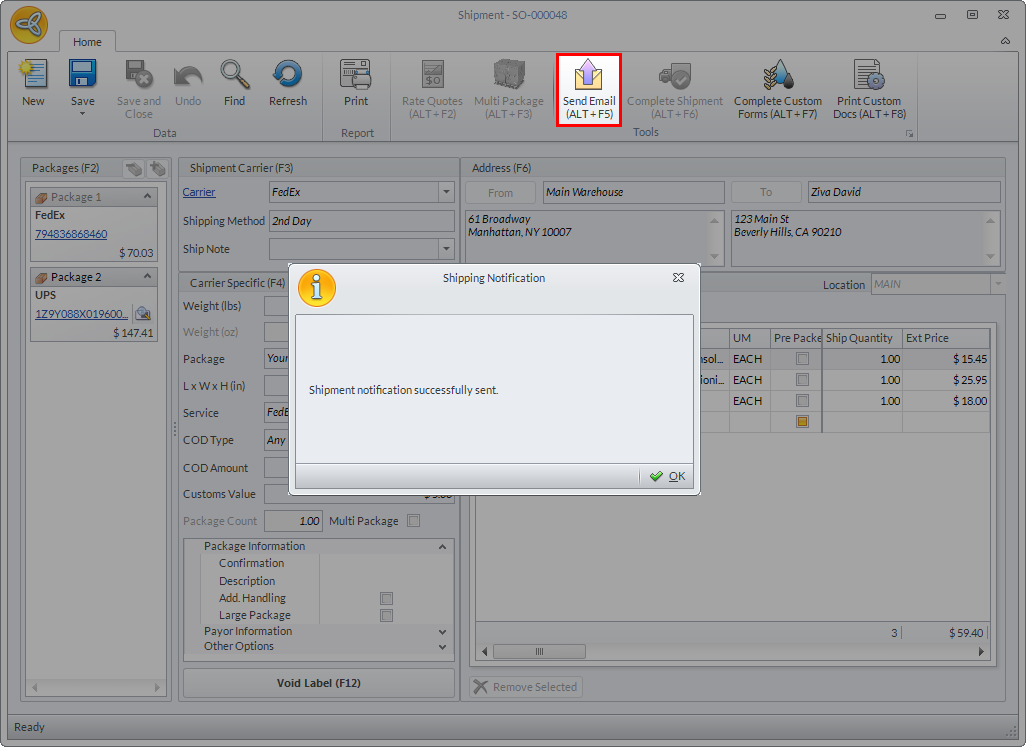
Click Image to Enlarge
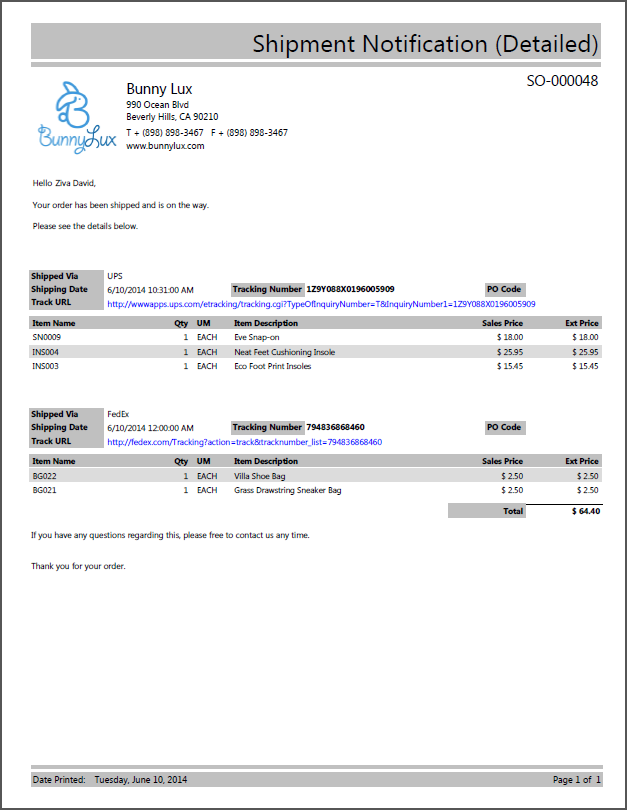
- To view the notification, go to CRM module > Mail > Outbox. Open the email message then double click on the attachment.

Click Image to Enlarge
Notice on the notification, all the shipment details per shipment package is indicated.
Click Image to Enlarge