Generate and Manage Target Lists
|
Content
|
|---|
Overview
Target List in Connected Business is a generated list of contacts that may be used in mass mailing, fax messaging, and outbound calls. The generated target list may also be imported to different file formats such as excel, html and text.
Generate Target List of Contacts
Steps
- From the CRM module, click Campaign > New Target List button from the menu options. The Target List Wizard will display.
- Select Source
Specify the following in the first screen of the Target List Wizard.

Target List Wizard
Definition
Target Source
An option to create a target list of Leads, Prospects, Customers and Customers and Prospects.
All Contacts
When checked, all contacts of the selected target source will be included.
Target List Description
Describes the target list.
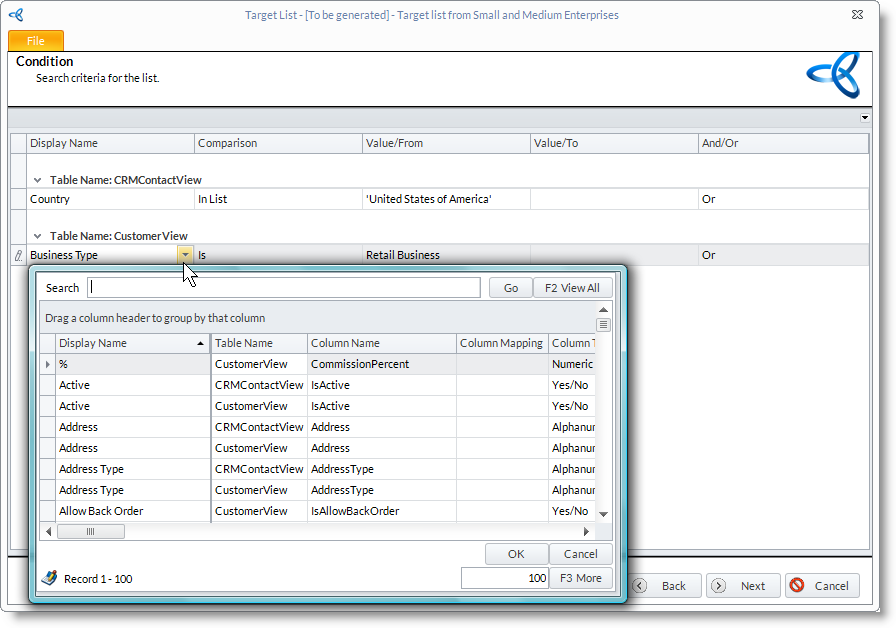
- Define Criteria
Specify your search criteria for creating the list. With the Display Name options, you may choose from the list of attributes as your list criteria. The list that will be created will be according to the display name or attribute you specified.
Comparison Column Options
Definition
All
All values in the selected display name or attribute. For example, the sample below will display a list of all customer of any customer type.
Is
Includes values as stated in the Value/From column according to the selected Display Name. For example, the sample below will display a list of customers in California.
If OR or And is selected, another row will display for you to define the other value. For example, the sample below will display a list of customers in California and New York.Not
Excludes all values stated in the Value/From column according to the selected Display Name. For example, the sample below will display a list of customers from all States except New York.
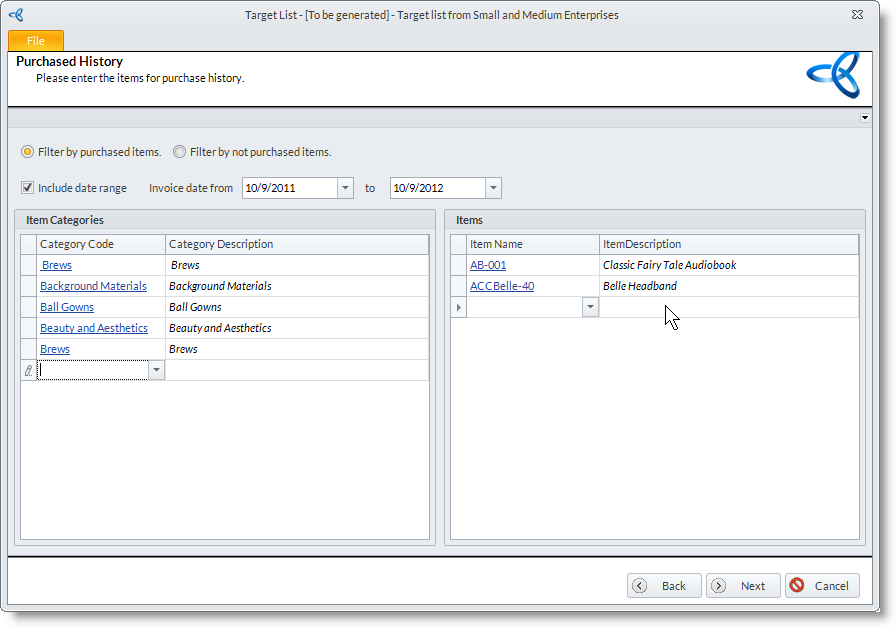
Is Greater Equal Includes all values that are equal and greater than the specified amount in the Value/From column according to the selected display name. For example, the sample below will display a list of customers with credit limit equal and greater than 1000. Is Lesser Equal Includes all values that are equal and less than the specified amount in the Value/From column according to the selected Display Name. For example, the sample below will display a list of customers with less than 10 in print counts. Is Greater Includes all values greater than the specified value in the Value/From column according to the selected Display Name. For example, the sample below will display a list of customers that have more than 15 overall discount percent. Is Lesser Includes all values less than the specified value in the Value/From column according to the selected Display Name. For example, the sample below will display a list of customers with a credit ranking of less than 5. Between Includes all values between a specified range in the Value/From and Value/To columns according to the selected Display Name. For example, the sample below will display a list of customers with Customer Code from CUST-000001 to CUST-000015. Begins With Includes all values that begin with a specified letter or word in the Value/From column according to the selected Display Name. For example, the sample below will display a list all customers with names beginning with “A” or “Al”. Contains Includes all values containing a specified word in the Value/From column according to the selected Display Name. For example, the sample below will display a list of customers with email addresses that has “hotmail.com” within it, i.e., all customers and contacts that have an email account in Hotmail. Not Contains Excludes all values that contain a specified word in the Value/From column according to the selected Display Name. For example, the sample below will display a list of all customers that do not have email accounts with Yahoo. Empty Includes values that are empty or are not specified according to the selected Display Name. For example, the sample below will display a list of customer files that have empty address fields or have no address specified. In List Includes values that are included in the list of expressions specified in the Value/From column according to the selected Display Name. Check the items specified in the search screen and these will be included in the list of expressions. For example, the sample below will display a list of customers that are from the United States of America and the United Kingdom. - Purchased History
This step allows you to filter the customers by specific items or items within a product category that they purchased (or did not purchase). You can also set a date range of the purchases made.
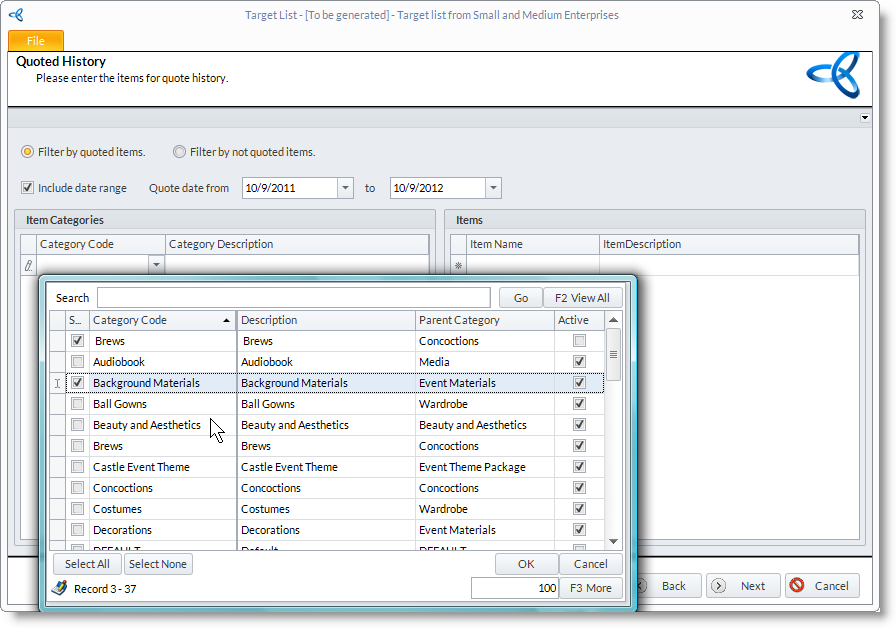
- Quoted History
This step allows you to filter the customers by specific items or items within a product category that was quoted them (or not quoted to them). You can also set a date range of the sales quotes made for them.
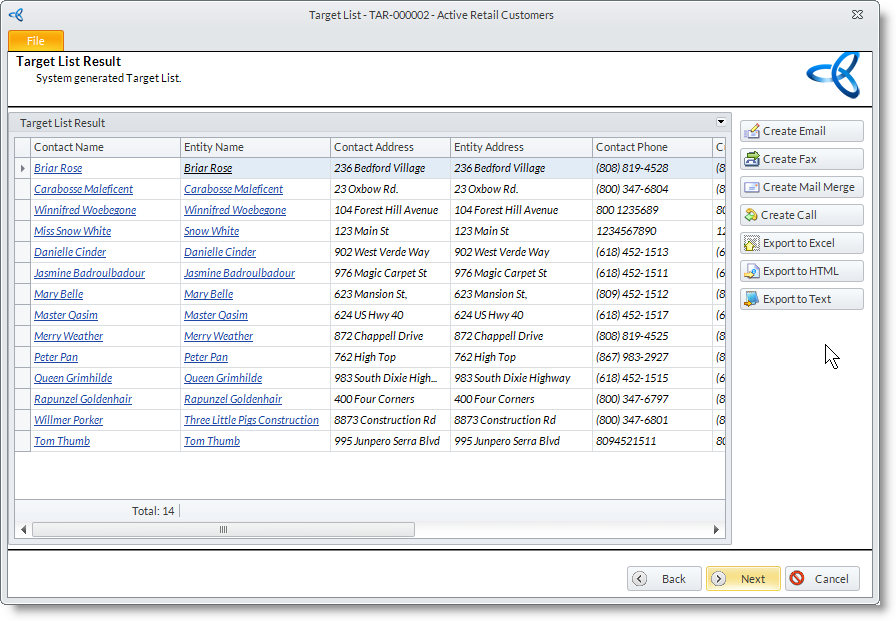
- Target List Result
The target list is generated. You can use any of the action buttons in the right for all the contact in the target list. See the How To topic list for more information.
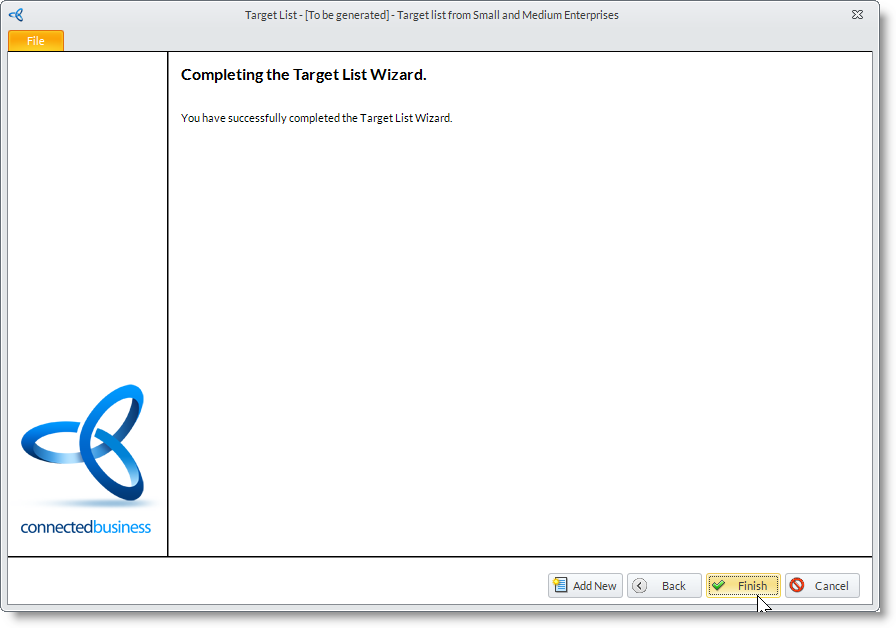
- Finish
Click Finish button to exit the Target List Wizard.
Export the List into File
- From the target list result screen (Step 6 of the Target List Wizard), you can export the target list using the following options:
- Export to Excel
- Export to HTML
- Export to Text
- Provide the file name and click on the Save button to save the target list into your file
Schedule Outbound Calls
- From the target list result screen (Step 6 of the Target List Wizard); you can create a call activity by using the Create Call option.
- You may select the contacts in the list to exclude.
- Click on the Create Call button. The Campaign Wave form will display with Wave Type set to Calls.
Send Mass Email through Email Merge
- From the target list result screen (Step 6 of the Target List Wizard); You can perform a mail merge by using the Create Mail Merge option.
- You may select contacts from the target list to exclude.
- Click on the Create Mail Merge button. The Campaign Wave form will display with Mail Merge set as the Wave Type.
See Also: Send Letters through Mail Merge
![]()
Send Email or Fax
- From the target list result screen (Step 6 of the Target List Wizard), you can send individual or mass email messages to the contacts in the target list.
- You may select contacts from the target list to exclude.
- For sending emails, click on the Create Email button. The Campaign Wave form will display with Wave Type set to Email.
See Also: Manage Emails

- Leads and entity contacts that have allowed to be sent with email messages (Ok To Email) will be included in the email recipients.
- Only those that have email addresses information will be added as recipients and sent the email message.
- The priority email address is the default contact's. If there is no email address specified for the contact, the entity's primary email address is used.
- For sending a fax messages, click on the Create Fax button. The Campaign Wave form will display with Wave Type set to Fax.
See Also: Manage Fax
- Leads and entity contacts that have allowed to be sent fax messages (Ok to Fax) will be included in the fax recipients.
- Only those that fax number information will be added as recipients and sent the fax message.
- The priority fax number is the default contact's. If there is no fax number setup for the contact. The entity's primary fax number is used.
- For sending emails, click on the Create Email button. The Campaign Wave form will display with Wave Type set to Email.
Maintain Target Lists
Steps
- From the CRM module, click Campaign > Find Target List button from the menu options. The Target List Wizard will display.
- Select the target list record from the list to view the Target List Wizard.
- You may amend the condition or exclude contacts from the Step 6 (Target List Result).
- Click Finish.
![]()