Customer Recipient Billing
| Content |
|---|
The main purpose of the Customer Recipient Billing option is to record and associate the customer’s account number to a certain shipping carrier in the Ship To Customer form for future shipping payment reference and usage.
This feature automatically populates the account number details in the Payment Information of the Shipment form with the customer’s listed account number when the Payor Type is set to “Recipient”. This is integral when the shipment cost is set to be shouldered by the customers, being the “recipient”, through their own account.
Set Customer Recipient Billing
To assign a customer’s account number/s on the Carrier Account:
- Go to Customer > Find Customer > Ship To Customers tab. Select one from the displayed list of Ship To Customers. For this demo, we will be using “Bjorn Dylan”.
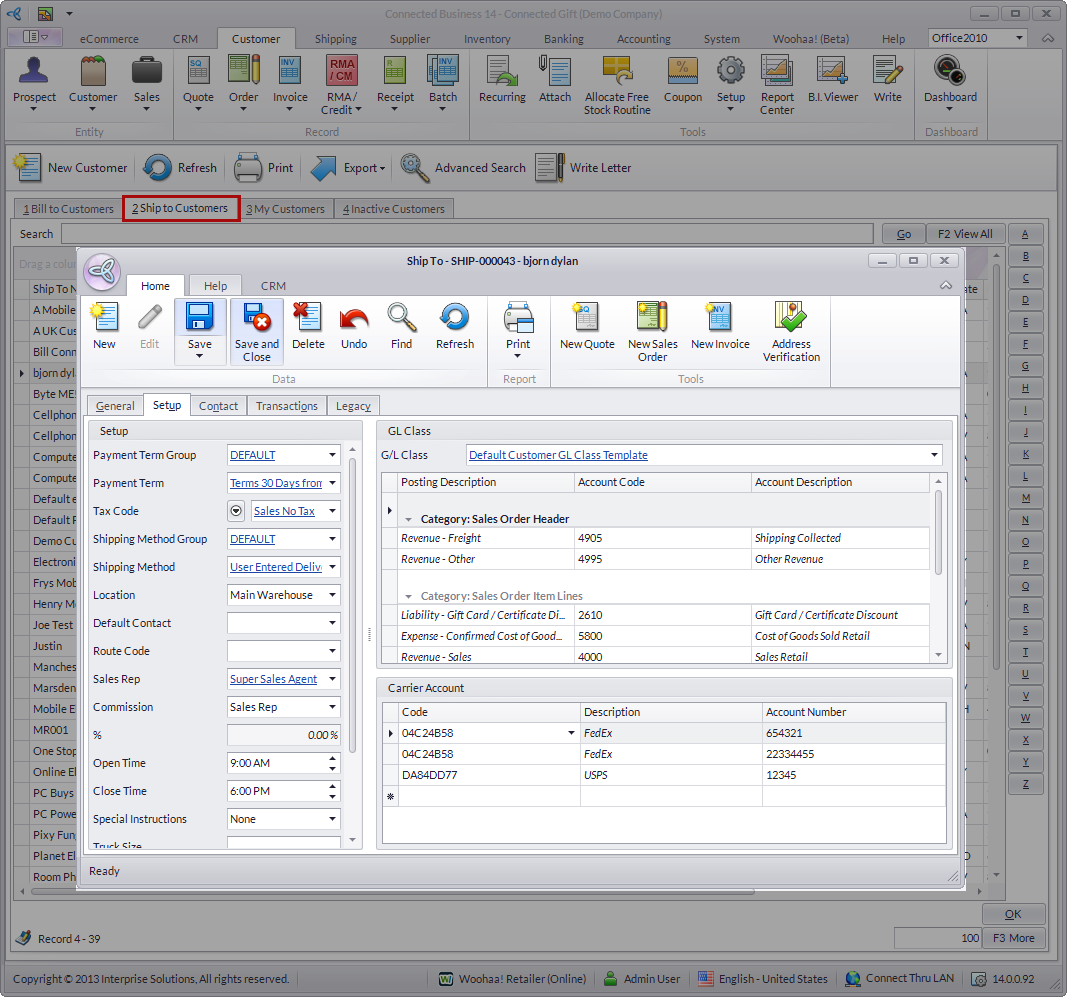
Click Image to Enlarge
- From the Ship To form, go to the Setup tab and input the customer’s account number/s that will be associated with a specific carrier on the Carrier Account section.
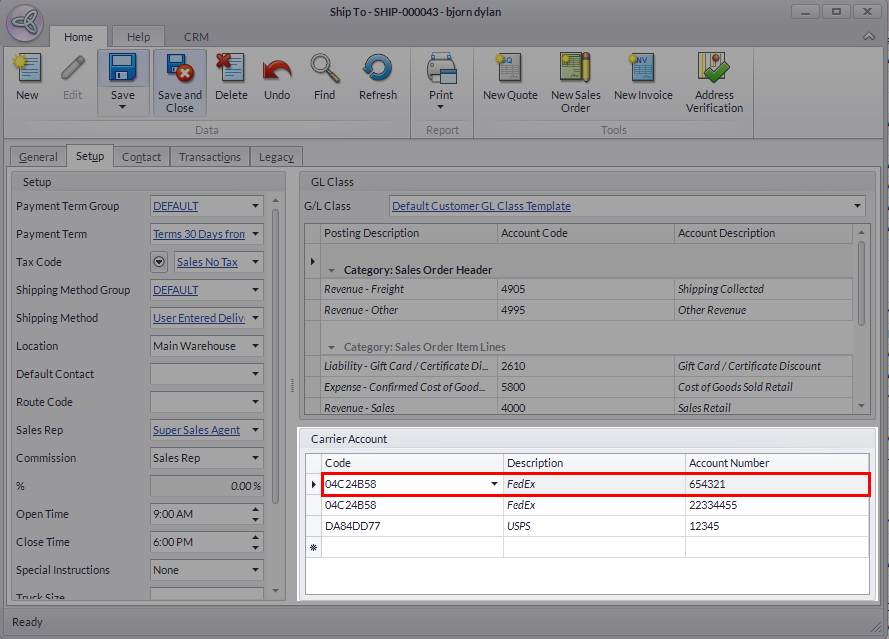
Click Image to Enlarge
- Save and Close to apply changes
![]()
Assign Customer Recipient Billing
To assign the Customer Recipient Billing, create a Sales Order or a Sales Invoice from the Customer module > Ship To Customers tab. For steps on how to do this, please refer to Create a New Sales Order | Create a New Sales Invoice.
- Once the Sales Order/Sales Invoice has been created, access the customer’s Shipment form via the Shipping module > “From SO” or “From INV”.
- Under the Carrier Specific section, change the Payor Type to “Recipient” in the Payment Information field. Notice that the Account No. field automatically uses the listed account number/s that have been previously set up on the customer’s Ship To form.
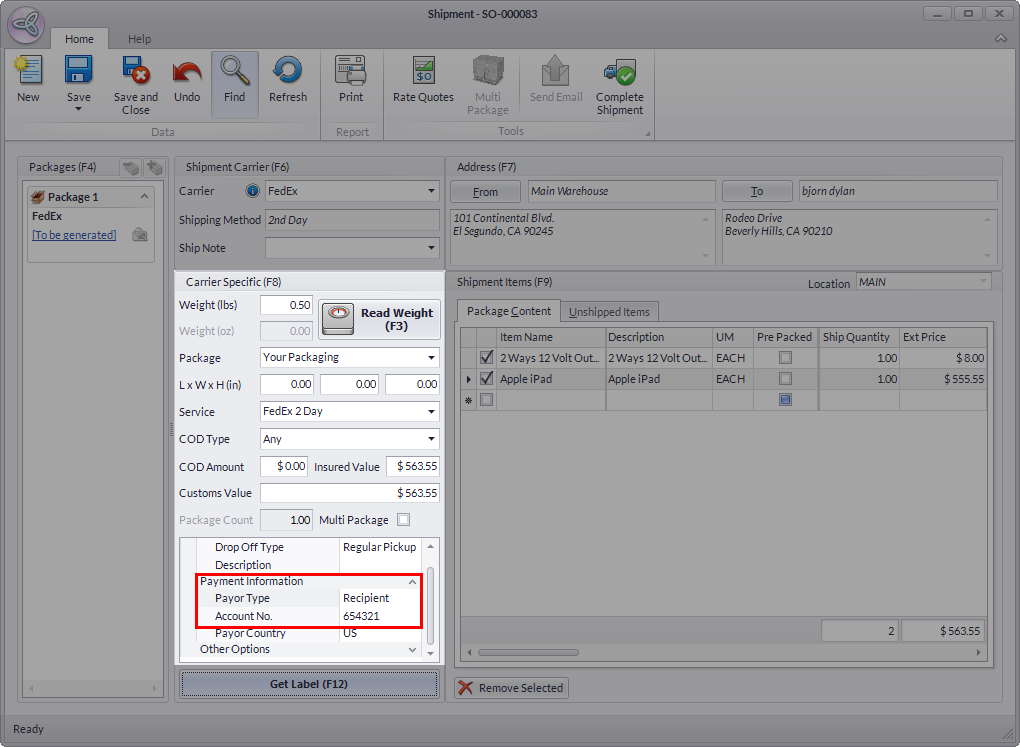
Click Image to Enlarge
- Save and Close the form to apply. After which, the shipment cost will now be charged to the customer’s account.
Moreover, this option will now allow the system to automatically use the account number for billing shipment costs whenever it is to be shouldered by the customer.

The account number reflecting on the transaction will not be shown on the generated label for the shipment.
![]()
Automatically Assign Customer Recipient Billing
In Connected Business v14, you can now automatically set the customer carrier account as the Recipient upon creating the shipment.
This feature is only available in Connected Business v14 and higher.
To do this,
- Go to the Customer module > Find Customer > Ship to Customers tab. The list of Customer Ship tos will be displayed.
- Select the customer ship to from the list to view the Ship To form.
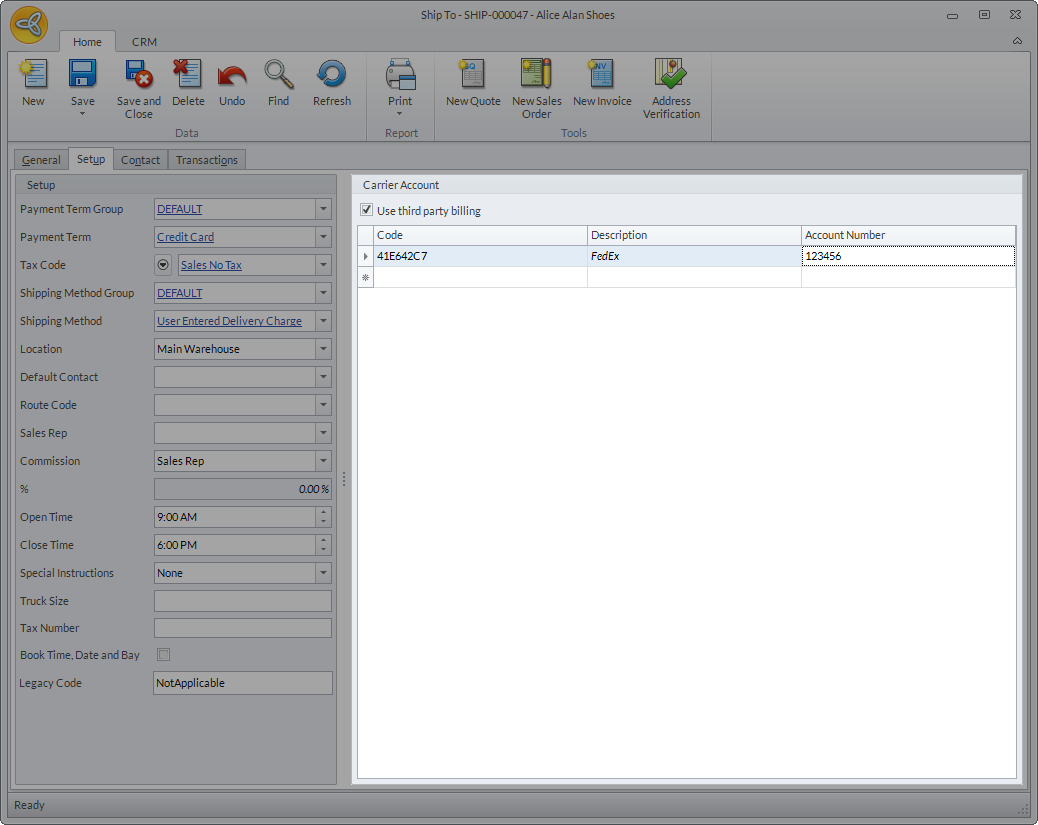
- Go to the Setup tab > Carrier Account and tick the Use third party billing checkbox.
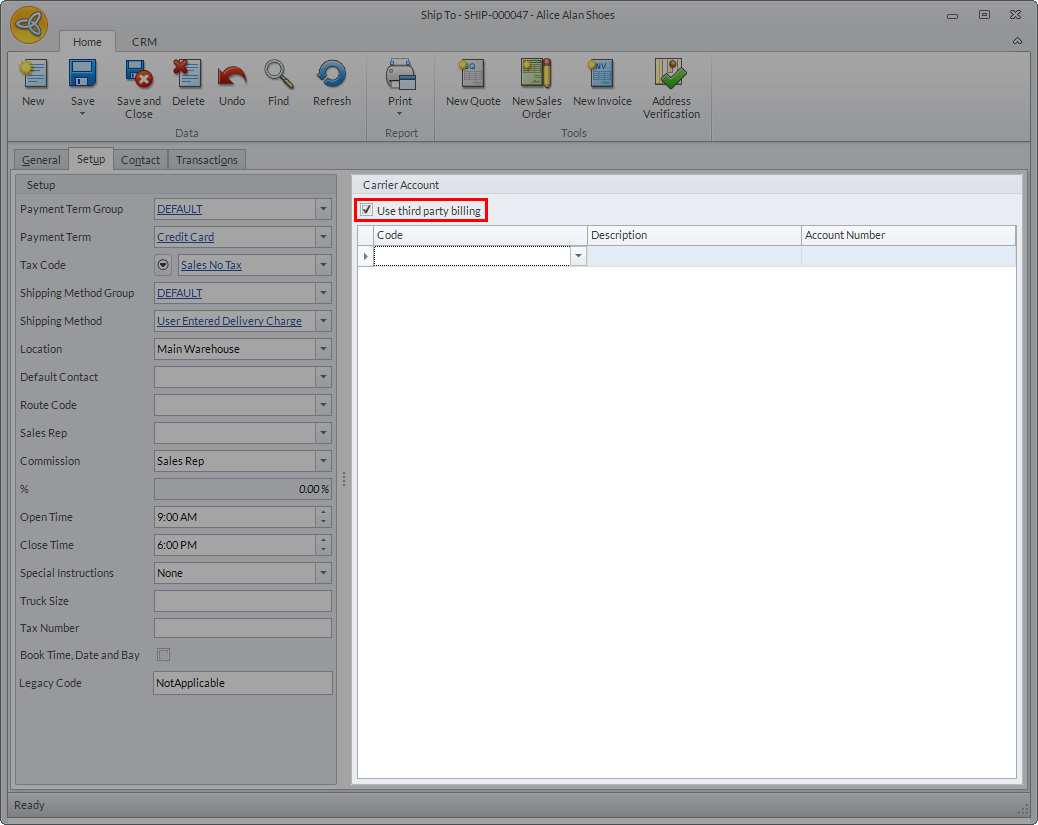
Click Image to Enlarge
- In the Code column, select the carrier account code from the dropdown list.
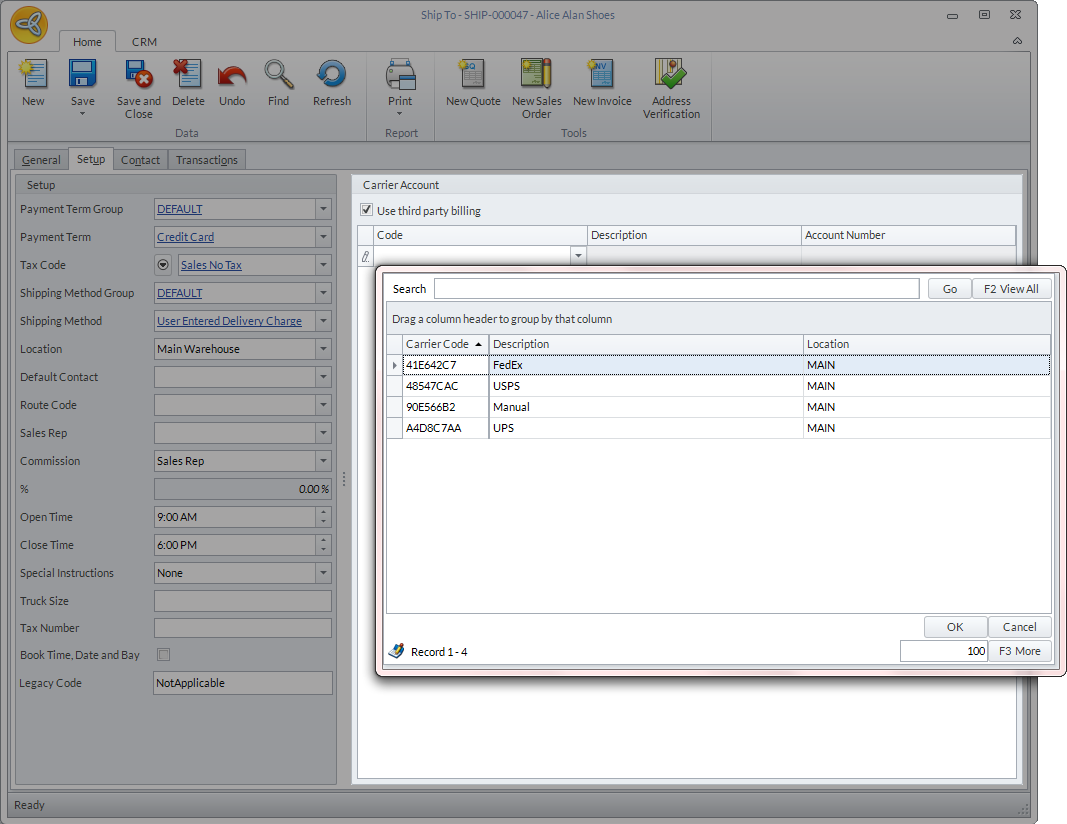
Click Image to Enlarge
- Enter the customer carrier account number in the Account Number column.
Click Image to Enlarge
- Click Save and Close to apply changes.
- Create a sales order for the customer.
- Go to Customer module > Order > New Order. The list of customers will be displayed.
- Select customer from the list to load the Sales Order form.
- Enter items in the sales order then click Save.
- Create the shipment record for the sales order. Go to the Shipment List tab and a message prompt will be displayed indicating that no shipment record is found for the sales order. Click Yes to create shipment record. The Shipment form will be displayed.
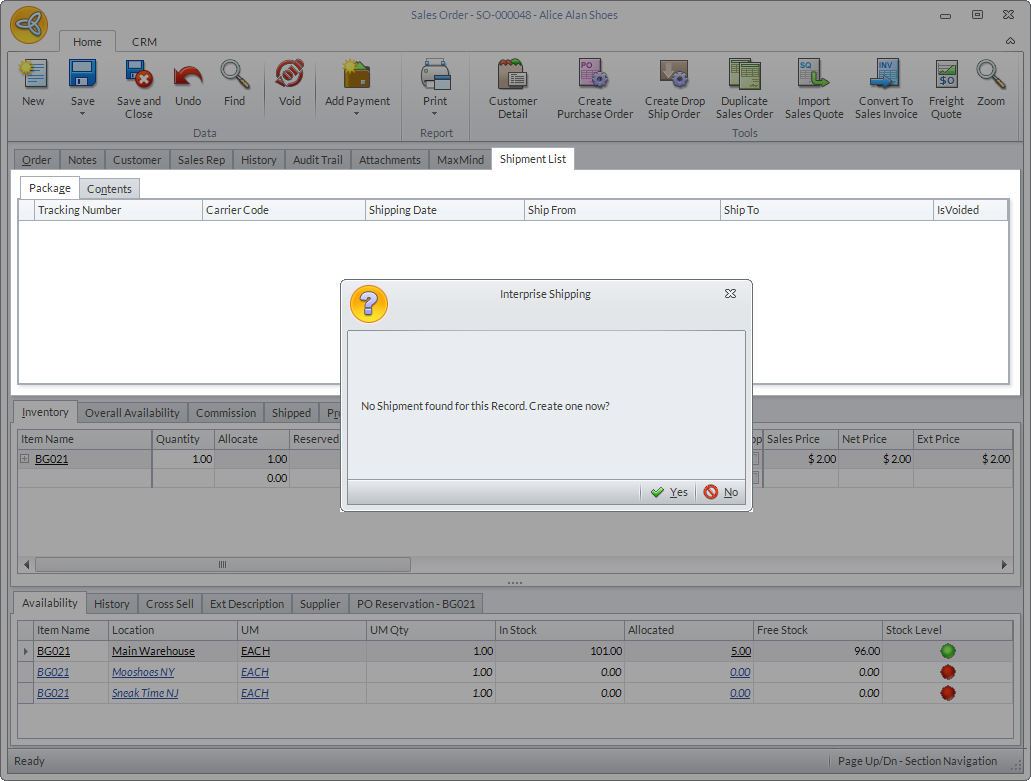
Click Image to Enlarge
Notice that in the Payment Information section of the form, the Payor Type is automatically set to Recipient together with the customer carrier account number.
Alternatively, you can also create the shipment record by going to the Shipping module > Shipment > From SO. Select the sales order from the list to load the shipment form.
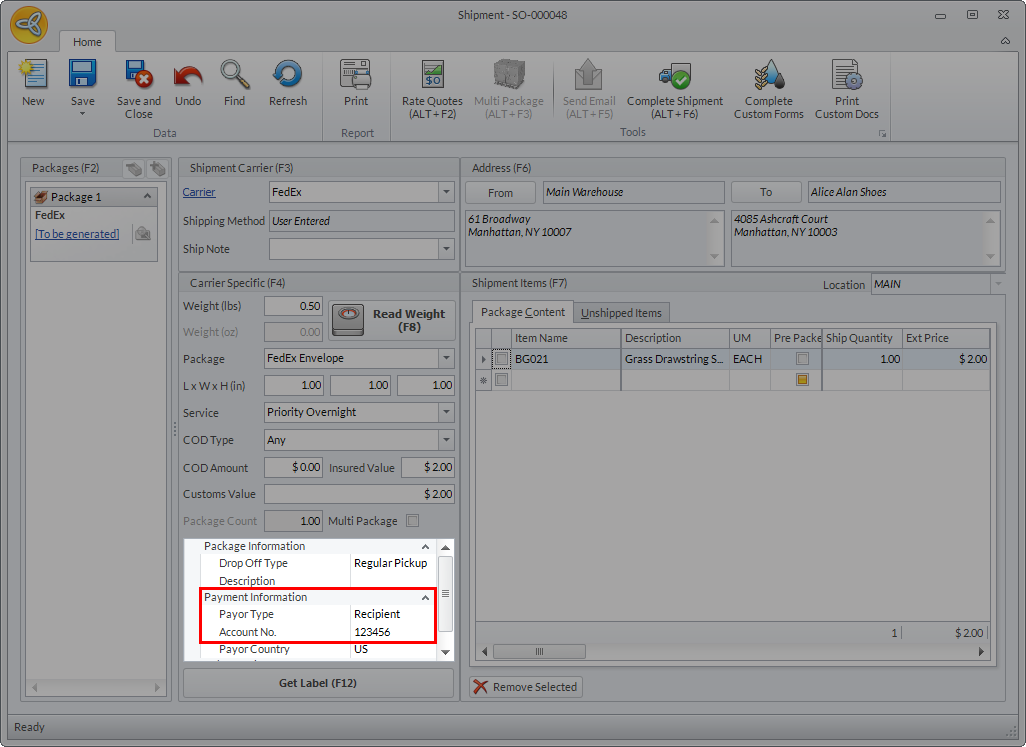
Click Image to Enlarge
![]()