Create Purchase Order from Approved Requisitions
|
Content
|
|---|
This section will discuss on how to create a purchase order from an approved requisition.
Steps
Note that only open purchase quotes may be edited.
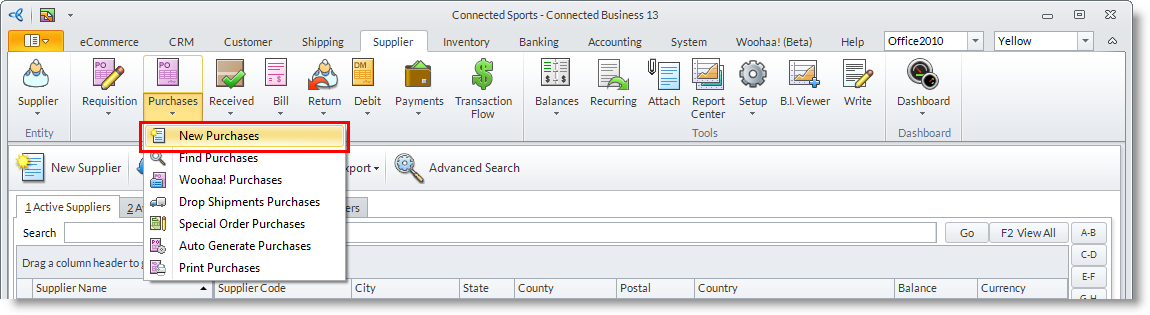
- From the Supplier module, select Purchases > New Purchases. A search screen displaying active suppliers and available requisitions will appear.
- Select the requisition record in the list to display the Requisition form.
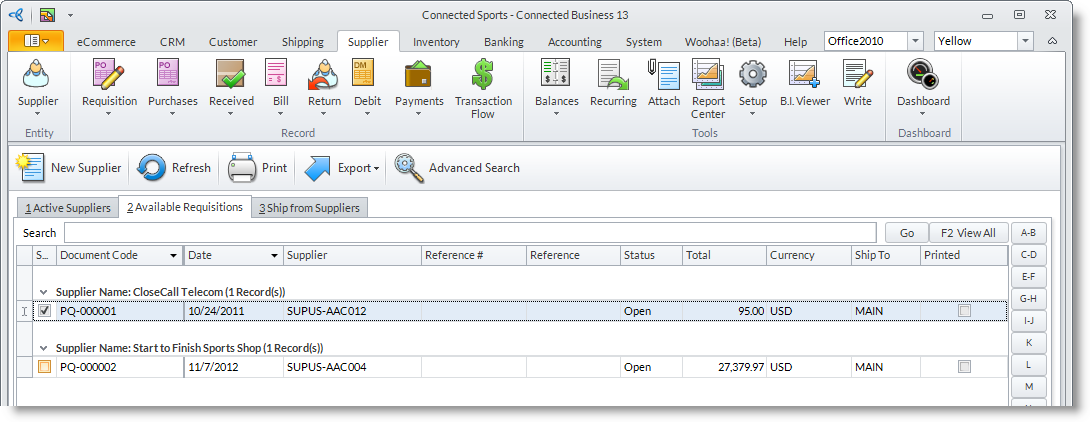
- To create purchase orders from approved requisitions, select the requisition from the Available Requisitions tab by clicking on the checkbox and clicking OK.
- To consolidate two or more approved requisitions, select the requisitions from the Available Requisitions tab (must be the same supplier) by clicking on the checkbox and clicking OK.
- Choosing any one of the options above, the Purchase Order form is displayed. The Purchase Order will reflect the details from the purchase requisition. You may modify or add details as necessary.
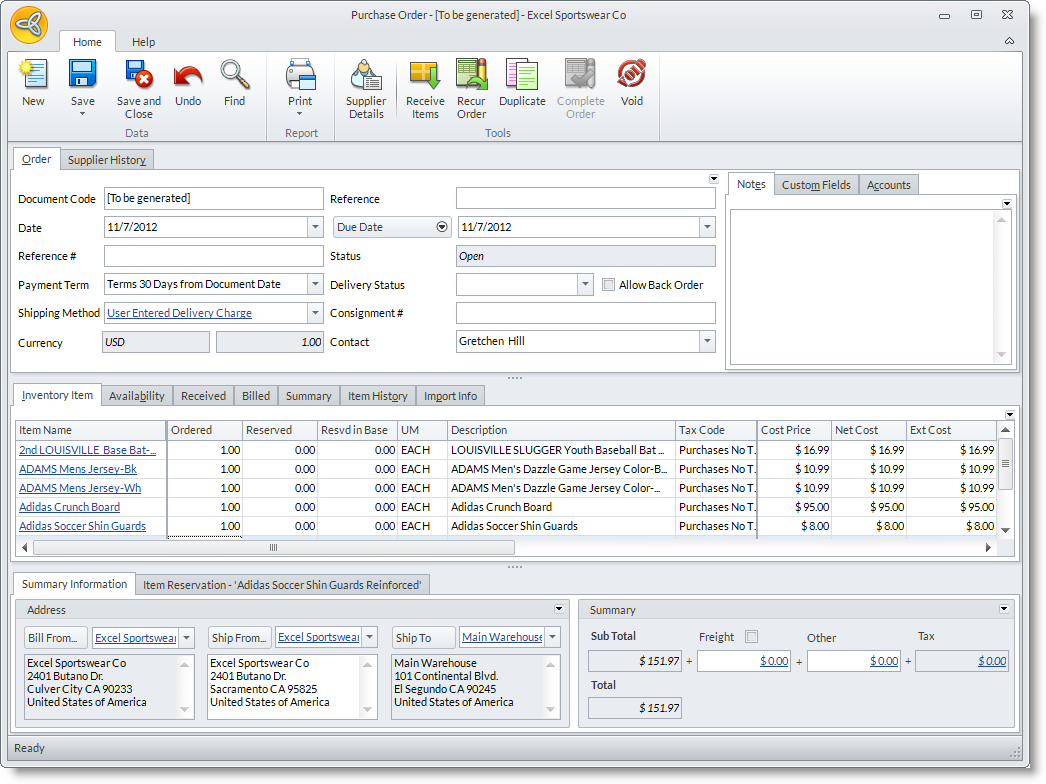
- You may change the default dates in the Date (document date), and Due Date fields. You may switch to other date fields to fill in by clicking on the arrow button beside the Due Date field.
- You can add relevant document codes or reference numbers in the Reference # and Reference fields.
- You may change the default Shipping Method and Payment Term.
- Optional: Enter a consignment number (if any) in the Consignment # field.
- Optional: You may select a Delivery Status for the items in the purchase order. The options are: Unknown,In Transit (Truck), In Transit (Ship) and At the Port.
- Optional: You may add notes about the purchase order in the Notes tab.
- The items lines from the requisition document is reflected in the Inventory Item tab. You may remove items by right clicking and selecting Delete Line Item.
- You may add items to the order by selecting the items in the Item Code column pulldown.
- the Ordered column displays the line items and quoted quantity from the requisition as default. You can change this to the actual quantity you are ordering from the supplier.
- You may change the details for each item line such as Unit Measure, Warehouse, Due Dates and Tax Codes.
- You may change the default warehouse where the supplier will ship the items by selecting another Warehouse in the Ship To field.
- Save the details before closing the Purchase Order form.
- You may convert the purchase order into a goods received document by clicking on the Receive Items from the option menu.

ENTER NON STOCK OR SERVICE ITEMS
- From the Item Code column, tab to the Ordered column and type in the quantity to automatically enter a non stock line item.
- You can type in the description of the non stock item in the Description column.
- You may specify the cost of the non stock line item in the Cost Price column. The total will be displayed in theNet Cost column.
- In the Purchase Account column, the default nominal code for the supplier is reflected. This process is automated by the Supplier Preferences. You may still change the Purchase Account code ass needed.
TURN OFF FILTERING OF PRODUCTS BY SUPPLIER
- From the Supplier module, select Setup > Preferences. The Preferences form will display.
- On the General section, uncheck the Filter items according to supplier option.
- Click Ok to apply your preferences and close the Preferences form.
ADD IMPORT INFORMATION
- In the Purchase Order form, switch to the Import Info tab to add import information for each line item.

PRINT THE PURCHASE ORDER DOCUMENT
- From the Purchase Order form, click on the Print button from the toolbar menu to display the Print Dialog window.
- Select the printing Destination and configure your printing preferences before printing.
SEND PURCHASE ORDER TO SUPPLIER OR CONTACTS
- From the Purchase Order form, click on the Print button from the toolbar menu to display the Print Dialog window.
- Select Email or Fax as printing destination. You may change the default message in the Email or Fax tab.
- The default contact’s email address will appear in the Email Address field or the fax number in the Fax Number field. If there is no email address of fax number setup for the default contact, then the supplier’s primary email address of fax number is used.
- Click on the Print button to attempt sending the documents via email or fax.
RECEIVE ITEMS
- From the Purchase Order form, click on the Receive Items button from the menu to convert the purchase order to goods received document.
- You can also use the Goods Received option under the New menu of the Supplier module.
FIND WHAT ITEMS ARE BILLED OR RECEIVED
- You can view received items in the Received tab.
- Invoiced items are shown in the Billed tab.
- The summary or ordered, received and invoiced quantity per line item is displayed in the Summary tab.
APPLY SUPPLIER ACROSS ALL WAREHOUSES
To be able to select another warehouse for the supplier to ship to,
- From the Supplier module, select Setup > Preferences. The Preferences form will display.
- On the General section, uncheck Apply same supplier across all warehouse option.
- Click OK to apply your preferences and close the Preferences form.