Create New Sales Quote
|
Content
|
|---|
Overview
Sales Quote is the part of the order process where the items are listed and presented to a customer or a prospect. It helps customers get information about your company’s merchandise and make decisions when making orders.
Create New Sales Quote/Proforma
Steps
- Click on the Customer module tab.
- You can create a sales quote from any one of the following sources:
- Quote > New Quote/Proforma
- New Sales Quote option from the Customer detail form. This will load the Sales Quote form automatically.
- New Sales Quote option from the Opportunity form. This will load the Sales Quote form automatically.
- After selecting any one of the options above, a search list of active prospects, customers and shipping addresses are displayed.
- Select a customer or a prospect or a shipping address in the list to display the Sales Quote form.
- In the Sales Quote form, you will notice that the Order tab is populated with details you set up for the customer. You can make changes or accept the default values.
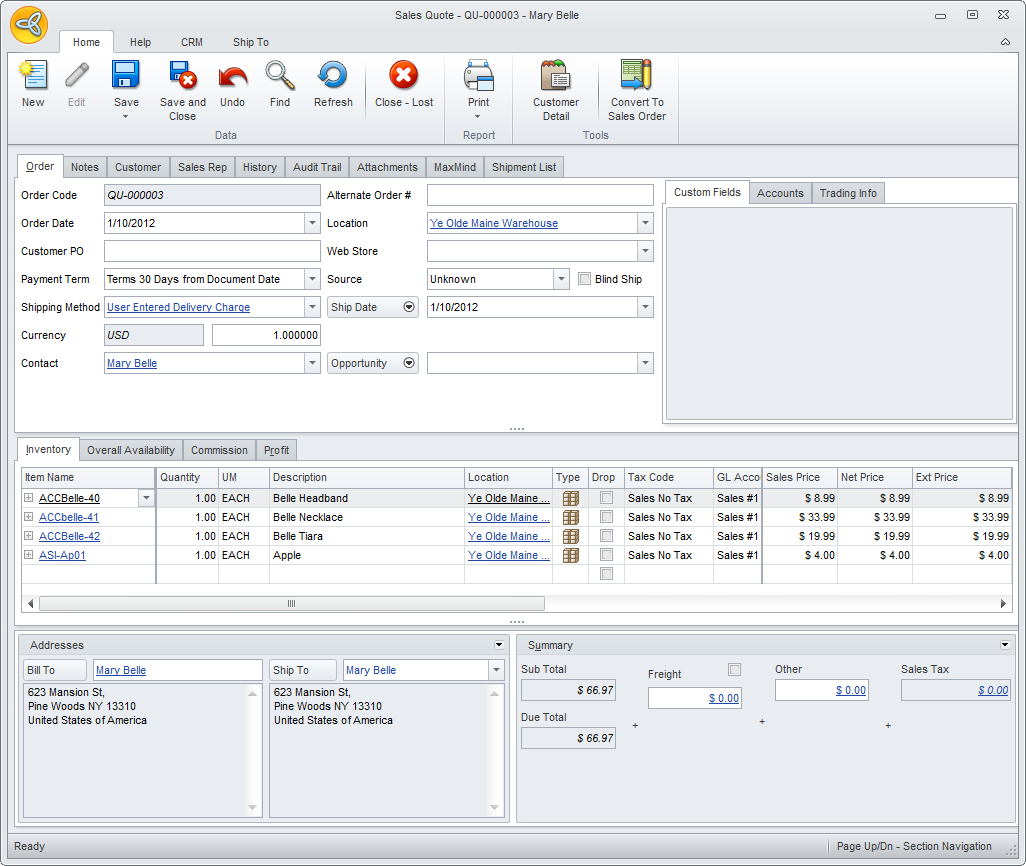
Sales Quote Field
Definition
Order Code
This field is automatically generated by the system once a sales quote.proforma is created. Order Date
This is the date when the order is first created. You may change the defualt current date as needed. Customer PO
You may add relevant document codes in this field as well as the Alternate Oder # field. Payment Term
This field sets the payment term assigned for the sales quote. You may change the payment term when needed. Shipping Method
This field sets the Shipping Method assigned for the sales quote. You may change the payment term when needed. Currency
Set the currency used for the sales quote. You may change the currency as needed. Contact
This field shows the contact assigned for the sales quote. Location
Select the default location to which the items should be picked from. Web Store Select the website assigned to the sales quote. You may change the website as needed. Source Optional: You may change the default Source for the customer. Ship Date Assign a date for the shipment to be delivered to the customer.
Click on the arrow button next to this field to view the Latest Ship Date and Overall Due Date fields. You can assign approximate dates for these fields.Opportunity If the sales quote is generated from an opportunity record, the Opportunity Code will display in this field. You can also assign an opportunity record by selecting it from the pulldown list.
Click on the arrow button next to this field to view the Wave fields. You can select a related campaign wave to the sales quote.
- In the Inventory Item tab, select the items to include in the quote by clicking the pulldown arrow button in the Item Code column. Select item(s) by checking the adjoining check boxes on the left. You can search for items in the list by Item Name, Description, Item Type.
- You may change the details of each line item to what you and the customer had agreed upon. You may change the default Unit Measure, Location, Tax Code, Selling Price and the Discounts (if any).
- Indicate the quoted quantity in the Quantity column. You can view the availability of the item in selected location source in the Overall Availability tab. Select an item line and click on the Overall Availability tab to view its availability.
- You may change the default customer shipping address in the Ship To field of the Addresses section.
- To view other tabs in the Sales Quote form, place the cursor in the Quantity column in the selected item line. The supplementary tabs are as follows:
Order Tabs
Definition
Availability shows the availability of the item in all warehouses History shows the invoice history. Cross-Sell shows the items that the customer bought along with the item. Extended Description shows the extended description of the item. Supplier shows the suppliers of the item with details to supplier cost, lead time and priority. - The Freight field displays the freight amount based on the freight calculation from the shipping method.
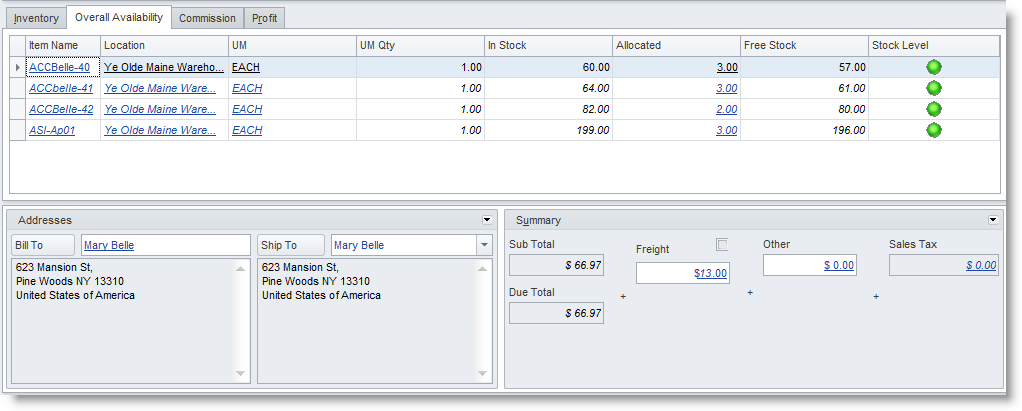

Optionally, you may change this value to the actual freight charge then tick the checkbox above the Freight field to disable the freight calculation from the Shipping Method.
- Save the details before closing the Sales Quote form.
- When approved, you may convert the sales quote to sales order by clicking on the Convert to Sales Order button from the menu.
View Customers Details
- You can view current credit information of the customer from the Customer tab of the Sales Quote form.
- You can view full details by clicking on the Customer Detail button from the menu options.
Attach Documents
- Go to the Attachments tab of the Sales Quote form.
- In the ellipsis button inside the File Name column.
- Select if you will attach documents from the computer or from the CRM Document Management.
See Also: Manage Documents
Print Sales Quote
- From the Sales Quote form, click on the Print button from the menu to display the Print Dialog window.
- In the Report List, select the document type you want to print. You may select to print the sales quote document or a proforma.
- Select the Printing Destination of the document.
- Select a printer from the Printer pulldown and click Print button.
Send Copy of Sales Quote to Customer or Contact
- From the Sales Quote form, click on the Print button from the menu to display the Print Dialog window.
- In the Report List, select the document type you want to send. You may select to send the sales quote document or a proforma.
- Select Email or Fax as printing destination. You may change the default message in the Email or Fax tab.
Note that the document will be sent as a pdf attachment.
- The default contact’s email address or fax number will appear in the Email Address or Fax Number field. If there is no email or fax number setup for the default contact, the customer’s primary email address or fax number is used.
- Click on the Print button to start sending the document through email or fax. Make sure that you are currently online to the internet.