Create and Post Partial Bills
| Content |
|---|
This document explains the steps involved in creating and post partial bills. This process occurs after the purchasing and receiving transactions between you and your supplier.
Partial billing occurs when the quantity of the items indicated in the Goods Received Note (GRN) is not equal to the quantity entered into the Billing Form. You can process the difference depending on whether the quantity you are billing for is less or more than that is indicated in the GRN.

This feature will be available in Connected Business v15 and for Connected Business v13 and earlier versions.
The action demonstrated in this document follows the standard process of creating a bill through the goods received form.
-
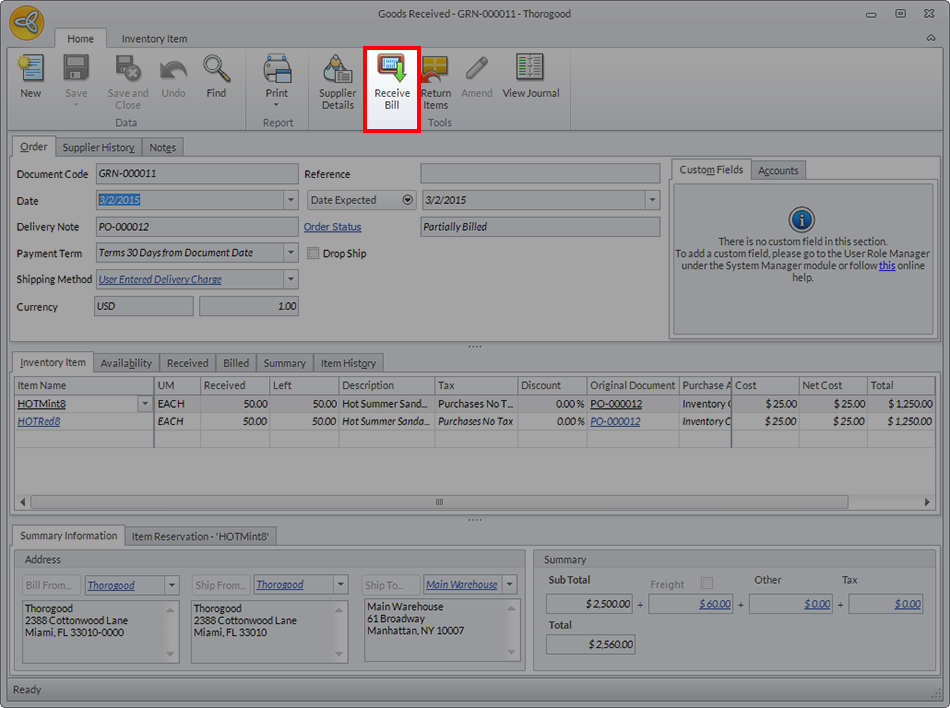
Open the Supplier module, go to Received < Find Goods Received. On the Goods Received form, click the Receive Bill button to generate a new bill.
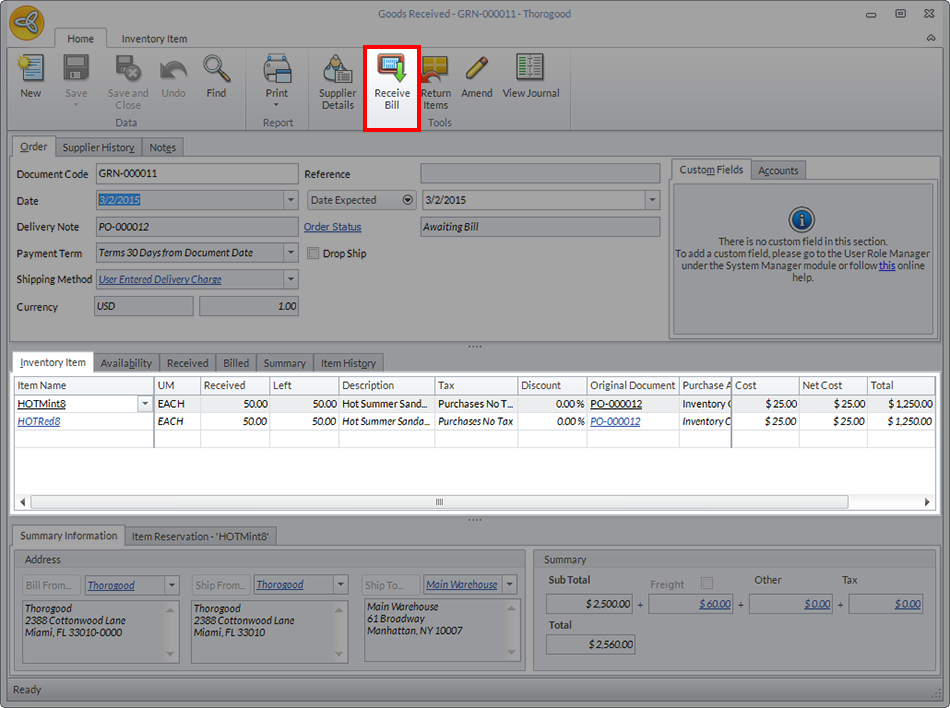
Click Image to Enlarge
-
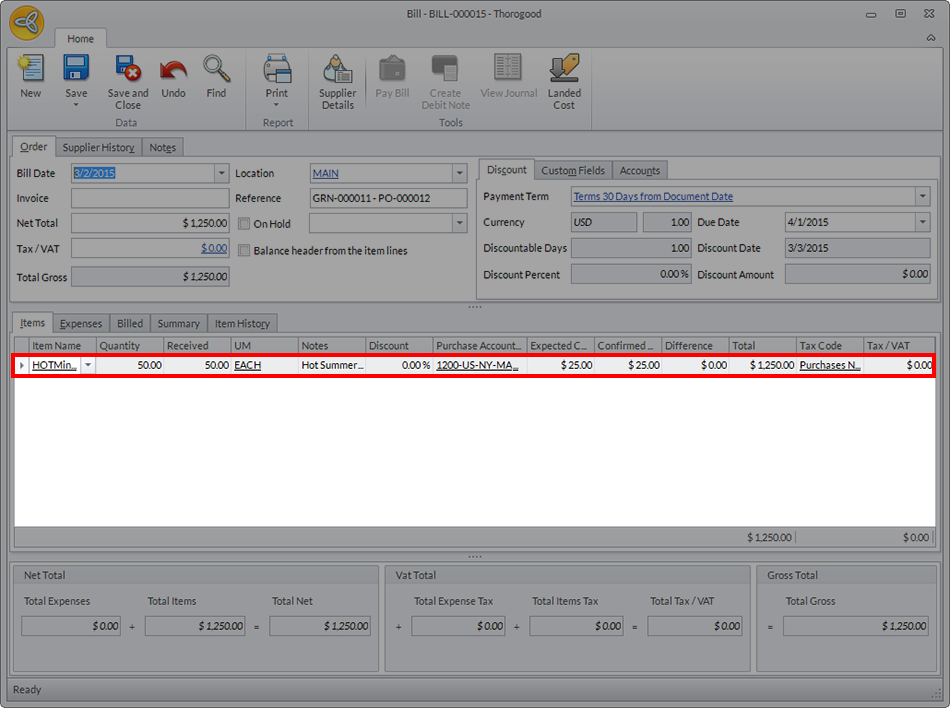
Go to Supplier > Bill > Find Bill. On the Bill History tab, you can find a list of generated bills.
Find the correct document by cross-referencing the GRN code found under the Reference column.
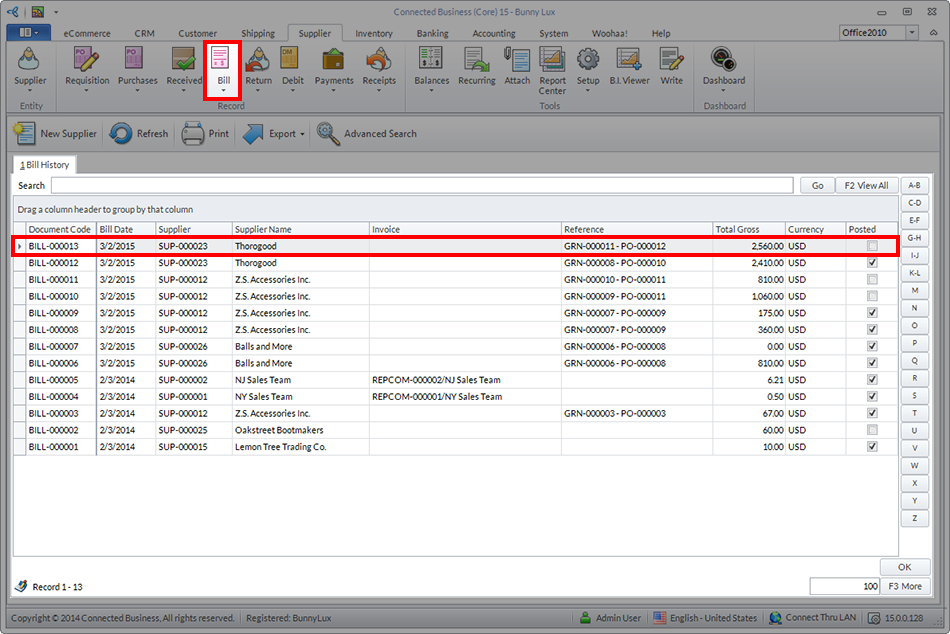
Click Image to Enlarge
-
Double click on the chosen entry to display the Bill form.
Process Bill With Zero Items Received
-
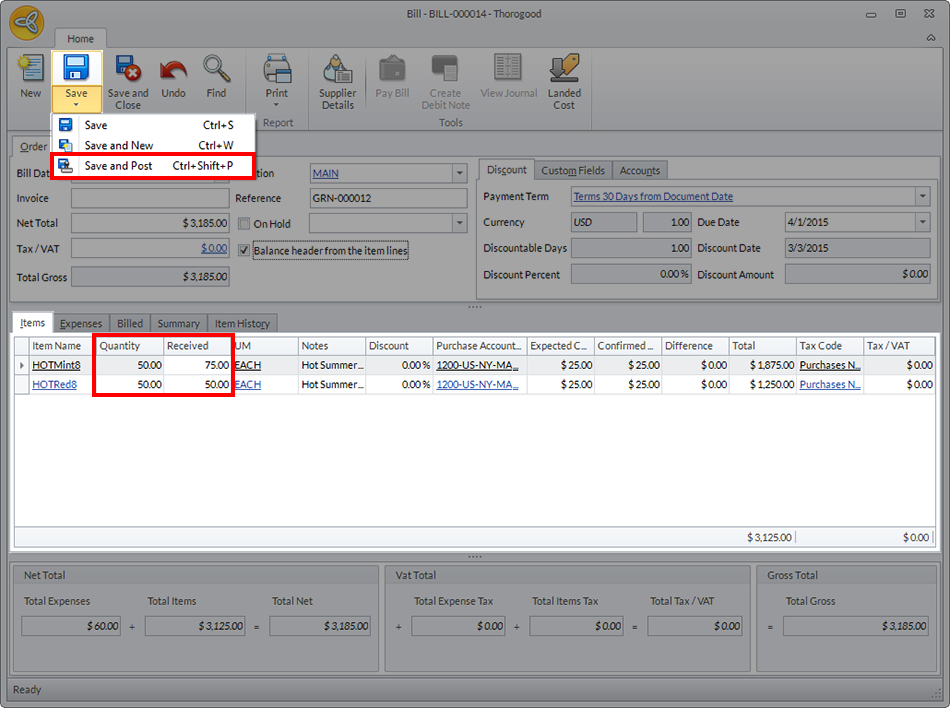
On the Items tab of the bill form, enter 0 (zero) under the Received column of your chosen item.
-
Click on the dropdown menu found in the Save button and choose Save and Post.
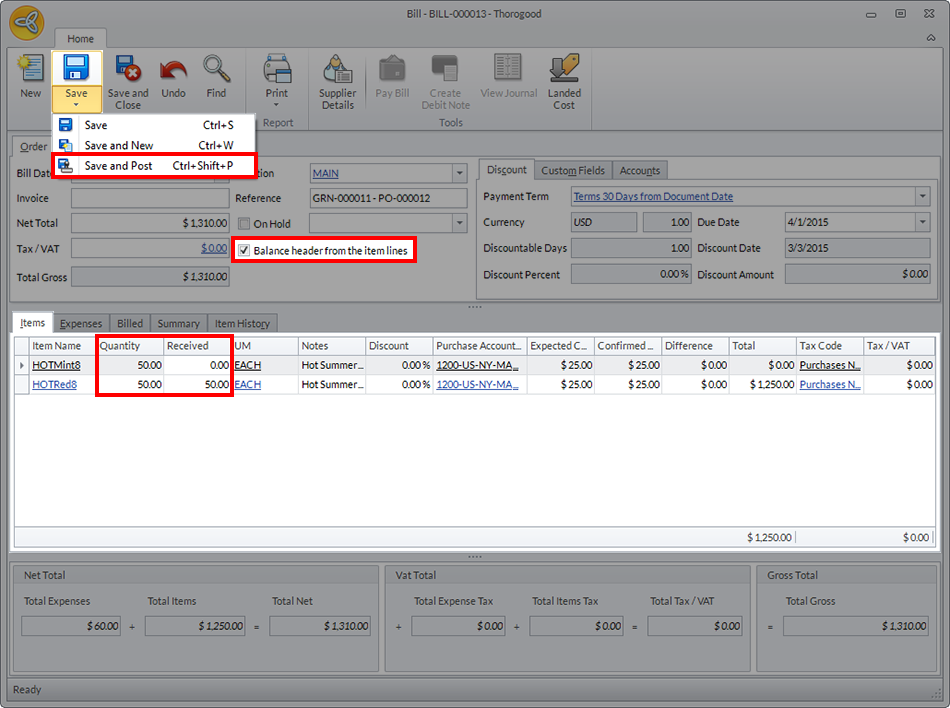
Click Image to Enlarge
Make sure that the check is enabled for the tick box labeled Balance header from the item lines. If you try to save and post with this option unchecked, a prompt will appear asking you to do so.
You will not be able to perform the rest of the task without checking the tick box. -
Go back to Supplier > Received > Find Goods Received.
Because at least one of the line items have not been fulfilled, the original GRN remains open. The order status is now labeled as Partially Billed.
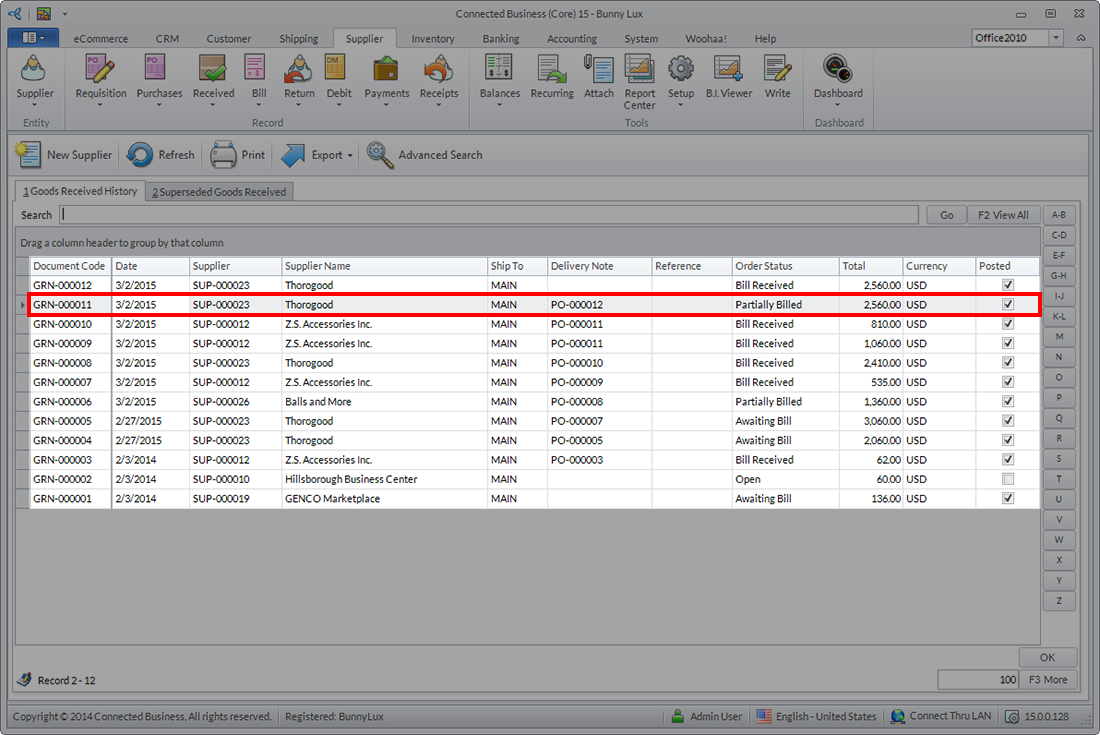
Click Image to Enlarge
-
When the rest of the line items have been delivered by the supplier, open the GRN and click on the Receive Bill button again.
Click Image to Enlarge
-
A new billing form will be generated containing the line items that you have marked zero on your previous transaction.
Click Image to Enlarge
-
If all the remaining items have been delivered, you can close the GRN by clicking Save and Post.
Process Bill With More Items Received
-
If you want to bill your supplier for a larger quantity of items than is listed from the GRN, you can type the number under the Received column of the line item.
Complete the process by cliking Save and Post. You can then move on to the next transaction such as paying the bill.
Click Image to Enlarge
-
To process the excess items, click on the Create Debit Note button on located in the form.

Click Image to Enlarge
-
A new Option form will be displayed where the excess line items will be listed. Make sure that the tick box is enabled before choosing a new action.
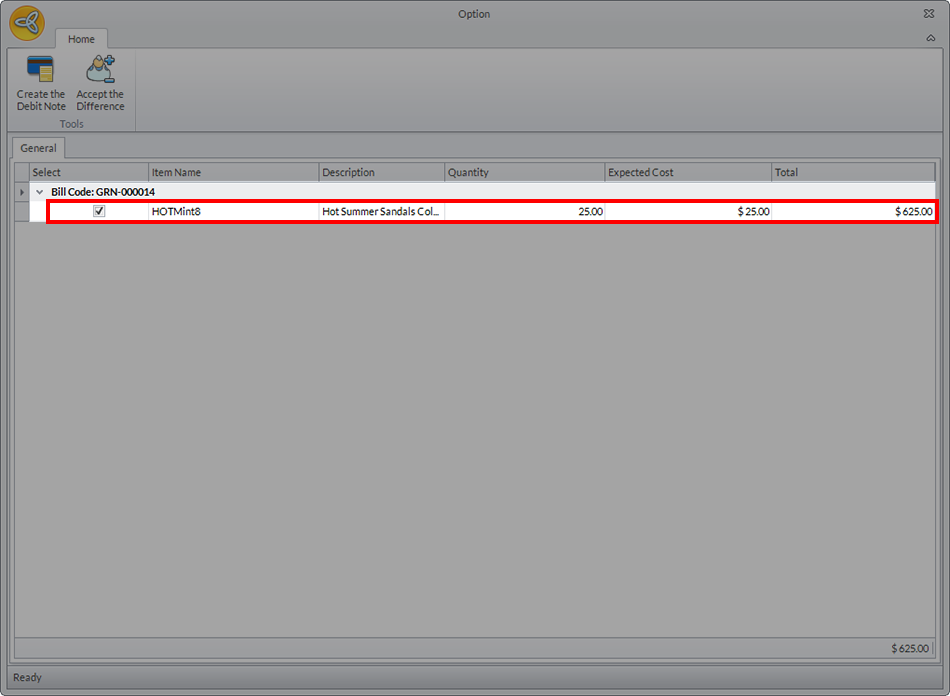
Click Image to Enlarge
If you click Create the Debit Note, a new debit memo associated with this transaction will be generated. You can access this new document by going to Supplier > Debit > Find Debit Note.
If you click on the button labeled Accept the Difference, no further documents associated with this transaction will be generated.
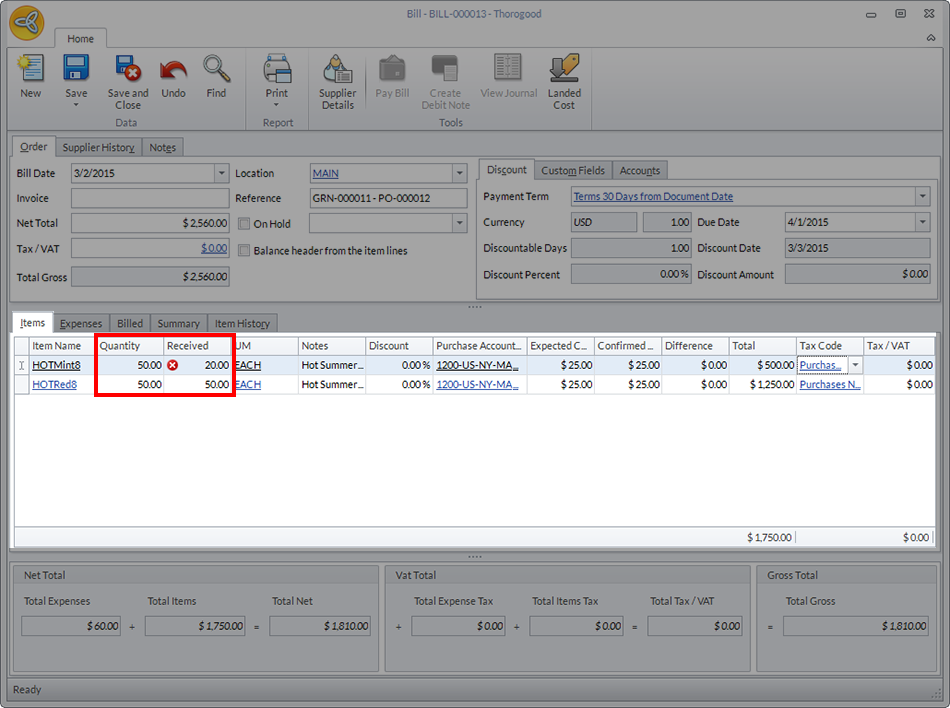
Error In Processing Bill With Less Items Received
The billing form does not allow you to enter a number under the Received column that is lesser than stated under quantity, except if the number is zero. Encoding a smaller number into the field will display an error indicator and will prevent you from continuing with the transaction.
Click Image to Enlarge