Add Tab Page
|
Content
|
|---|
Learn how to create a new tab page within Connected Business forms. You can rename or remove the tab and customize the way the tab page would look like.
Follow the steps below to start creating one.
ADDING A TAB PAGE
- On the tab labels, right click on Customize layout. The Customization form will display.
- Select Add Tab on the options.
- You may customize the layout of the tab section or add fields. To do this, click on the Customize Section Layout.

![]()
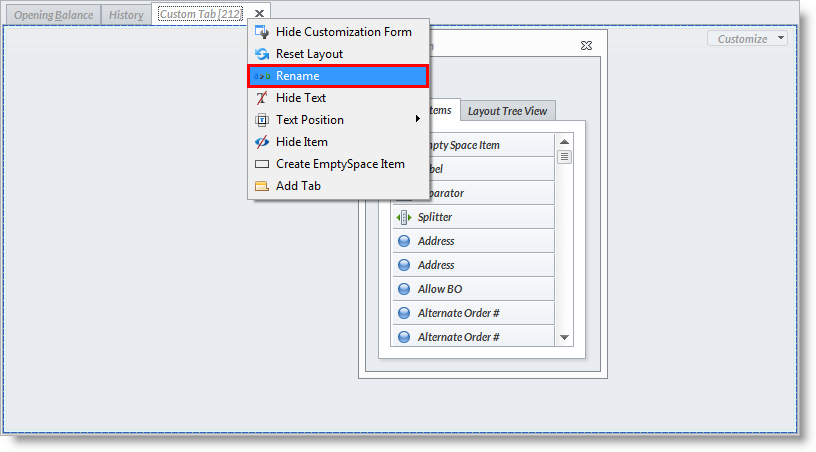
RENAME TAB PAGE
- Select the tab page and right click on the Customize Layout button. The Customization form will then display.
- Select Rename on the options and then type the new name of the tab you want to create.
- Then, select Close button on the tab page.
- Select Yes on the User Role Customization form.
![]()
REMOVE TAB PAGE
- Select the tab page and click on the Customize Layout button.
- Select Close button on the specific tab page.
- Select Yes on the User Role Customization form.
![]()
OTHER CUSTOMIZATION OPTIONS FOR CREATING TAB PAGE
Other options for creating a new tab page are as follows:

- Hide Customization Form - hides the customization form.
- Reset Layout - restores back to the previous setting/action done on the layout.
- Hide Text - does not display the name of the tab.
- Text Position - displays the position of the name of the tab. Options that can be selected are: Top, Bottom,Left, Right.
- Hide Item - hides the specific tab.
![]()