Add Items/Accessories/Substitutes in POS
| Content |
|---|
The following article demonstrates how to manage items, accessories, and substitute items in Connected Business POS.
Add / Delete Items
You can add items to the current POS transaction by selecting the items from the category product display grid, use the Product Search function, or enter the item barcode.
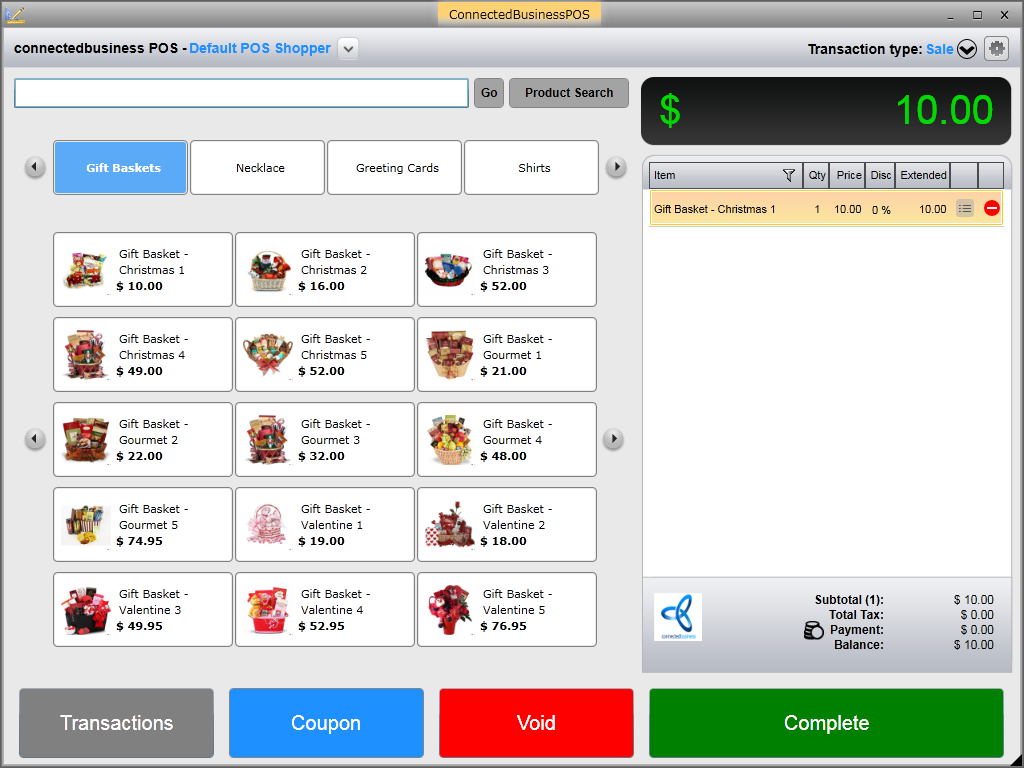
Add Items from Product Display Grid
You can add items directly from the product display grid of the category. Simply select the category and the list of category items will be displayed. Click on the item to be purchased and it will be automatically added in the transaction tape. You can use the left and right arrow buttons in the product display grid to browse the items in the category.

Click Image to Enlarge
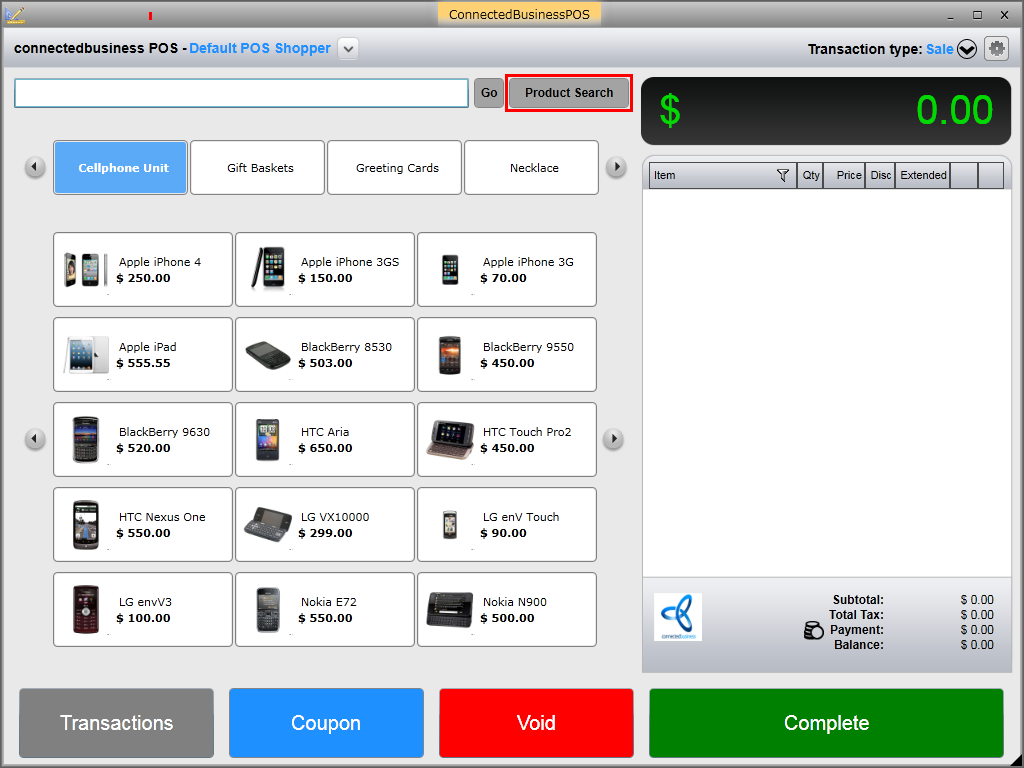
Add Items Using Product Search Function
To add items using the Product Search function,
- Click on the Product Search button. The list of available products will be displayed.
Click Image to Enlarge
- Enter the keyword or the complete item code and click the Search button. The list of related items will be displayed. Select the item from the list and click Select.

Click Image to Enlarge
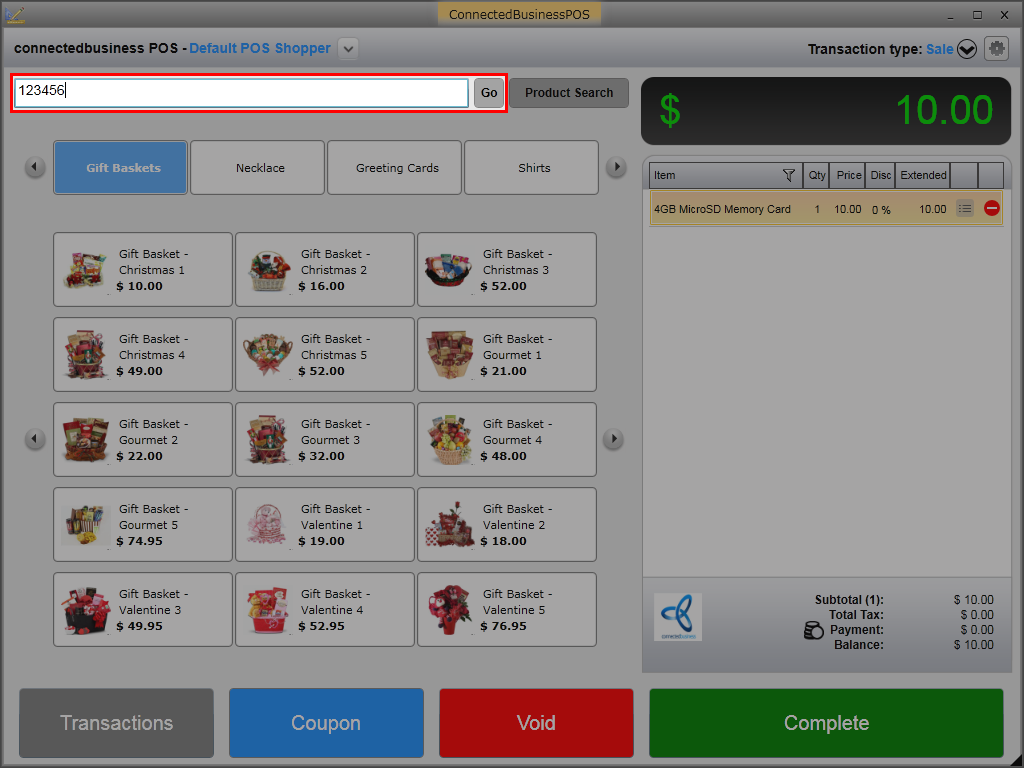
Add Items Using Item Barcode
To add items using barcode, simply enter the item barcode in the search control field and click Go. The item will be automatically added in the transaction tape.
Click Image to Enlarge
Delete Item
To delete the item, simply click on the delete button (![]() ), or if you want to view the item properties prior to deleting, click on the item property icon (
), or if you want to view the item properties prior to deleting, click on the item property icon (![]() ). Refer to Void Item / Transaction for more information.
). Refer to Void Item / Transaction for more information.
![]()
Add Accessory / Substitute Items
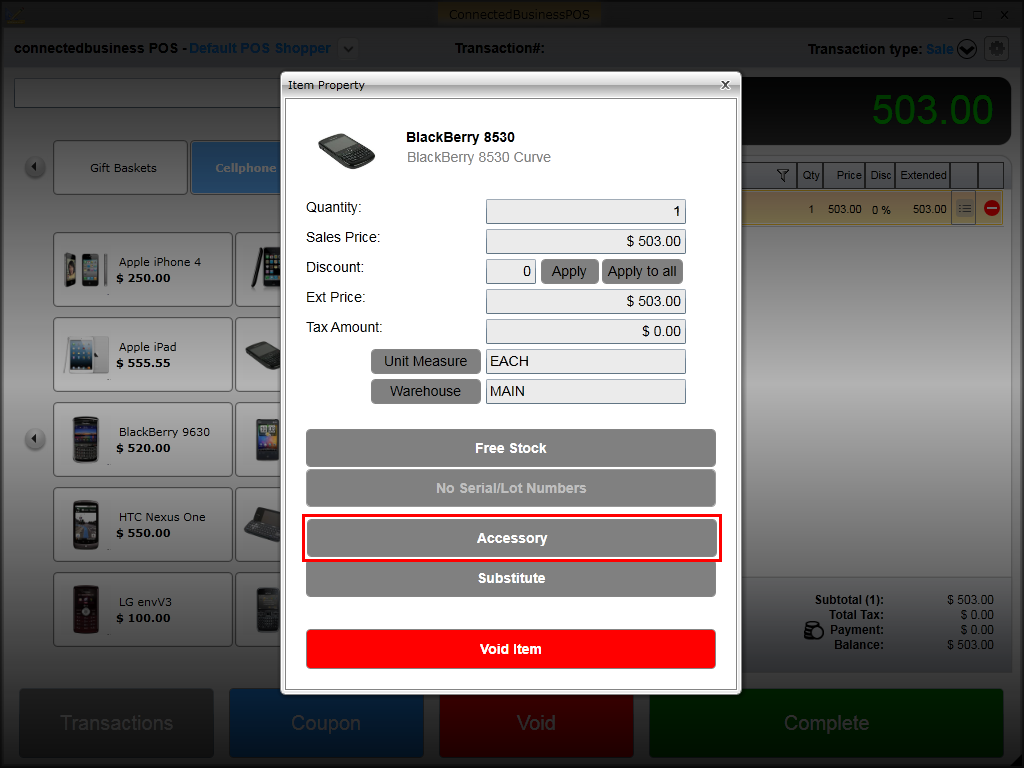
To add an accessory item,
- Click on the Item Property icon (
 ). The Item Property window will be displayed.
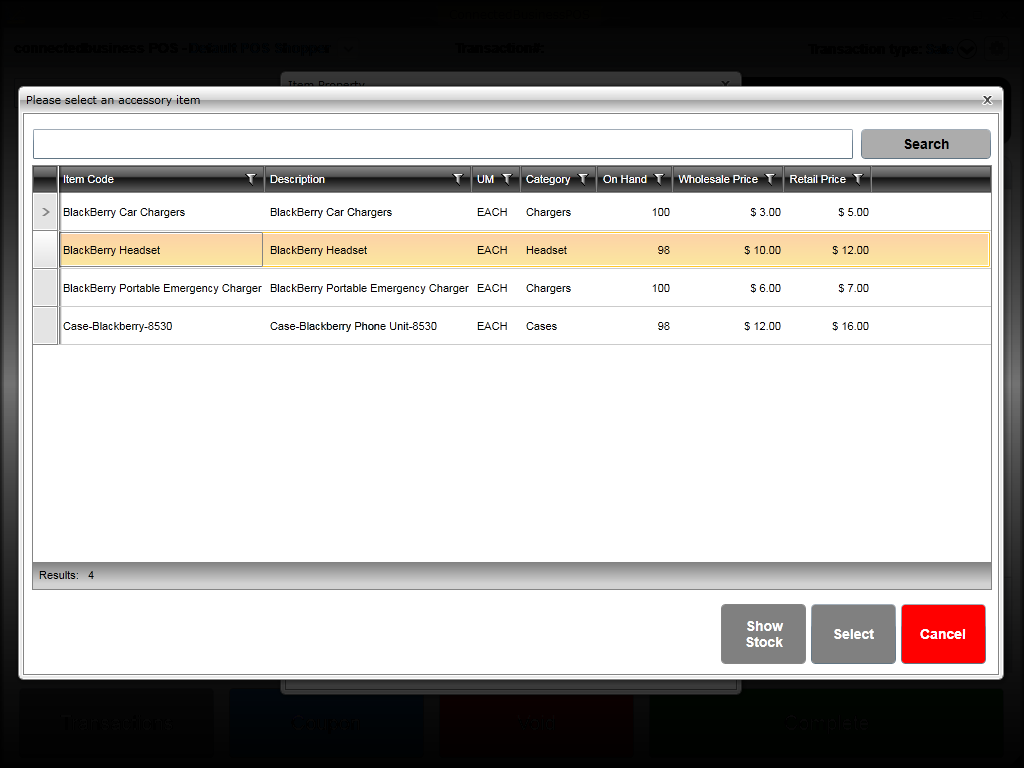
 - Select the Accessory button to display the list of accessories available for the item.
Click Image to Enlarge
- Select the accessory item to be added and click Select. The item will be automatically added in the transaction tape.
Click Image to Enlarge
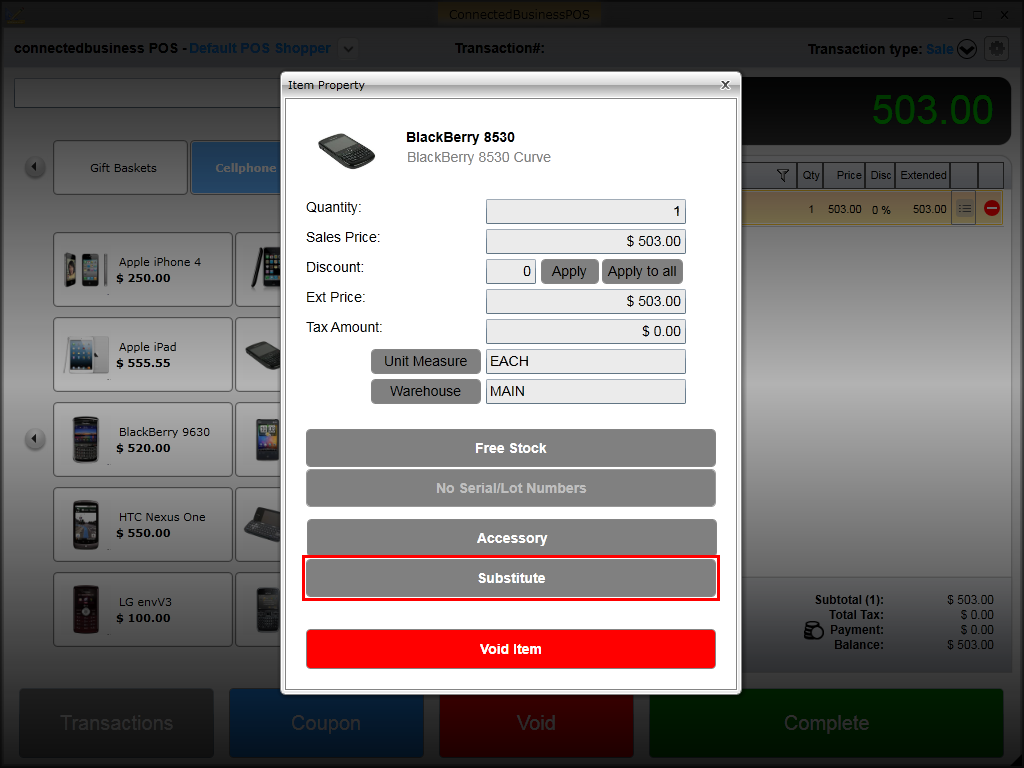
To add a substitute item,
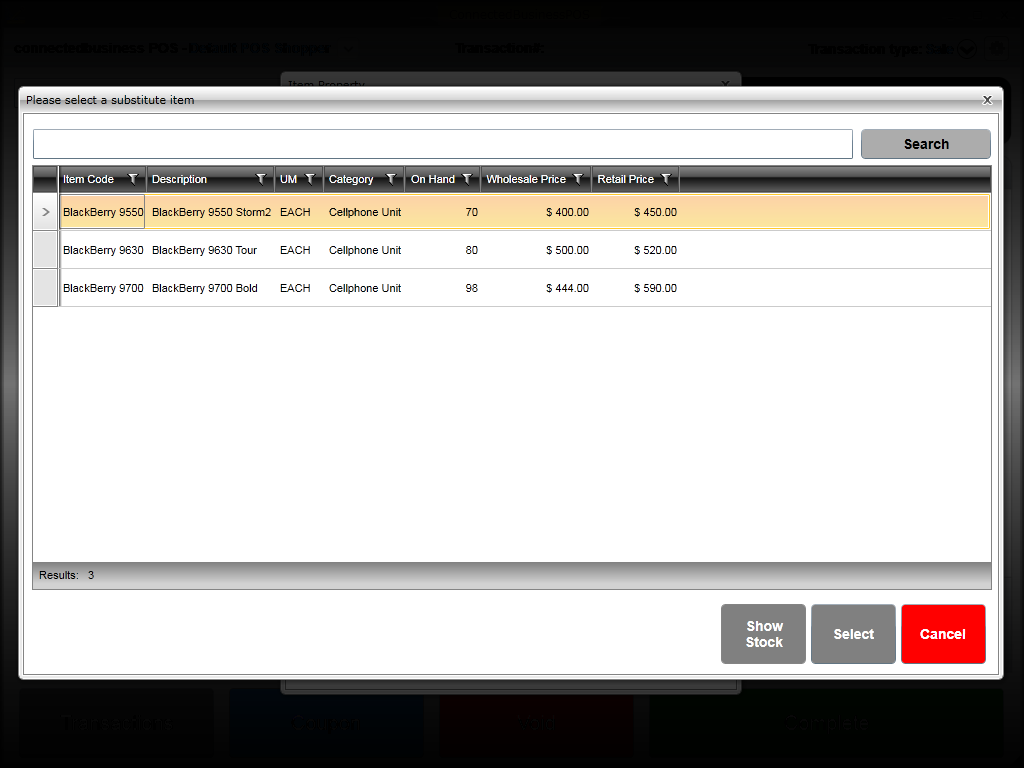
- Click on the Substitute button and the list of available substitute items will be displayed.
Click Image to Enlarge
- Select the substitute item to be added and click Select. The item will be automatically added in the transaction tape.
Click Image to Enlarge
![]()
Change Item Quantity
To change the item quantity, you can either click on the item quantity value under the Quantity column in the transaction tape;
Click Image to Enlarge
or in the Quantity field of the Item Property window.
Click Image to Enlarge
The numeric keypad will be displayed. Enter the preferred item quantity and click Accept.

Click Image to Enlarge
The item quantity as well as the total price in the transaction tape will be automatically updated.
![]()
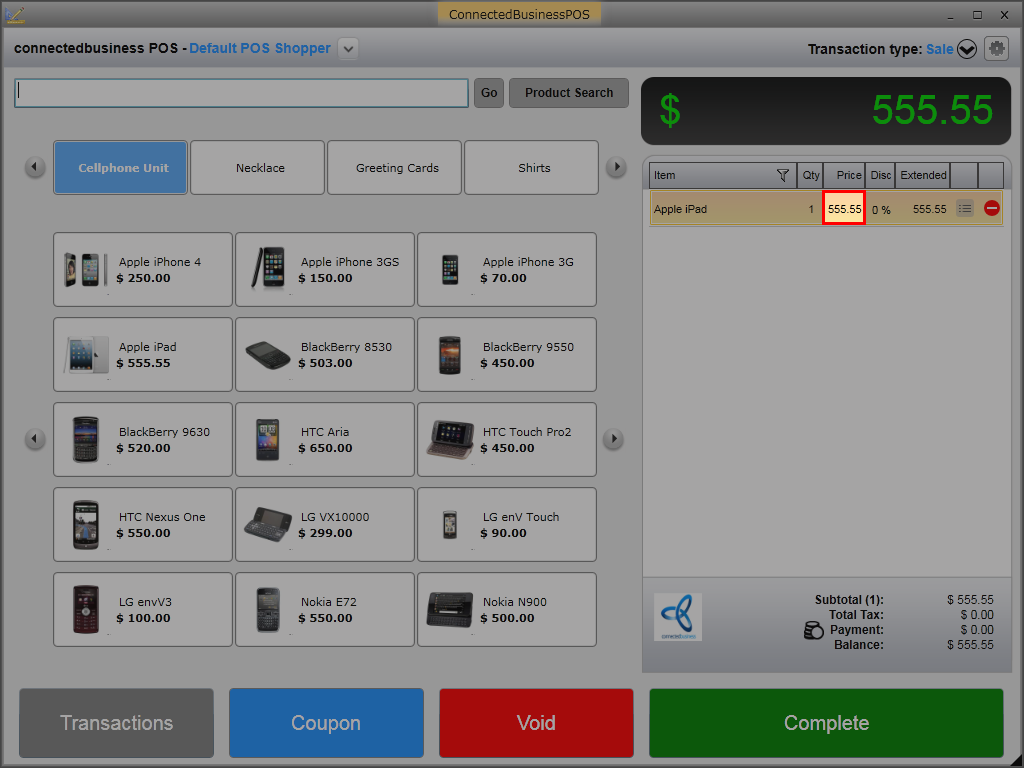
Modify Item Price
To change the item price, click the item price value in the Price column of the transaction tape.
Click Image to Enlarge
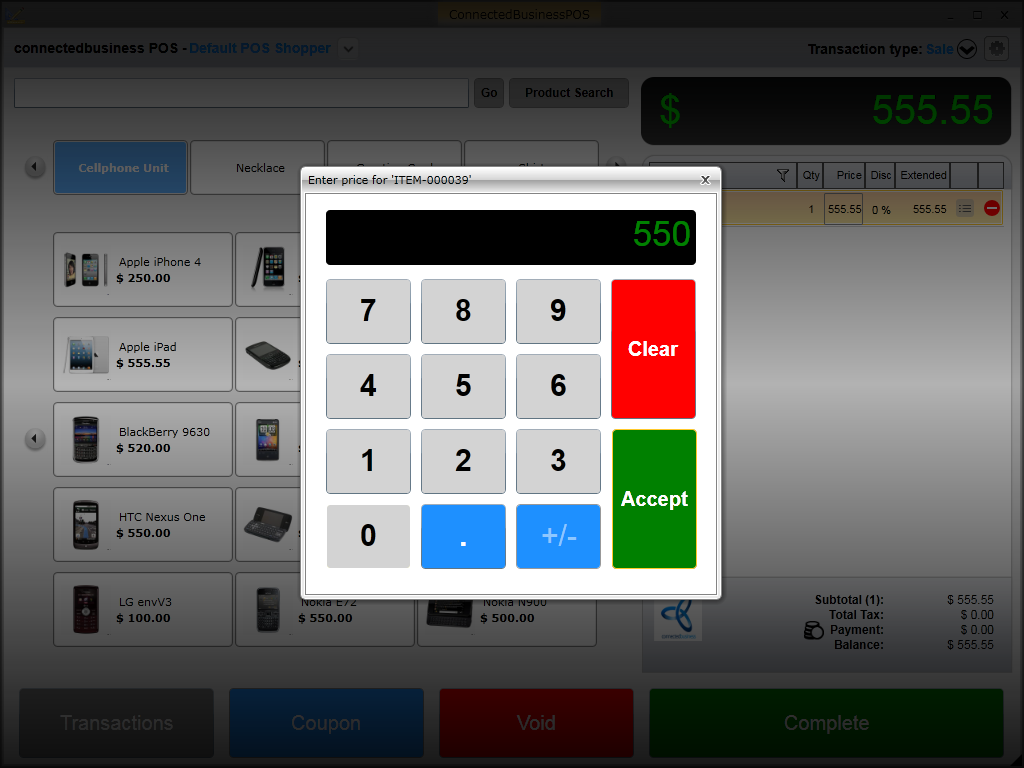
The numeric keypad will be displayed. Enter the preferred price for the item and click Accept.
Click Image to Enlarge
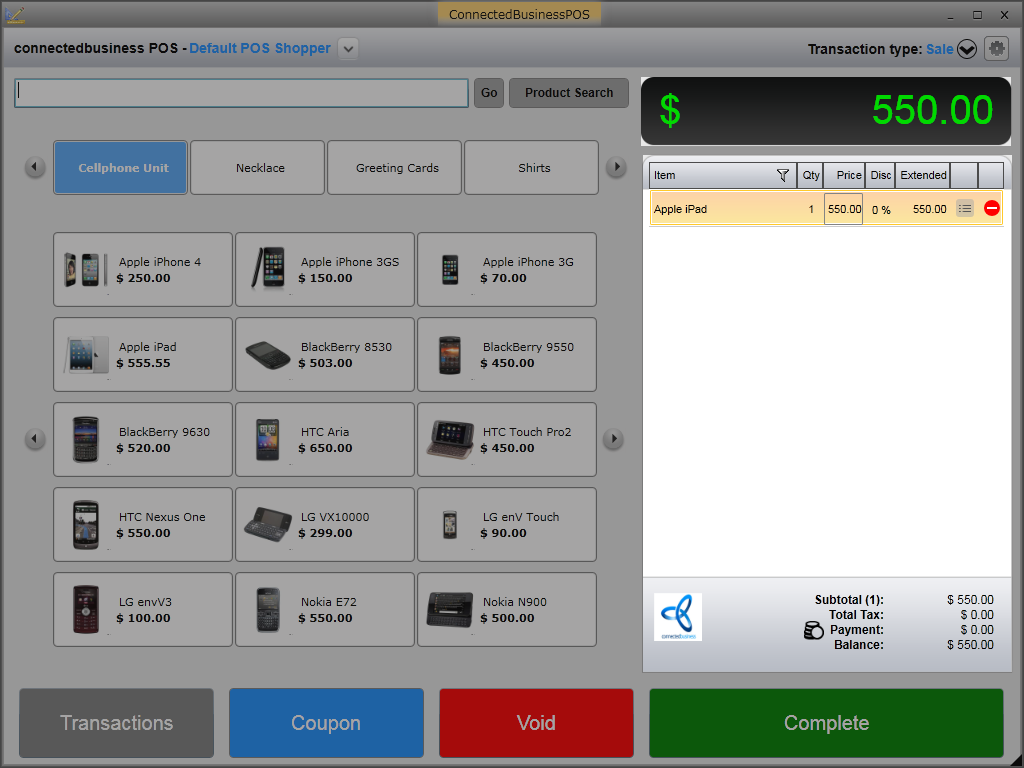
The price for the item, both the total and extended value, will be automatically updated.
Click Image to Enlarge

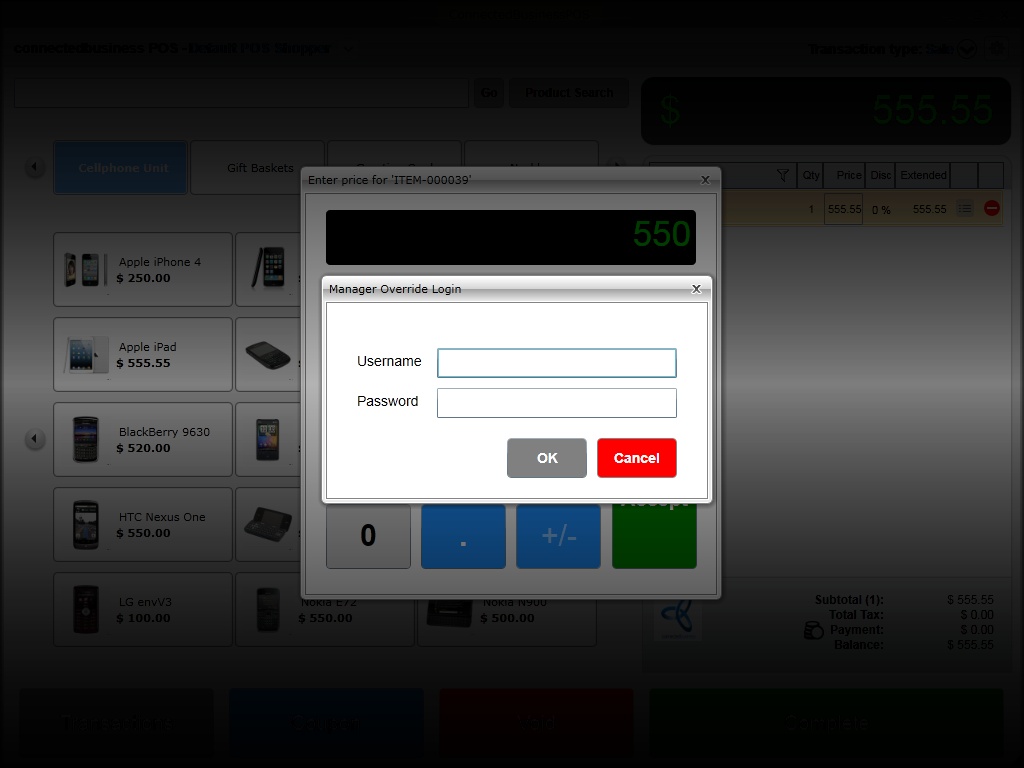
Only those user roles with administrative rights can change the item price. If price is changed by a user role who does not have admin rights, the Manager Override Login window will be displayed. The user will be asked to enter the admin username and password to change the price. To change override settings, refer to Assign Manager Override.
Click Image to Enlarge
![]()
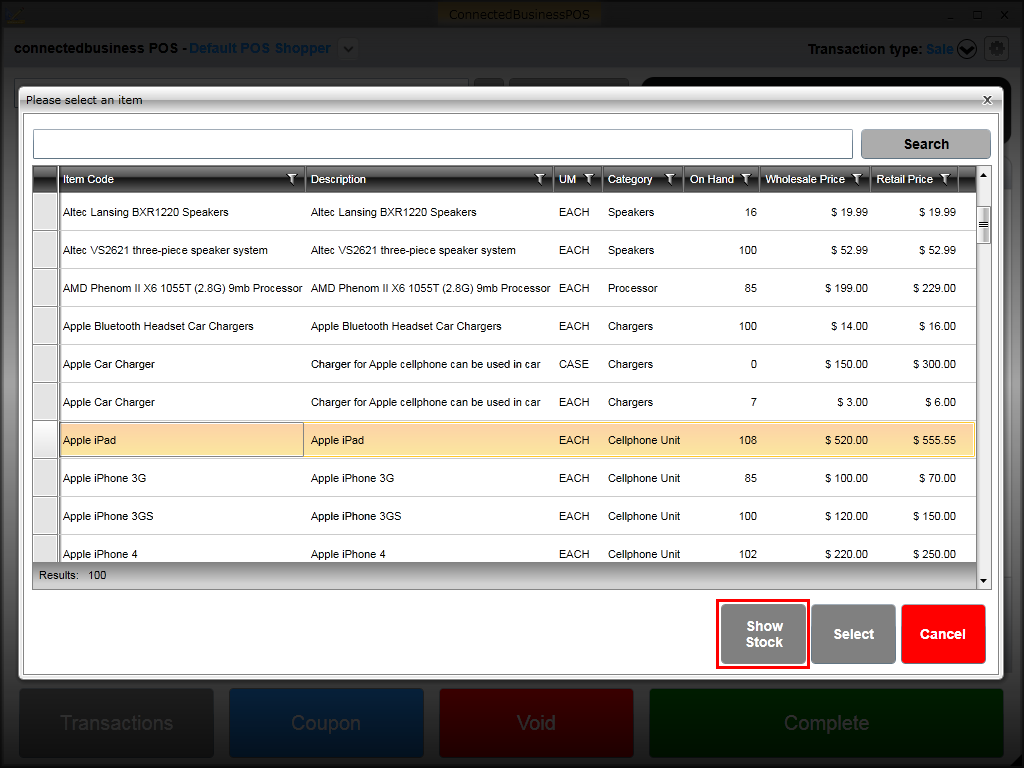
View Item Stock Detail
You can view the item location and stock details either from the Product Search window or from the Item Property details.
To view stock details in the Product Search window,
- Click the Product Search button and the product list will be displayed.
Click Image to Enlarge
- Select an item and click Show Stock button.
Click Image to Enlarge
- The Item Location and Stock Details window will be displayed. From here, you can see the number of free stocks for the item per location.
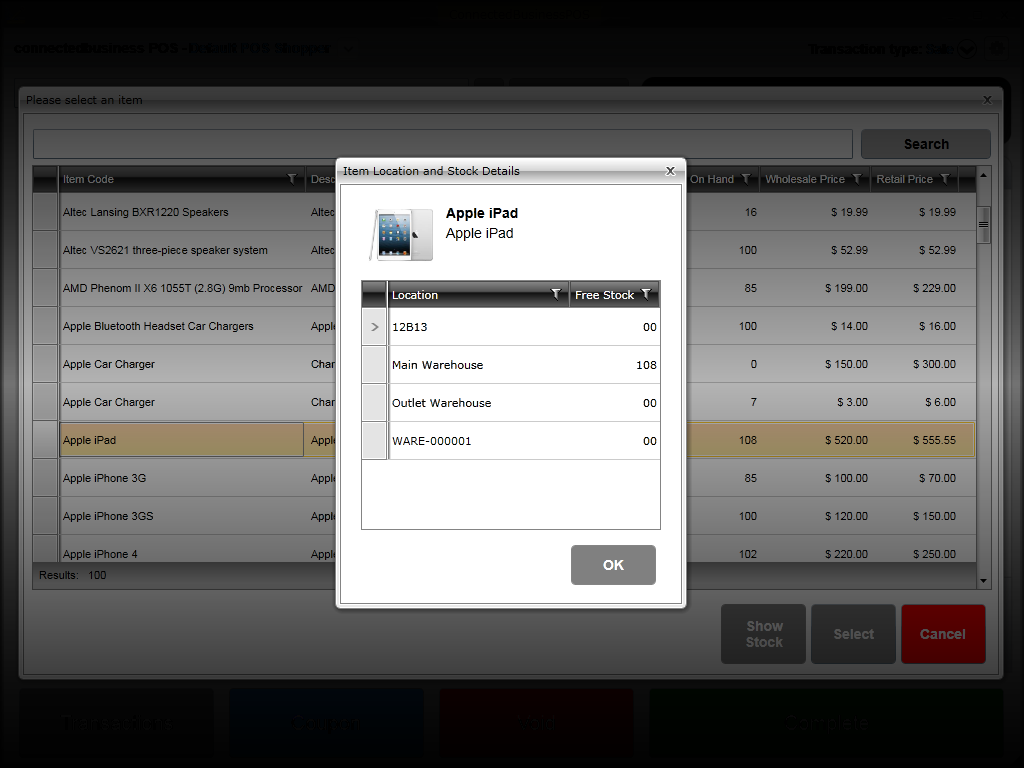
Click Image to Enlarge
- Click OK to close the window.
To view stock details in the Item Property window,
- Add the item in the transaction tape and click on the Item Property icon(). The Item Property window will be displayed.
- Click on the Free Stock button.

Click Image to Enlarge
- The Item Location and Stock Details window will be displayed. From here, you can see the number of free stocks for the item per location.
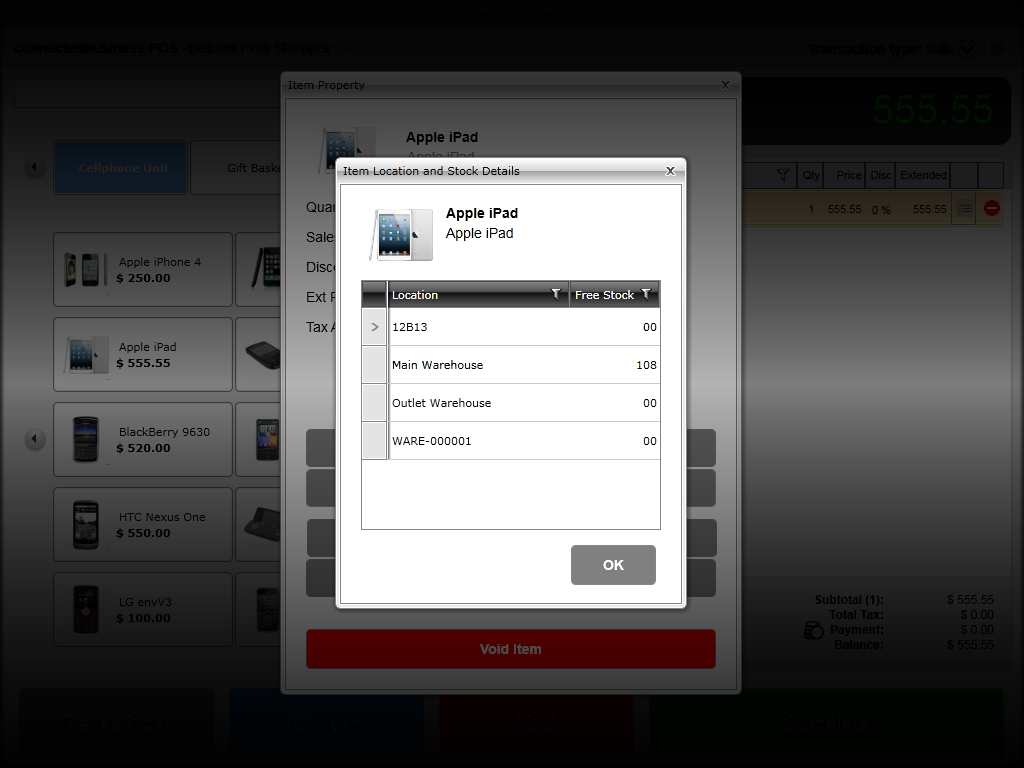
Click Image to Enlarge
- Click OK to close the window.
![]()